The Force Engine development news and updates.
01 Jan 2024
Table of Contents
- 2023 Retrospective
- 2024 Plans
2023
With the release of The Force Engine (TFE) version 1.0 at the end of 2022, I had big plans for 2023. Unfortunately, as often happens in these cases, the year was pretty busy and development proceeded at a slower pace overall. That said, several key milestones were reached in 2023 that will set up 2024 features and aid in the path to version 2.0 - Outlaws support.
Version 1.02 - January 16
The version 1.0 release exposed many bugs and issues with TFE, so a few weeks after the version 1.0 milestone, a large bug-fix build was released. It included quality of life features like Alt+Enter for fullscreen, the framerate limiter, and improvements to the audio system. It also featured over two dozen bug fixes.
Version 1.08 - February 6
Version 1.08 was the first time Linux was officially supported, thanks in large part to the contributions of Manuel Lauss. He also contributed fixes when running Dark Forces using different languages, and did the initial pass at removing 3DO hardcoded limits (which was then further modified later).
This release also saw more bug fixes, such as HOM in Executor using the GPU Renderer, fixed font rendering issues, fixed the Gamorrean Guard so he attacked properly, similar fixes to the Sewer Creatures, more work on the midi system, and more crashes.
Version 1.09 - February 15
This version added midi synthesis using Sound Font 2 (SF2) data. It also added proper OPL 3 emulation, which became the new default, making the music sound similar to playing Dark Forces through DosBox.
Version 1.09.2 - May 26, Version 1.09.3 - July 4
During this time, work on the project was slow, but feature work was happening in the background. These two releases fixed dozens of additional bugs and issues found throughout the year.
Version 1.09.4 - July 31
Kevin Foley made large contributions to this release with Smooth Vue Animations, which interpolated rotation, translation, and scale for Vue animated objects - such as flying ships. This greatly enhances the animation quality. He also added the Beta version of the Closed Captions feature.
In addition to contributions by Kevin and Manuel, I implemented a number of improvements to the GPU renderer allowing for up to 65536 visible portals in a frame, properly handling more than 65536 visible sector vertices in a frame (as originally intended), improved debug view modes, added settings templates, added the 8-bit interpolated color mode, and finally the post processing system and bloom.
Version 1.09.5 - September 21
This release saw the addition of True Color Rendering, which included optional texture filtering Sharp Bilinear filtering, mipmapping, and approximated true-color to colormap mapping. It also, finally, added the option to adjust the field of view.
Kevin was also hard at work, adding support for custom caption files and fonts, UTF-8 support, and generally improving the Accessibility UI and Captions.

Version 1.09.52 - September 25 / Version 1.09.53 - 27th
At this point I was mainly focused on bringing back the built-in tools that were removed early on due to large changes in the project. This release saw the return of the Editor option in the main menu, the initial pass on the Asset Browser, and better error handling. Kevin contributed to fixes in the Captions system, and Manuel continued to contribute fixes and to work on the Linux implementation.
Manuel Lauss contributed more improvements to the audio system, replacing RTAudio with SDL Audio - fixing a number of issues and reducing the number of dependencies. Kevin contributed to more accessiblity fixes, and I worked on improving the true color mode - making textures appear closer in coloration to 8-bit mode. This release also saw more progress on the Asset Browser, such as factoring out the Asset system.
Color Improvements to True Color Rendering

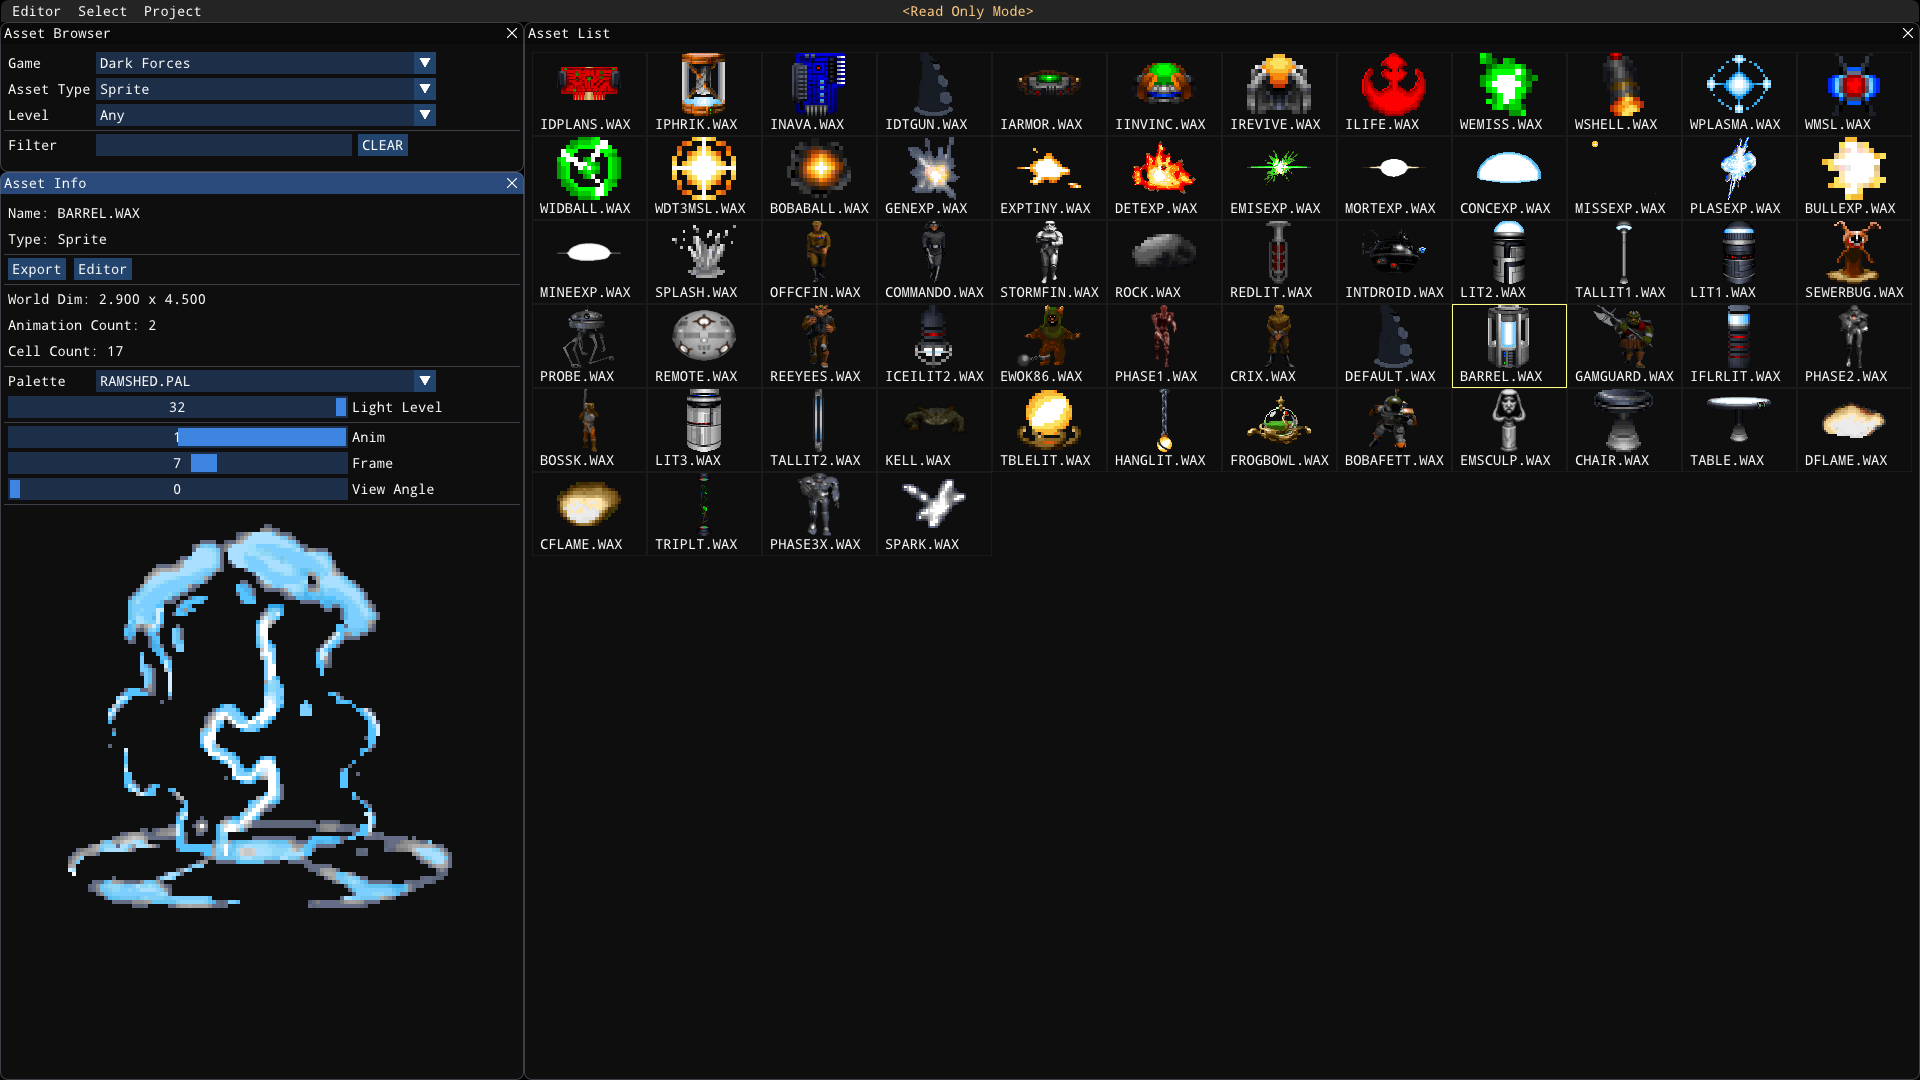
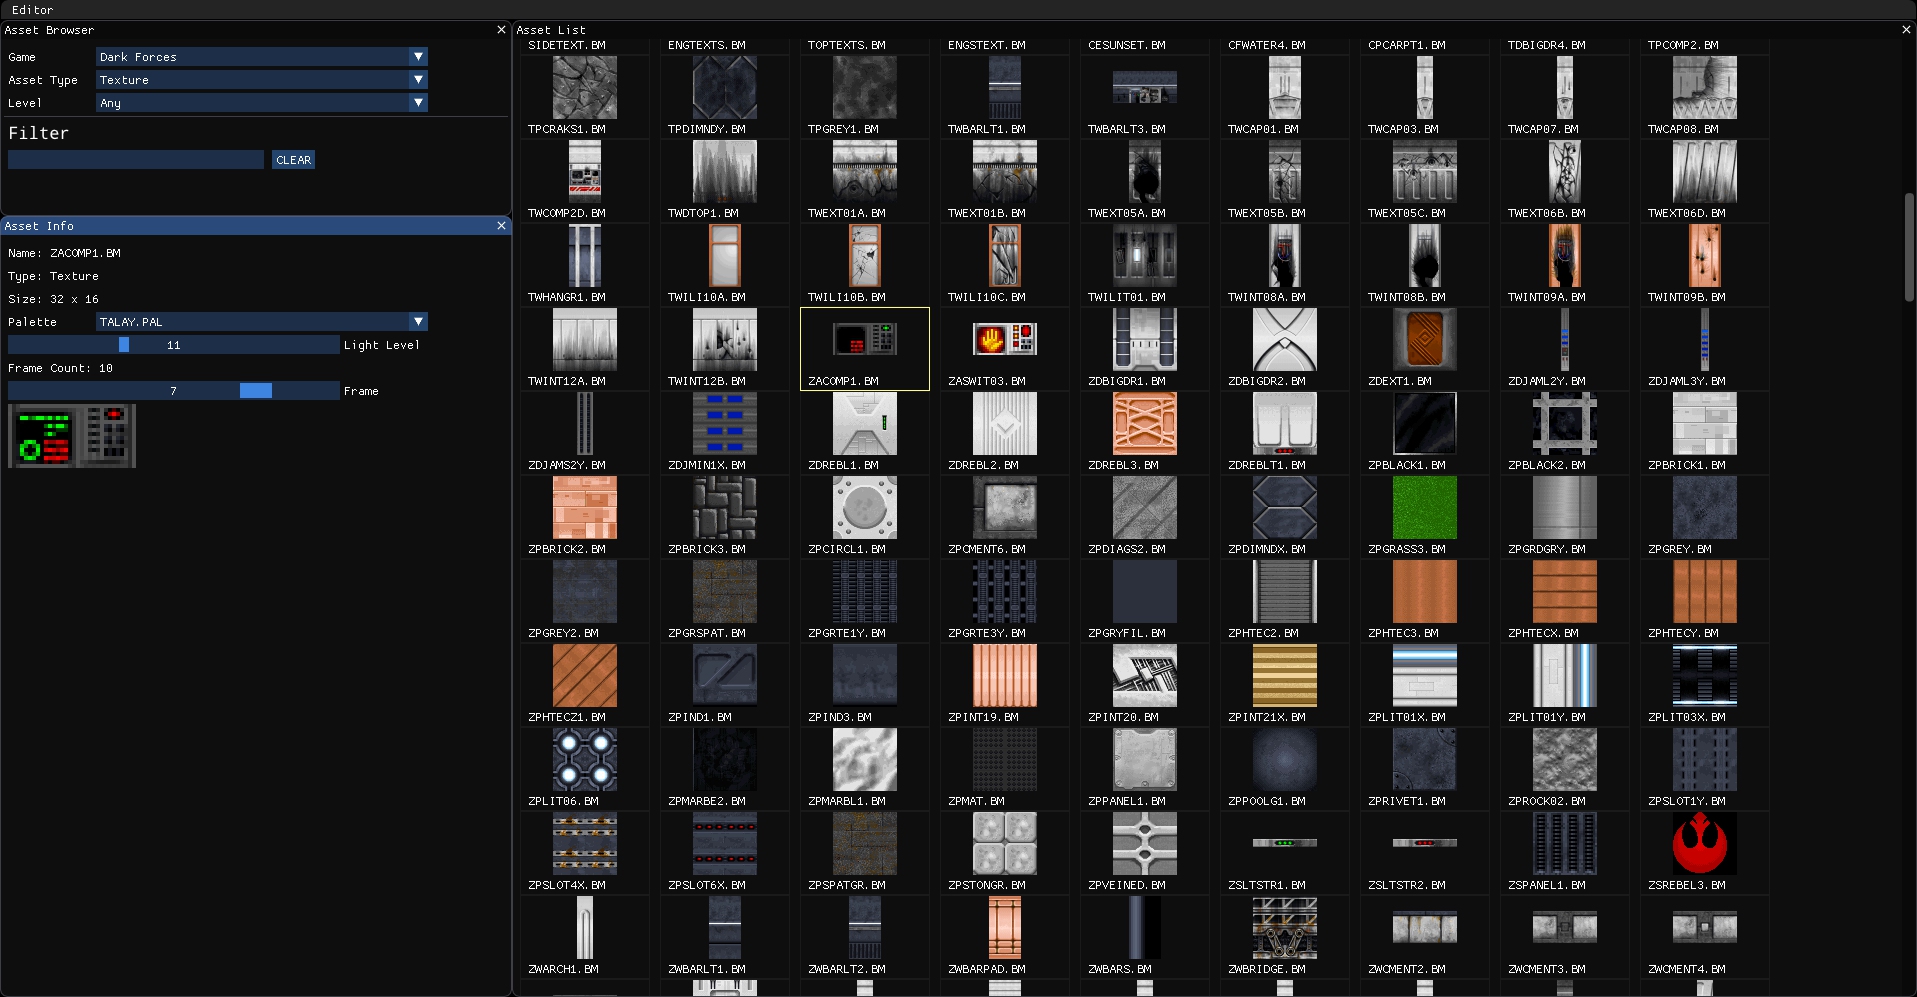
Asset Browser
Version 1.09.54 - Final Release of 2023
In the final release, more work went into the editor - setting up for the Level Editor work that would consume the rest of the year. RtMidi was made optional on Linux thanks to Manuel, now possible with OPL 3 and SF2 support. After discussions, we also replaced DeviL with SDL Image to make future Linux packages easier.
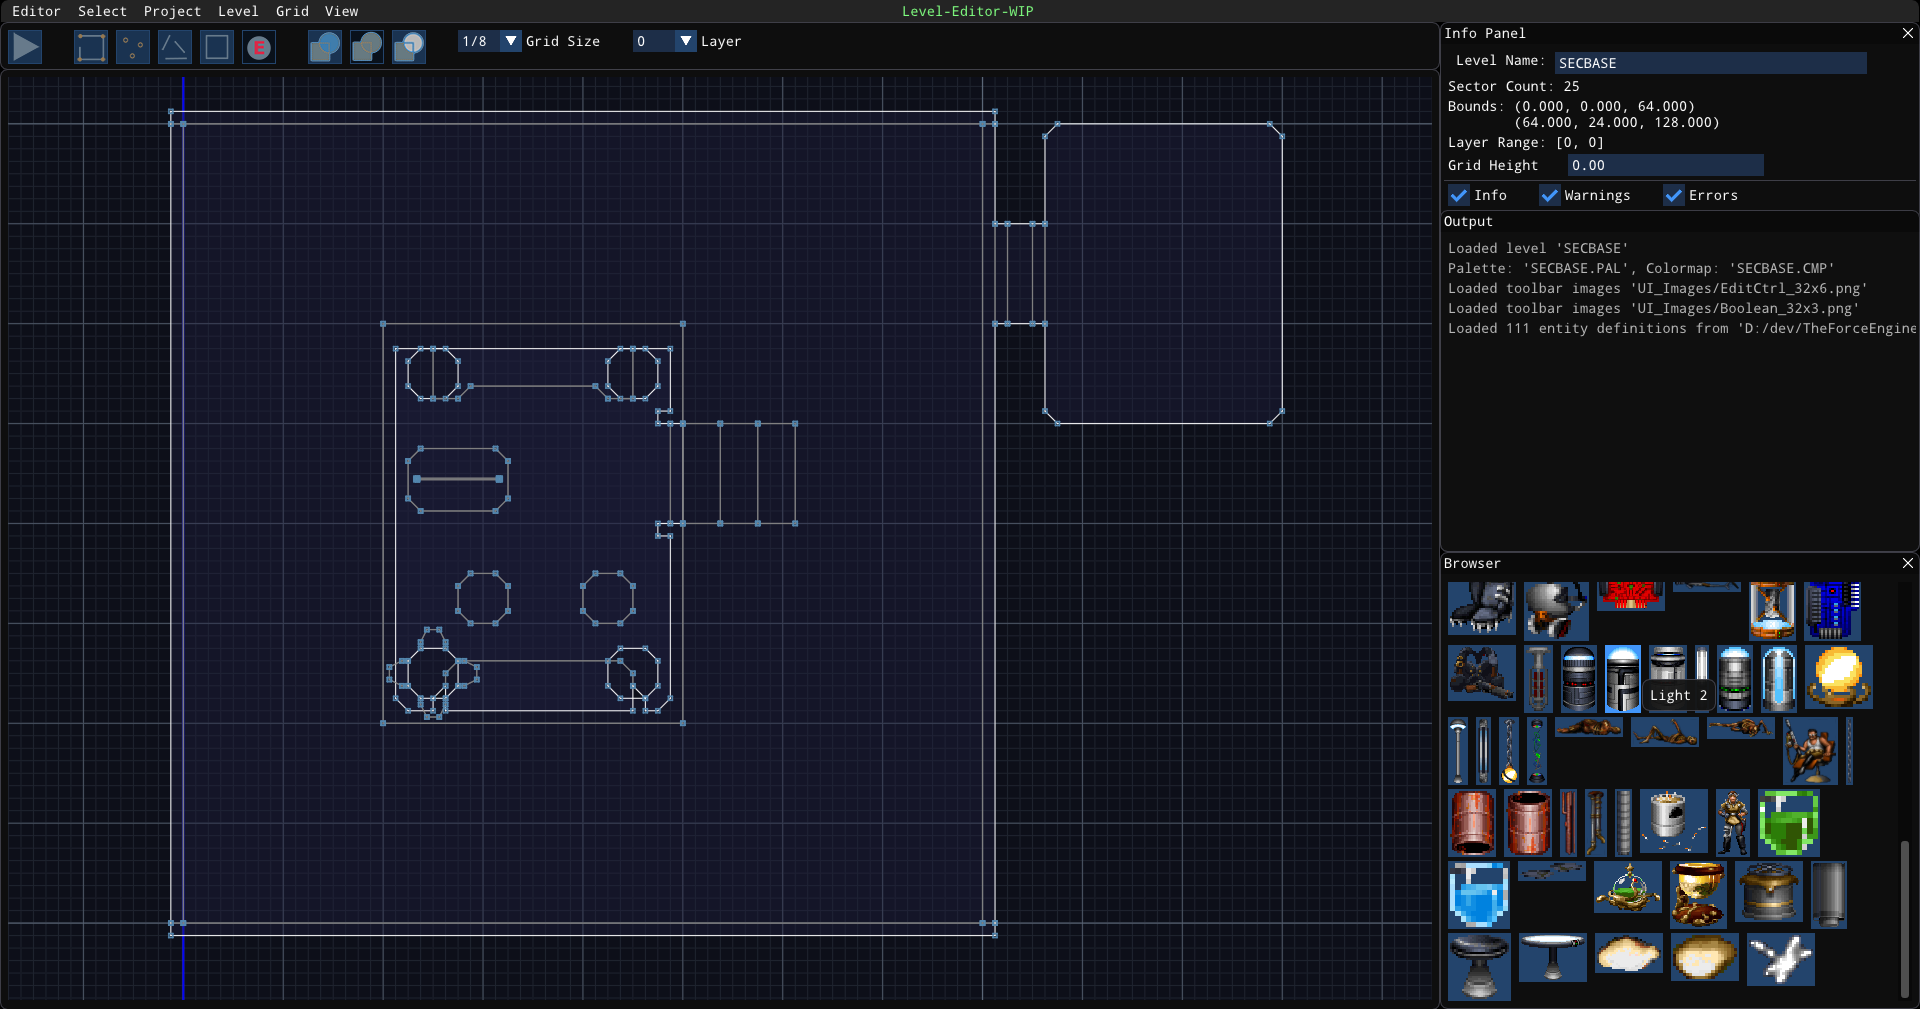
Level Editor
The rest of the year was spent on the level editor and supporting systems. While not yet useable, a number of features have been completed and, overall, it is shaping up well for a January release.
Level Editor

Outlaws
Behind the scenes, initial work on Outlaws was started leading to a good understanding of the renderer changes from Dark Forces as well as various other systems. This work will be leveraged in 2024 to both support Outlaws asset types and levels in the editor, but also to port over enhancements to Dark Forces to allow for the features to be used (slopes, dual-adjoins, etc.) but also to implement Outlaws support throughout the year.
Other
Another feature that was worked on, but not quite ready for prime time, is dynamic lighting. That will be ported from the branch and finished sometime in 2024.
2024 Plans
For 2024 Plans, I have split things up into a few projects.
Level Editor - Early 2024
Release a useable level editor that can be used to make complete levels with goals, INF support, editable entities, and everything else needed.
Asset Editor - Early 2024
Along with the level editor, I want to finish the Asset Browser. In addition to the formats currently supported, I want to add formats needed for cutscenes, and UI. And finally new assets - such as HD assets and voxels.
HD Asset Support - Early 2024
Now that the Asset Browser is available and editors and import/export functionality is available (for will soon be available), it will be possible to add support and easily test HD assets. HD assets include higher resolution / color depth textures, frames, and sprites, but also higher quality sound as well. My goal is to have this done for the Dark Forces Remaster release, so Nightdive’s new assets are supported.
Voxel Replacement Support - Early 2024
It is finally time to port over the experimental voxel code and make it “production ready.” The Asset Browser will be used to import voxel data, map hacks, and similar data to build voxel mods for Dark Forces and Outlaws.
Outlaws - Late 2024
My ultimate goal is Outlaws support in TFE this year, even if it is only single player to start. This will start by adding Outlaws formats and level editing support to the tools. Then there will be a number of releases throughout the year as Outlaws support is implemented - similar to Dark Forces before version 1.0 was released. A number of new features will come with this that can be used with non-vanilla Dark Forces mods, such as digital music playback.
25 Sep 2023
Version 1.09.5
Recently, the True Color build was released. With it, several features were added such as the True Color mode, texture filtering - including sharp bilinear, the ability to adjust the field of view, enhancements to the captions/subtitles system - such as choosing between fonts and UTF8 support, as well as a variety of bug fixes.
Upcoming Bug-Fix Release
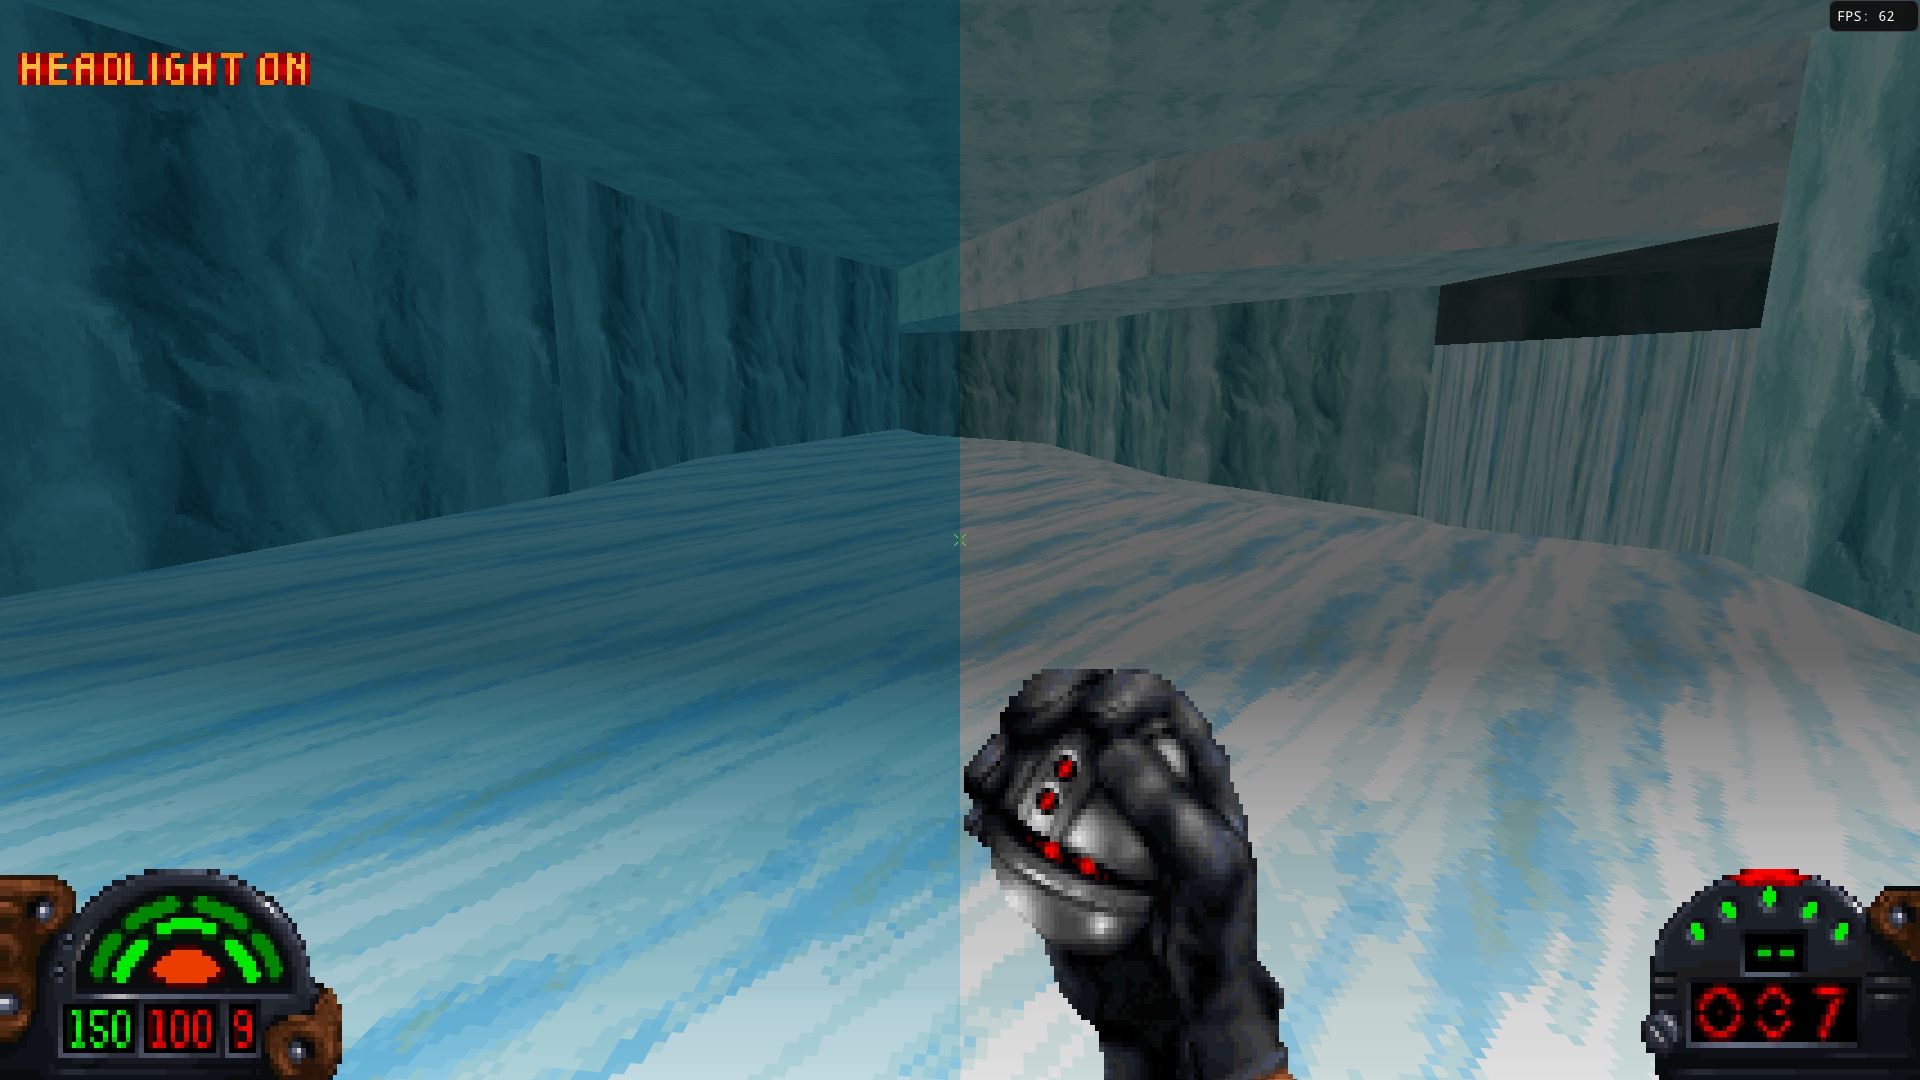
Since then, a number of bugs are been addressed. One large issue people found with the true color mode is that some textures did not have the correct hue and saturation at low light values (roughly half and lower). So I have been working on a new experimental automatic “per-texture” adjustment, which works well in most cases though there are some textures in some mods that still have issues.
Left is adjusted, and right is without the per-texture adjustment
Moving Forward
Moving forward, I plan on taking a break from feature work to instead focus on restoring and improving on the built-in tools. There are multiple reasons for this:
- Having tools will make it easier to implement new features such as voxel support and Outlaws engine enhancements.
- I can start getting the Outlaws assets loading, including levels, in preparation for Outlaws support.
- To improve forward momentum in terms of modding and Outlaws support.
- I can change up the work I am doing to help keep the project fresh.
Current Progress
I have restored the Editor option in the menu and have a first-pass implementation of the Asset Browser working, though only for textures and palettes at the moment.
- All textures in the base game can be viewed.
- Textures are automatically assigned a useful palette.
- The palette on textures can be visually changed.
- Textures can be viewed at different light levels to see how the colormap affects them.
- You can scrub through frames of animated textures.
- Palettes and colormaps can be viewed.
- Assets shown can be limited to those that are used in specific levels.


Current Plans
Rough editor plans going forward. This isn’t all of the work needed, but instead captures the initial chunk of
work to make the editors useable. Planning will continue once a decent amount of this has been done.
There are two main “work streams” listed here - the Asset Browser and Level Editor. However it is not intended that
the Asset Browser stream is finished before the Level Editor work begins. Most likely I will be jumping between
them as it makes sense for the work.
Note also that work already done for the Asset Browser is not listed here.
Asset Browser / Core
I. Core Systems
- Add Editor Config
- Editor Data Path
- Path to store editor settings, thumbnails, and other editor specific data.
- Export Path
- For generic, non-project based file exports and conversions.
- UI Font Scale
- UI Thumbnail Scale
- Compute default UI scaling based on monitor resolution.
- UI scaling should be adjustable.
- Separate thumbnails from Asset Info image(s).
- Generate thumbnails and store to disk.
- Load generated thumbnails if they exist, else generate.
- Do NOT preload textures, images, and other data except for thumbmails. Lazy loading.
- Handle font scale, set default based on monitor resolution.
- Handle thumbnail scale, set default based on monitor resolution.
- Add Export option for textures and palettes.
II. Resources
- Add the ability to add and remove resources (zips, gobs, folders).
- Add the ability to ignore or hide core game resources.
III. Functionality
- Frame browser.
- Refactor code based on having three different asset types working.
- Split into shared and unique parts.
- Factor out common UI patterns.
- Sprite browser.
- 3D Object browser.
- Level browser.
- Final refactor step.
Projects
I. Core
- Project system.
- Name, Description, Path, Type (Level, Resources), Game (Dark Forces, Outlaws), Feature Set (Vanilla, TFE).
- Menu options - New, Open, Close, Recent.
- Create project from existing GOB/Zip/Folder.
II. Import/Edit
- Add Import features for each asset type.
- Convert from true-color, etc.
- Create complex types - such as Wax data.
- Create voxel model editor to handle import, settings, and setting up animations.
- Port software voxel renderer over from the branch.
- Add GPU-based voxel renderer.
- Add “map hacks” equivalent for adjusting voxel models
(though it might be good to add support for this to the level editor, so it can be done visually).
III. Object Templates
- Auto-generate object/logic templates based on the original game.
- Add the ability to edit and create new object templates.
Outlaws
I. Initial Work
- Add support for Outlaws formats - (PCX, LVT/LVB, NWX, etc.).
Level Editor
Plans here are a little more unclear, the plan is to get the basics working again and then plan from there.
I. Restoration / Refactor
- Basic UI - ported to new UI patterns and supporting UI scaling.
- Add support for bindable level editor hotkeys (similar to the game).
- Restore level editor rendering.
- Implement new triangulation based on constrained delaunary triangulation
(much more robust then the library I was using, removes any dependencies for triangulation since I will just write it myself).
- Use Project system to allow for creating new levels and editing existing levels.
- Restore basic editing.
- Basic Outlaws level loading / support.
22 Aug 2023
As many of you have seen, Nightdive has announced their Dark Forces Remaster. They have partnered with me to help them in a technical advisory role to help with the project, which includes exchanging information and providing some TFE code. So I have written a FAQ to answer likely questions.
-
What impact does this announcement have regarding The Force Engine (TFE)?
This announcement has no negative impact on TFE, existing development plans - including the level editor and Outlaws support - are continuing as-is.
-
What sort of Dark Forces assets (art, etc.) does Night Dive have access to?
As seen below, I am not a Night Dive employee and so cannot say.
-
Are you a Night Dive employee or getting paid by Night Dive?
I am not a Night Dive employee, no money has changed hands, and I have no inside information I can share regarding schedules, other games in development and so forth.
-
Does TFE and the Night Dive version share code?
While it is true that some TFE code has been shared to help in development, such as iMuse, these projects use different code bases and use different implementations for many components - such as very different GPU renderers. The Night Dive project uses Kex, TFE uses its own framework. I have no access to the Night Dive code base.
-
Were contributor assets or code shared with Night Dive?
Only code reverse-engineered or written by myself has been shared with Night Dive. I have not shared any code or assets contributed by others with Night Dive.
-
When did this partnership begin?
While I cannot give exact dates, the reverse-engineering process for TFE and version 1.0 were nearly complete.
- Why agree to this partnership? Did TFE development benefit?
-
There were a number of reasons to agree, and it seemed like a good idea to help TFE be seen in a positive light (and I still think this is true). TFE has also benefited from the exchange of information (such as one of the developers pointing out a bug in iMuse).
-
Night Dive will also be helping me to support the new content they are creating in TFE - though you will be required to purchase the new version of Dark Forces in order to use that content.
-
In other words, this partnership was beneficial for all parties involved.
- Why not mention this before?
Mentioning this before the announcement would leak information about the project which I agreed not to do. It’s that simple.
31 Jul 2023
General Update
Some time ago, I started on the “True Color” release for TFE - originally planned to be version 1.20, and then moved to 1.10. During development the amount of time available for TFE shrunk dramatically due to various events and obligations. As a result work slowed to a crawl, and honestly the True Color branch became a mess of partially implemented features.
Recently things have settled on a new normal and time for TFE opened up again. However, given the mess that version 1.10 turned into, I needed a plan to get the features I had worked on finished and released, to increase the release cadence once again. So I decided that I would split the 1.10 release into multiple smaller releases, and that I would port the code for each release to master as needed, and finish the features there.
Version 1.10 Plan
Version 1.09.4 - Bloom
This release, see below.
Version 1.09.5 - True Color
- True-color mode (textures are pre-converted to 32-bit color on load, the “material” texture is another texture generated or loaded).
- Bilinear and Sharp Bilinear texture filtering options (previously shown in a screenshots).
- Mipmapping and Anisotropic filtering options.
- Colormap handling in True-Color (simple method initially).
Version 1.09.6 - Lighting
- Dynamic light support.
- Per-object light settings using text-based definition files.
- Automatic light generation for objects based on emissive values, if no definition is specified.
Version 1.10 - True Color Assets
- Support for true-color sprites and frames.
- Support for true-color textures.
- Subtitles/Captions for cutscenes and in-game (@kevin_foley).
Version 1.09.4
Version 1.09.4 is the first of those releases. It was meant to focus on getting the “Bloom” feature implemented, but as it turns out a couple of other large features made it in as well. Below is the full change list, but I will go through the more impactful features below.
Changes
- Smooth Vue Animations (optional).
- Fixed color flashing when switching between levels.
- Ported over GPU Renderer portal fixes - now supports up to 65536 visible portals as originally intended.
- Fixed GPU Renderer issues when using more than 65536 vertices for sector or sprite geometry in a frame.
- Fixed Wireframe so it works correctly in release mode, and made 3DOs solid color when in wireframe.
- Added a new “Retro” settings template which matches the “Modern” template from previous versions, where “Modern” enables new features, such as Bloom by default.
- Added an “8-bit Interpolated” color mode, which smooths out colormap-based shading and removes most of the banding.
- Added a new console command exportTexture that will export the texture on the surface the camera is currently pointing at.
- Added a bloom option, with the ability to adjust its strength and spread.
- Added Accessibility options, starting out with Closed Captions / Subtitles (Beta).
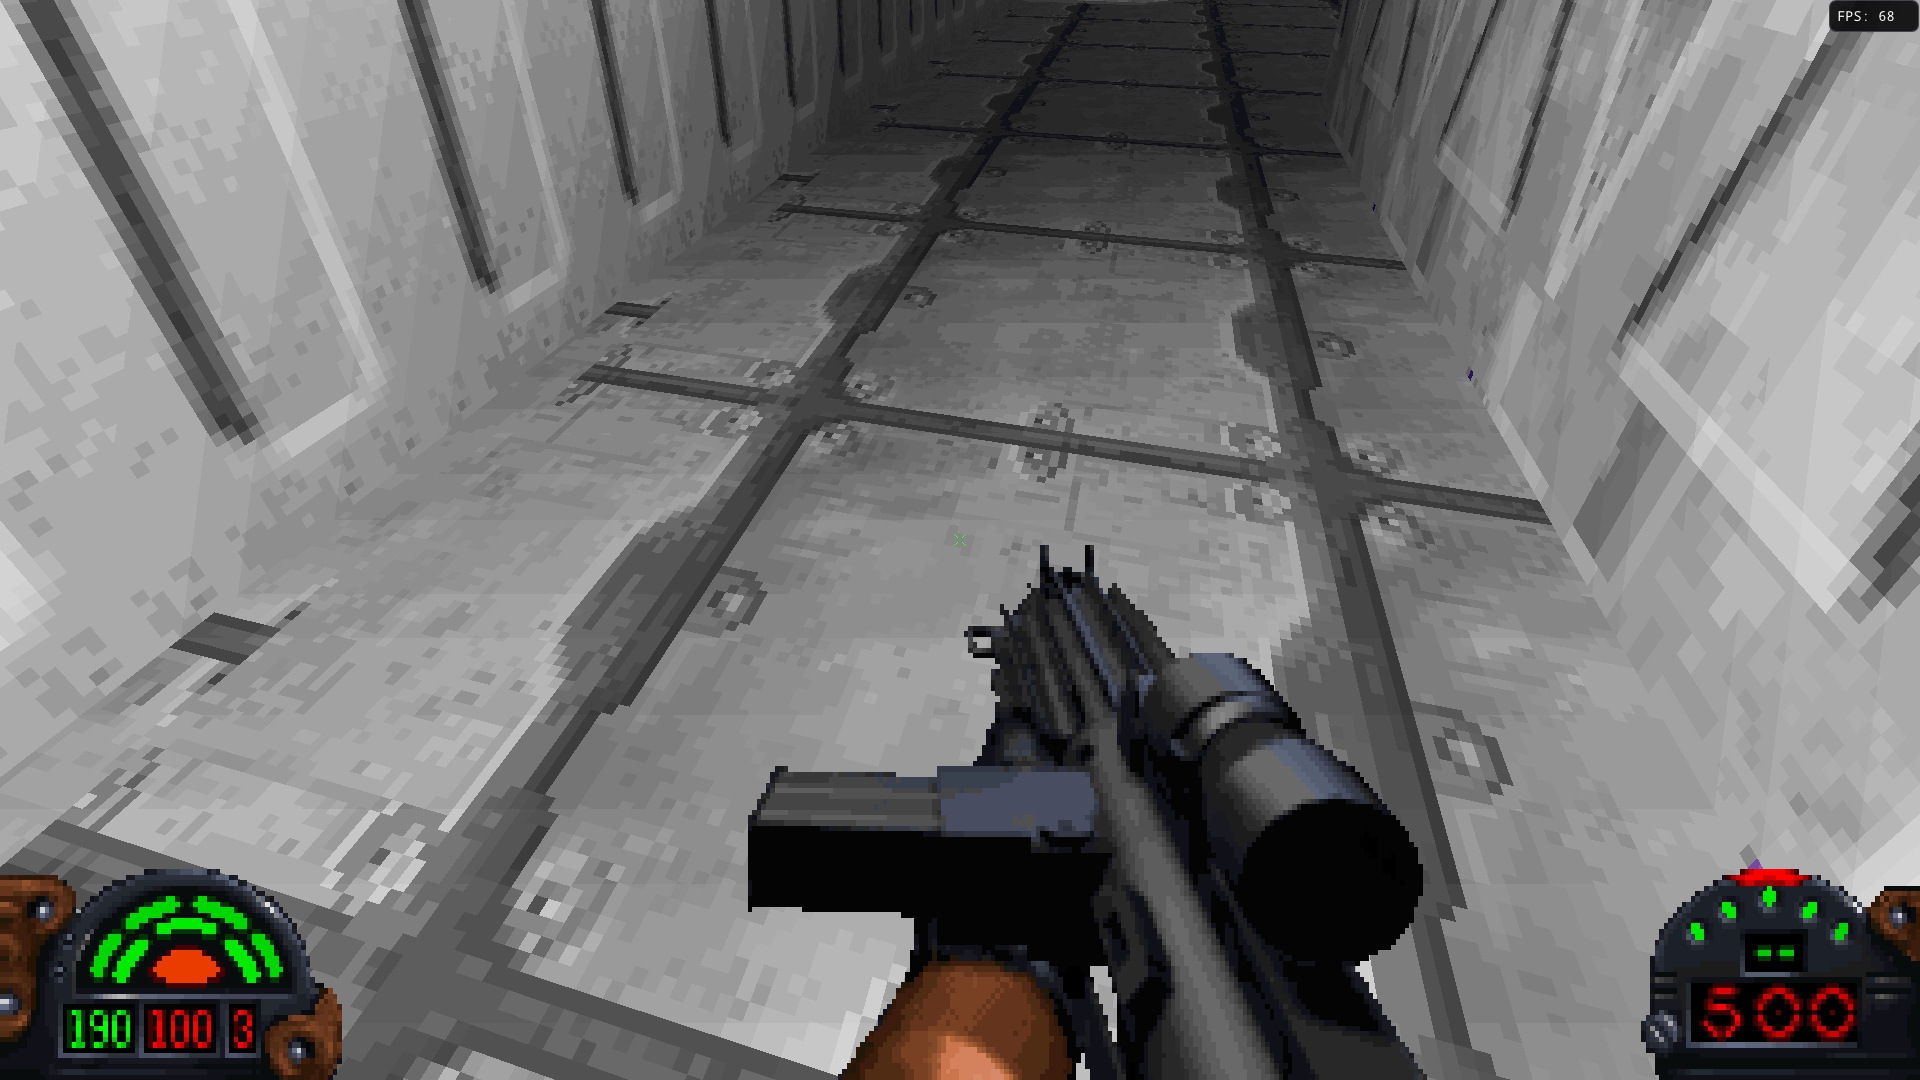
8-bit Interpolated Color
Previously, TFE only supported direct 8-bit colormap based shading producing the same results as the original game. While Dark Forces looks pretty good at higher resolutions, hard banding can be seen in many cases - due to the limited number of shading steps.
Examples:
Another option is to remove the quantization in the shading calculation - to generate a smooth result. The issue is, how do you use this smooth result with 8-bit colors and colormap? TFE will use the shading value to lookup the nearest colormap results, and then use the fractional component to blend between them.
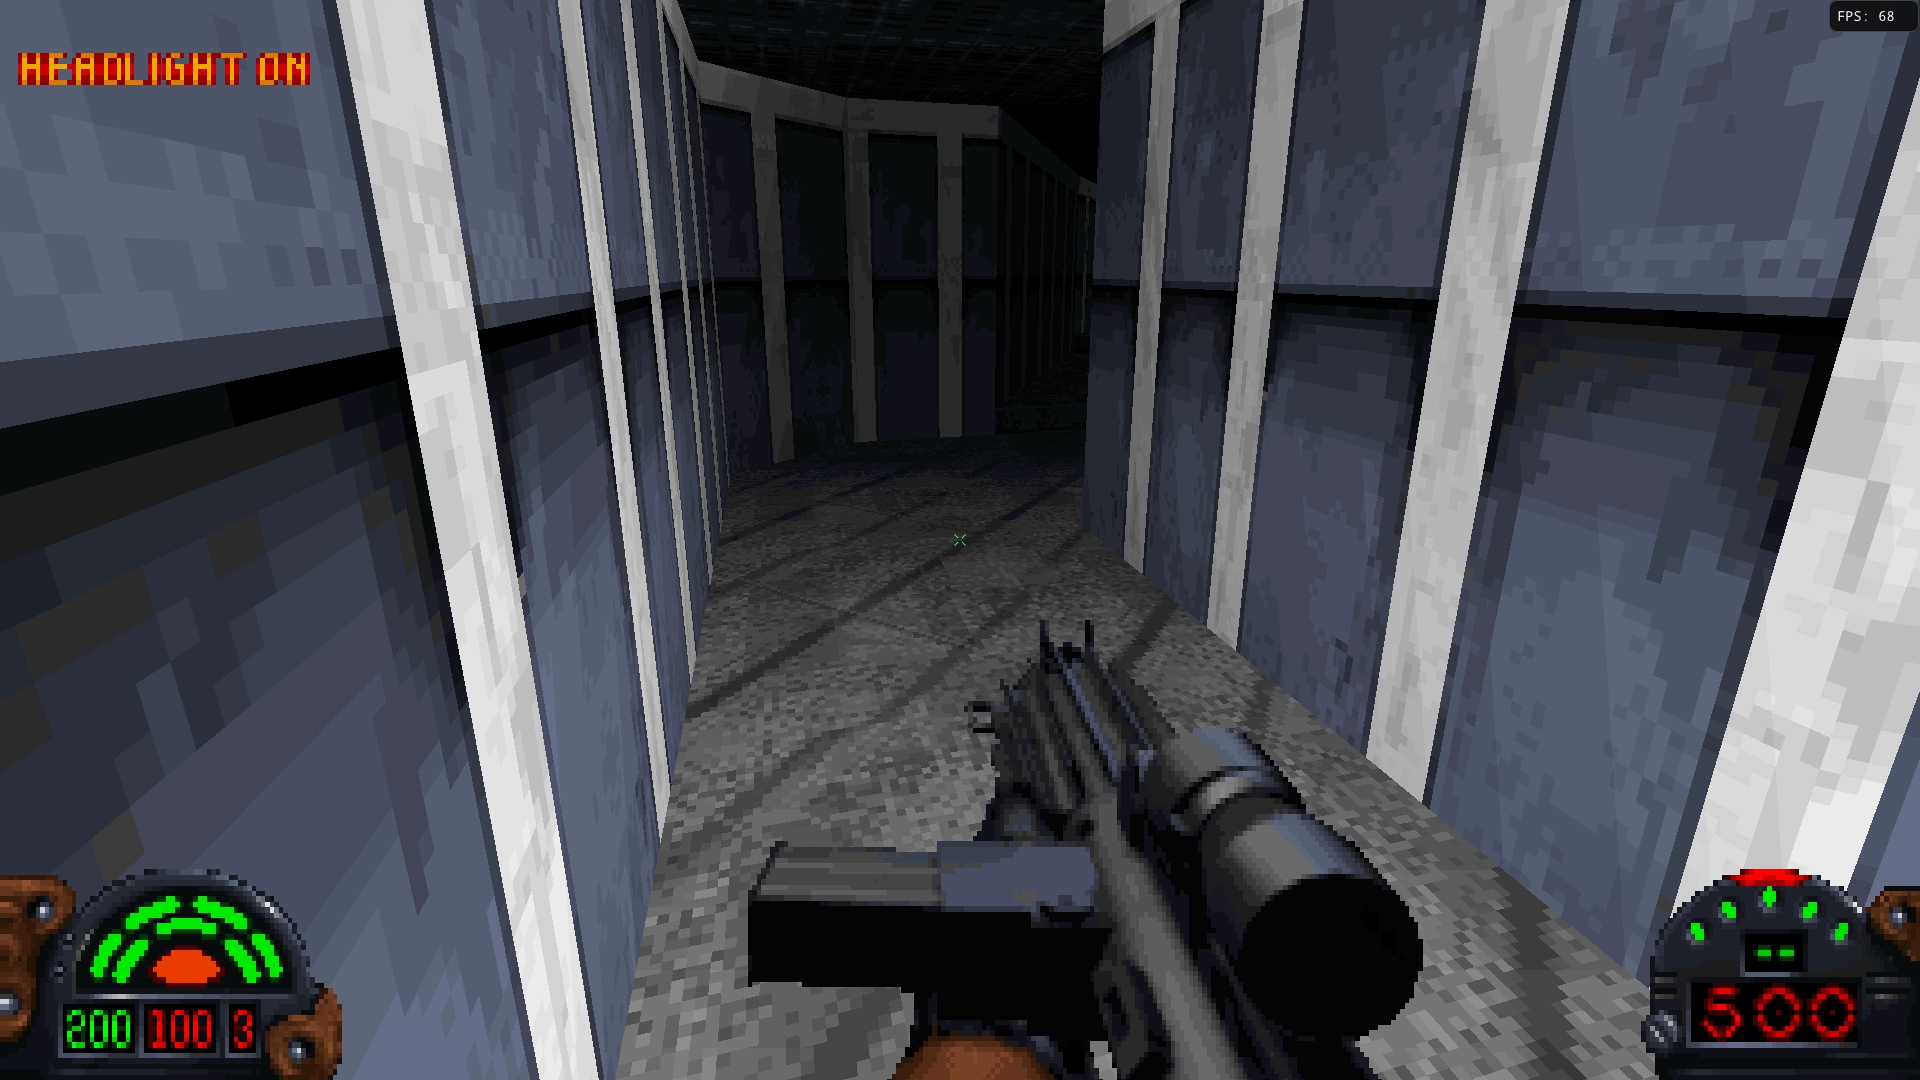
Doing this smooths out shading falloff with distance (where the color gets darker or more foggy farther away), but banding can still be seen when using the headlamp or during weapon fire. The reason is that a 128-entry ramp is used to map between z-distance and ambient value. The issue is that this map contains duplicate values - so direct interpolation still leads to hard banding.
The solution that TFE uses is to generate a smoothed version of the light ramp on the CPU when the feature is enabled that contains fractional ambient values, and the shaders interpolate between the nearest light ramp values to generate the final result.
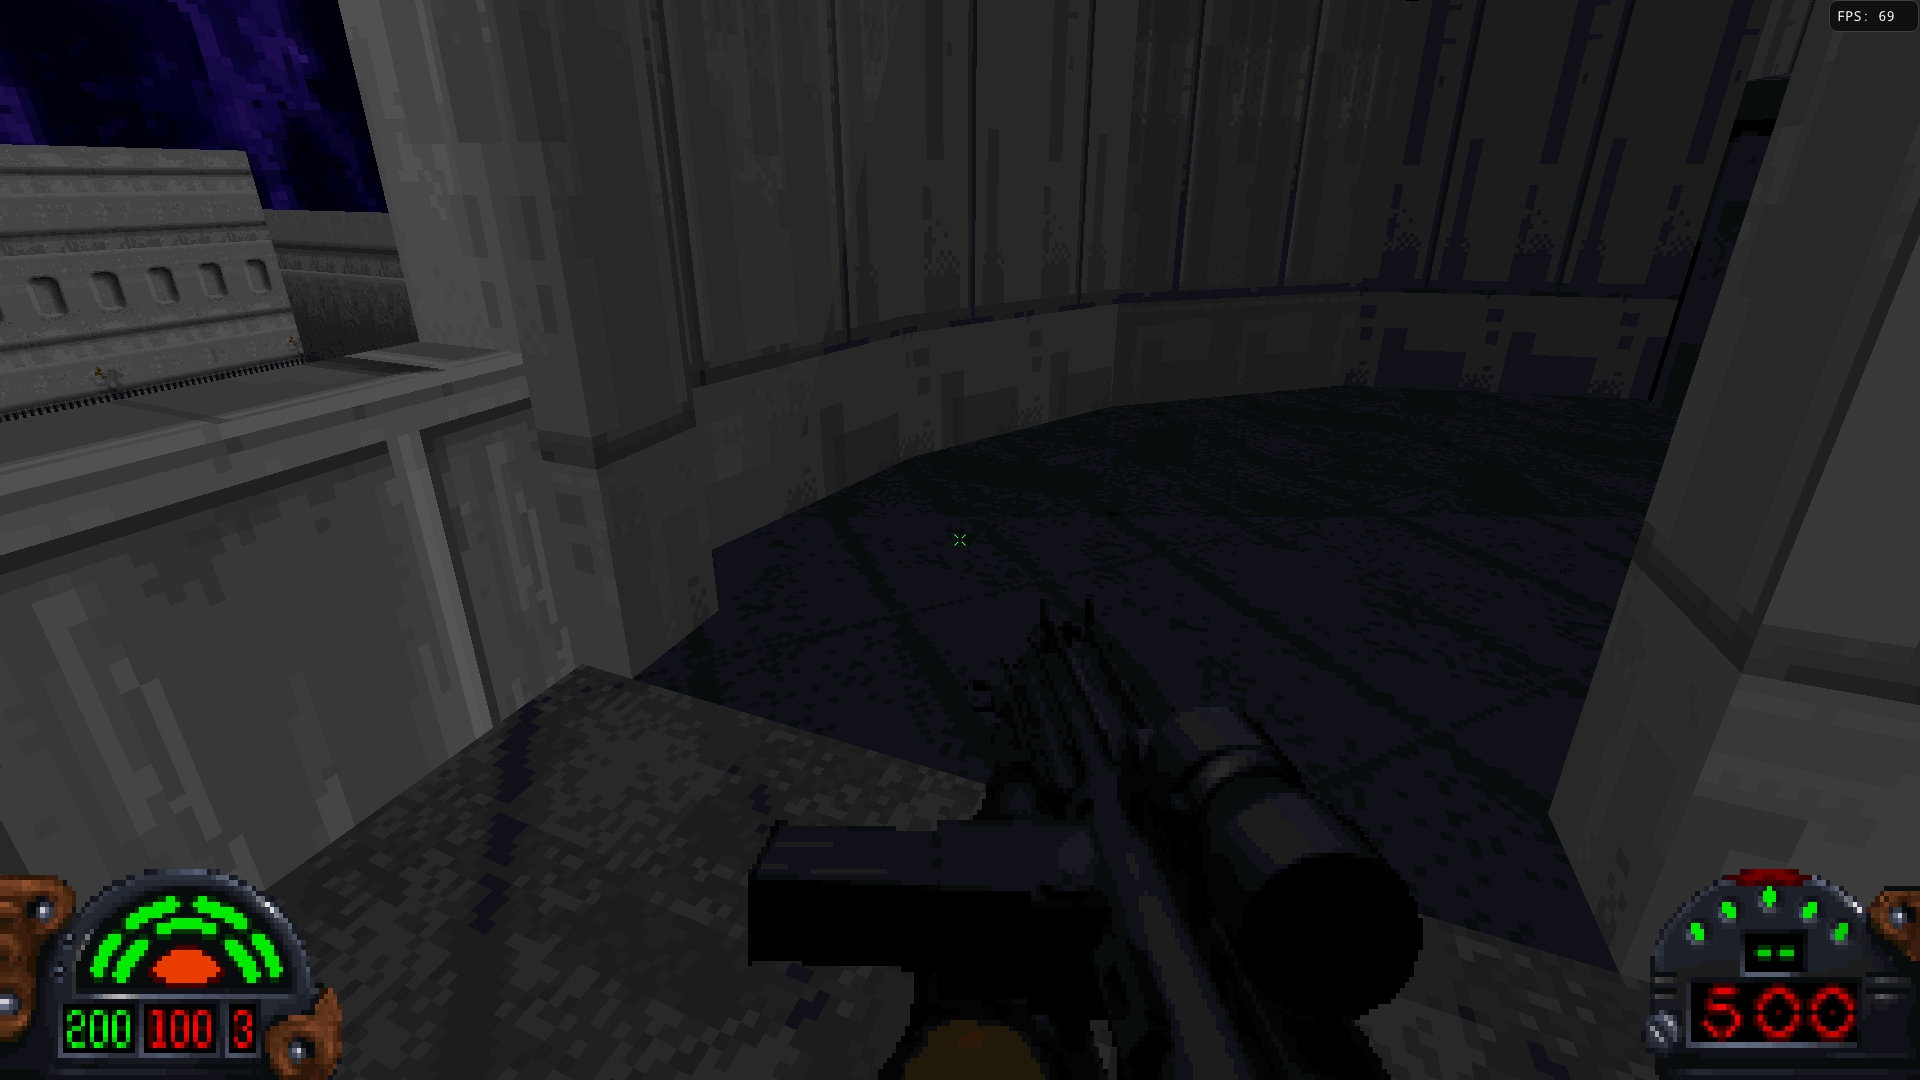
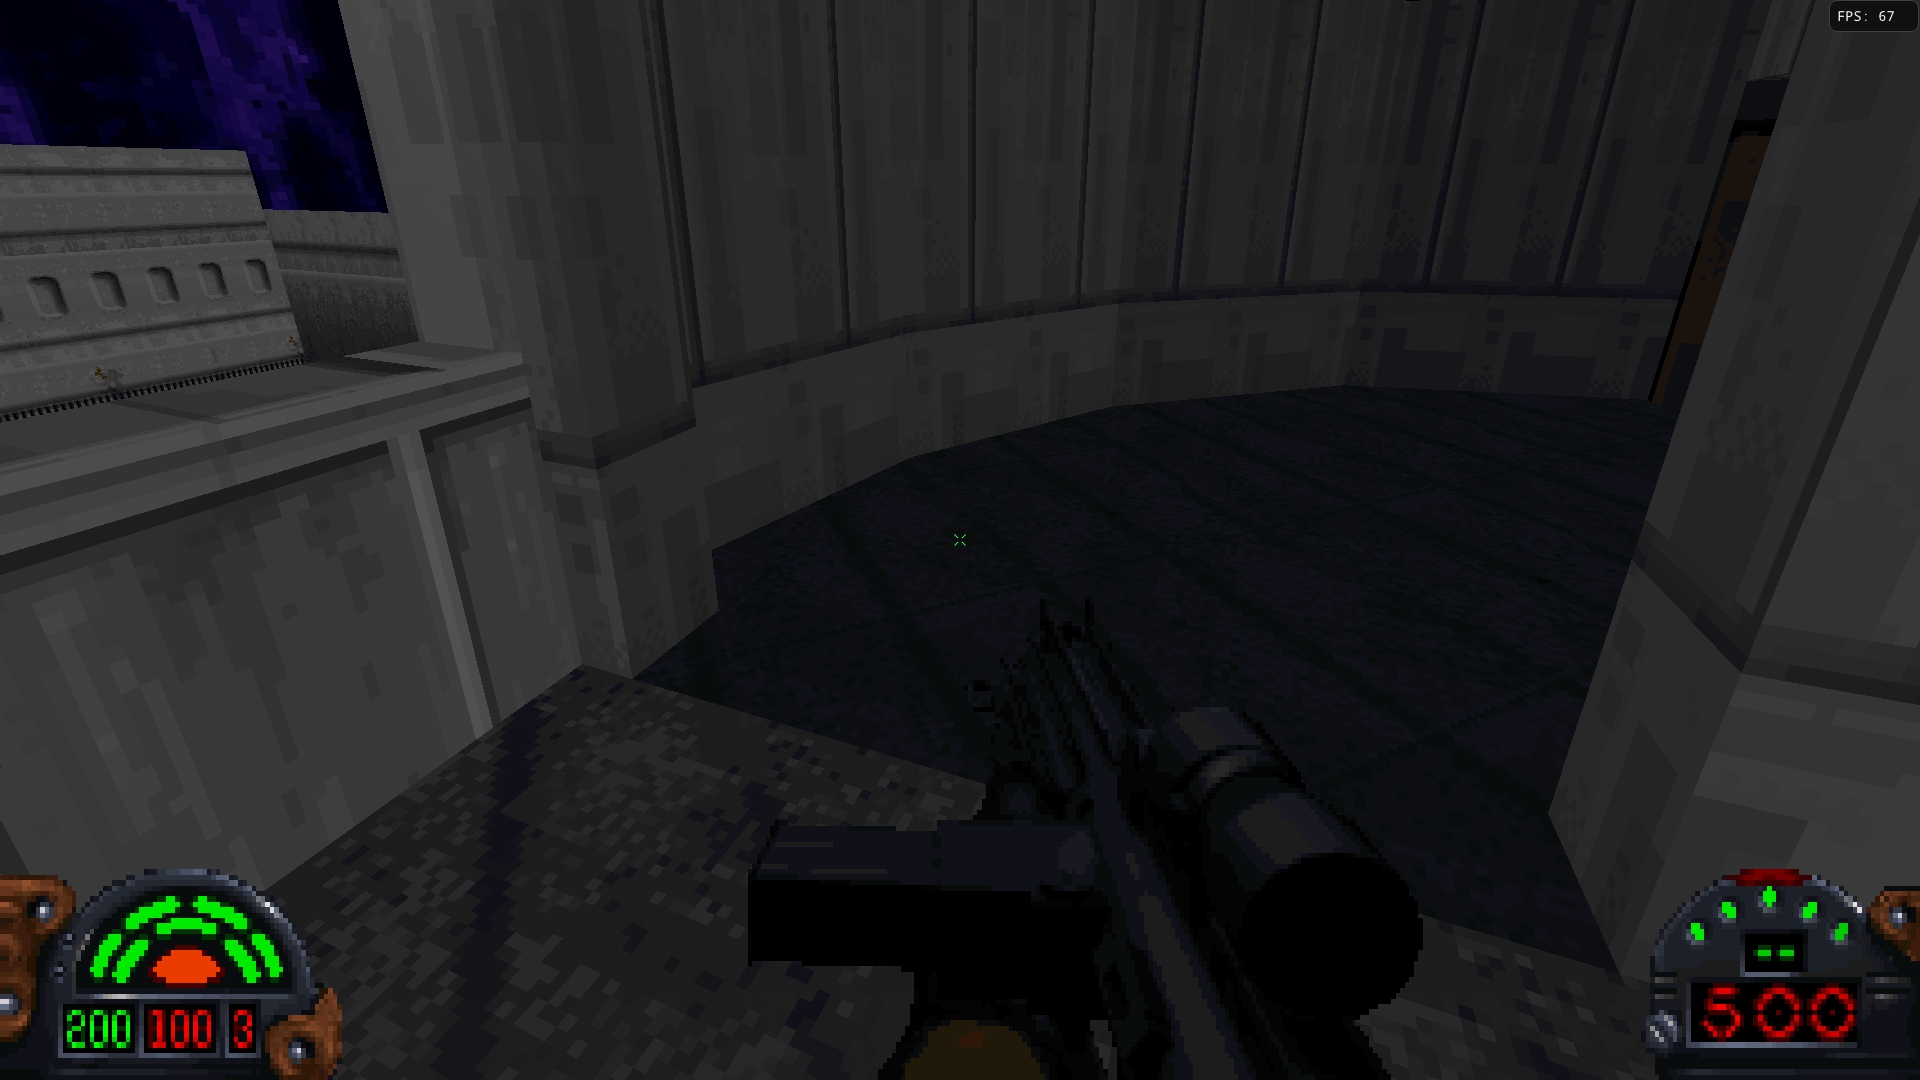
Comparison Images:
Vanilla / Interpolation

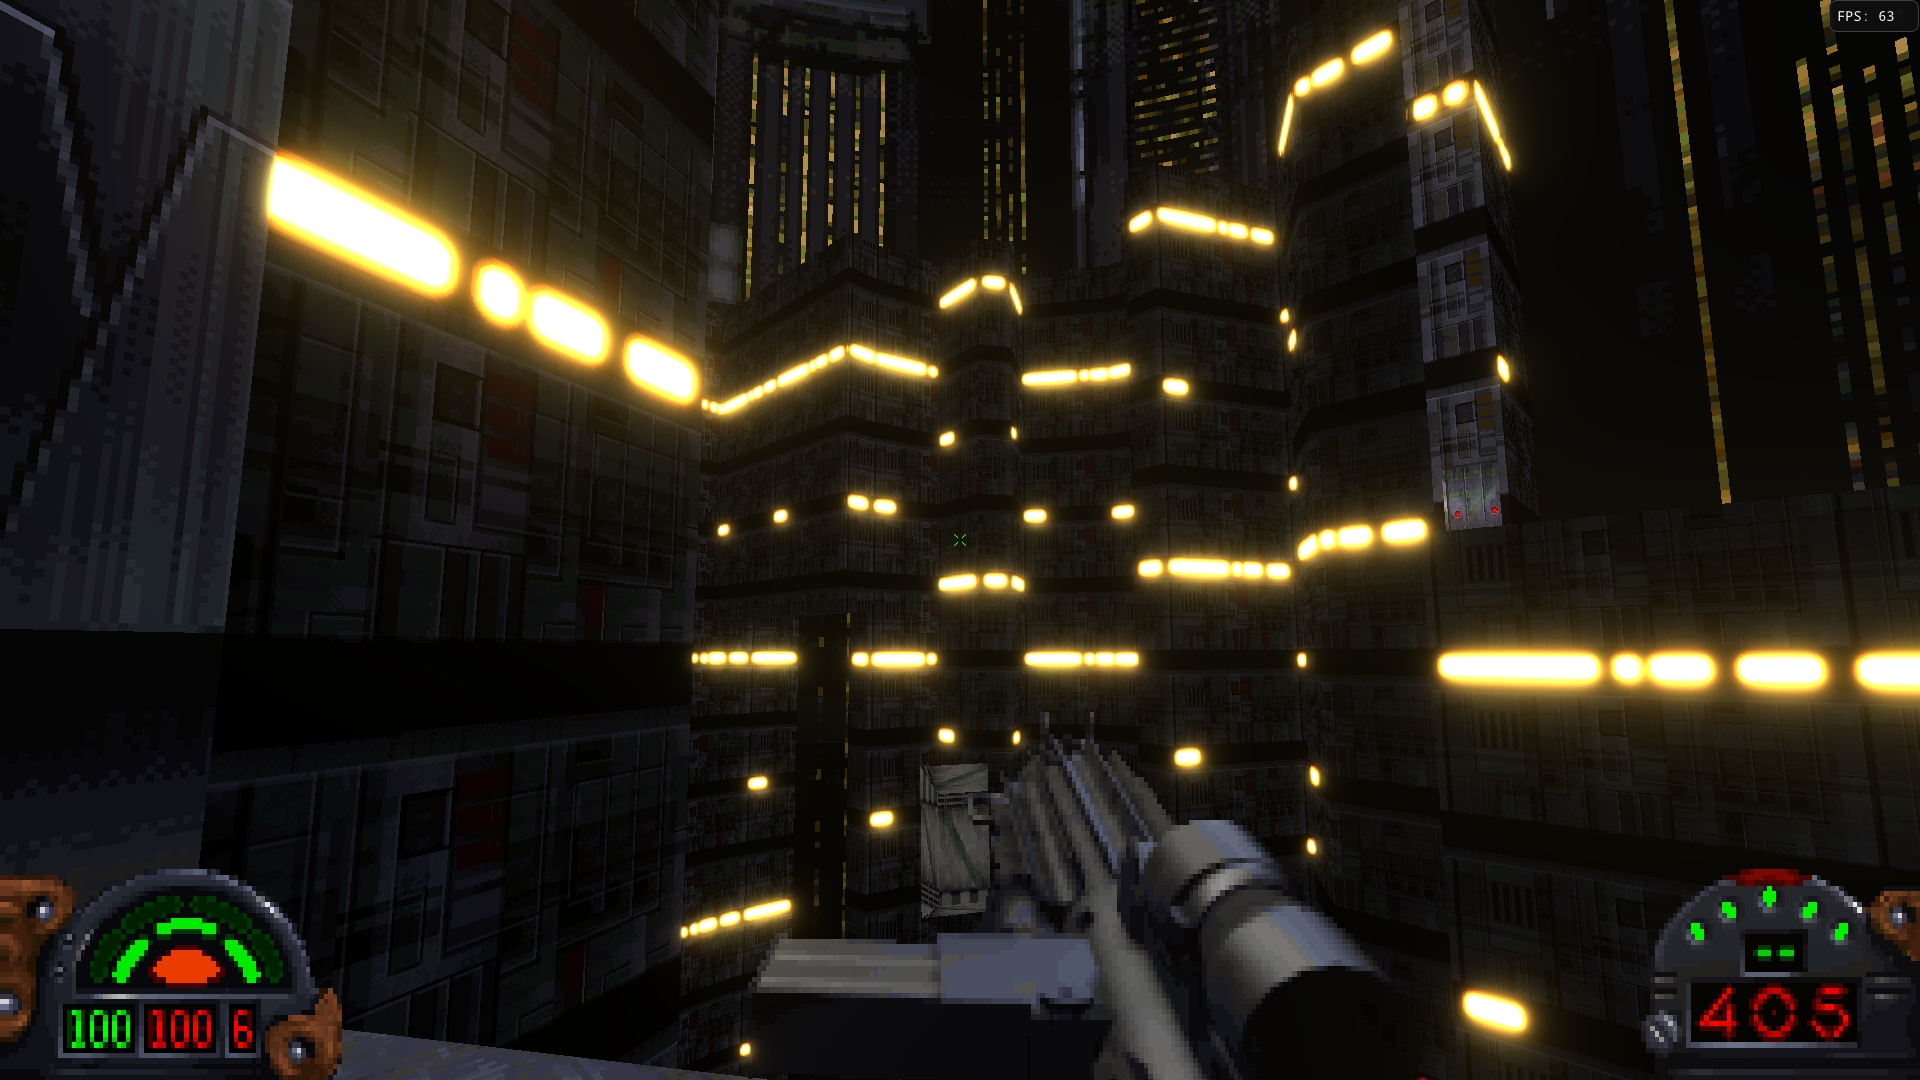
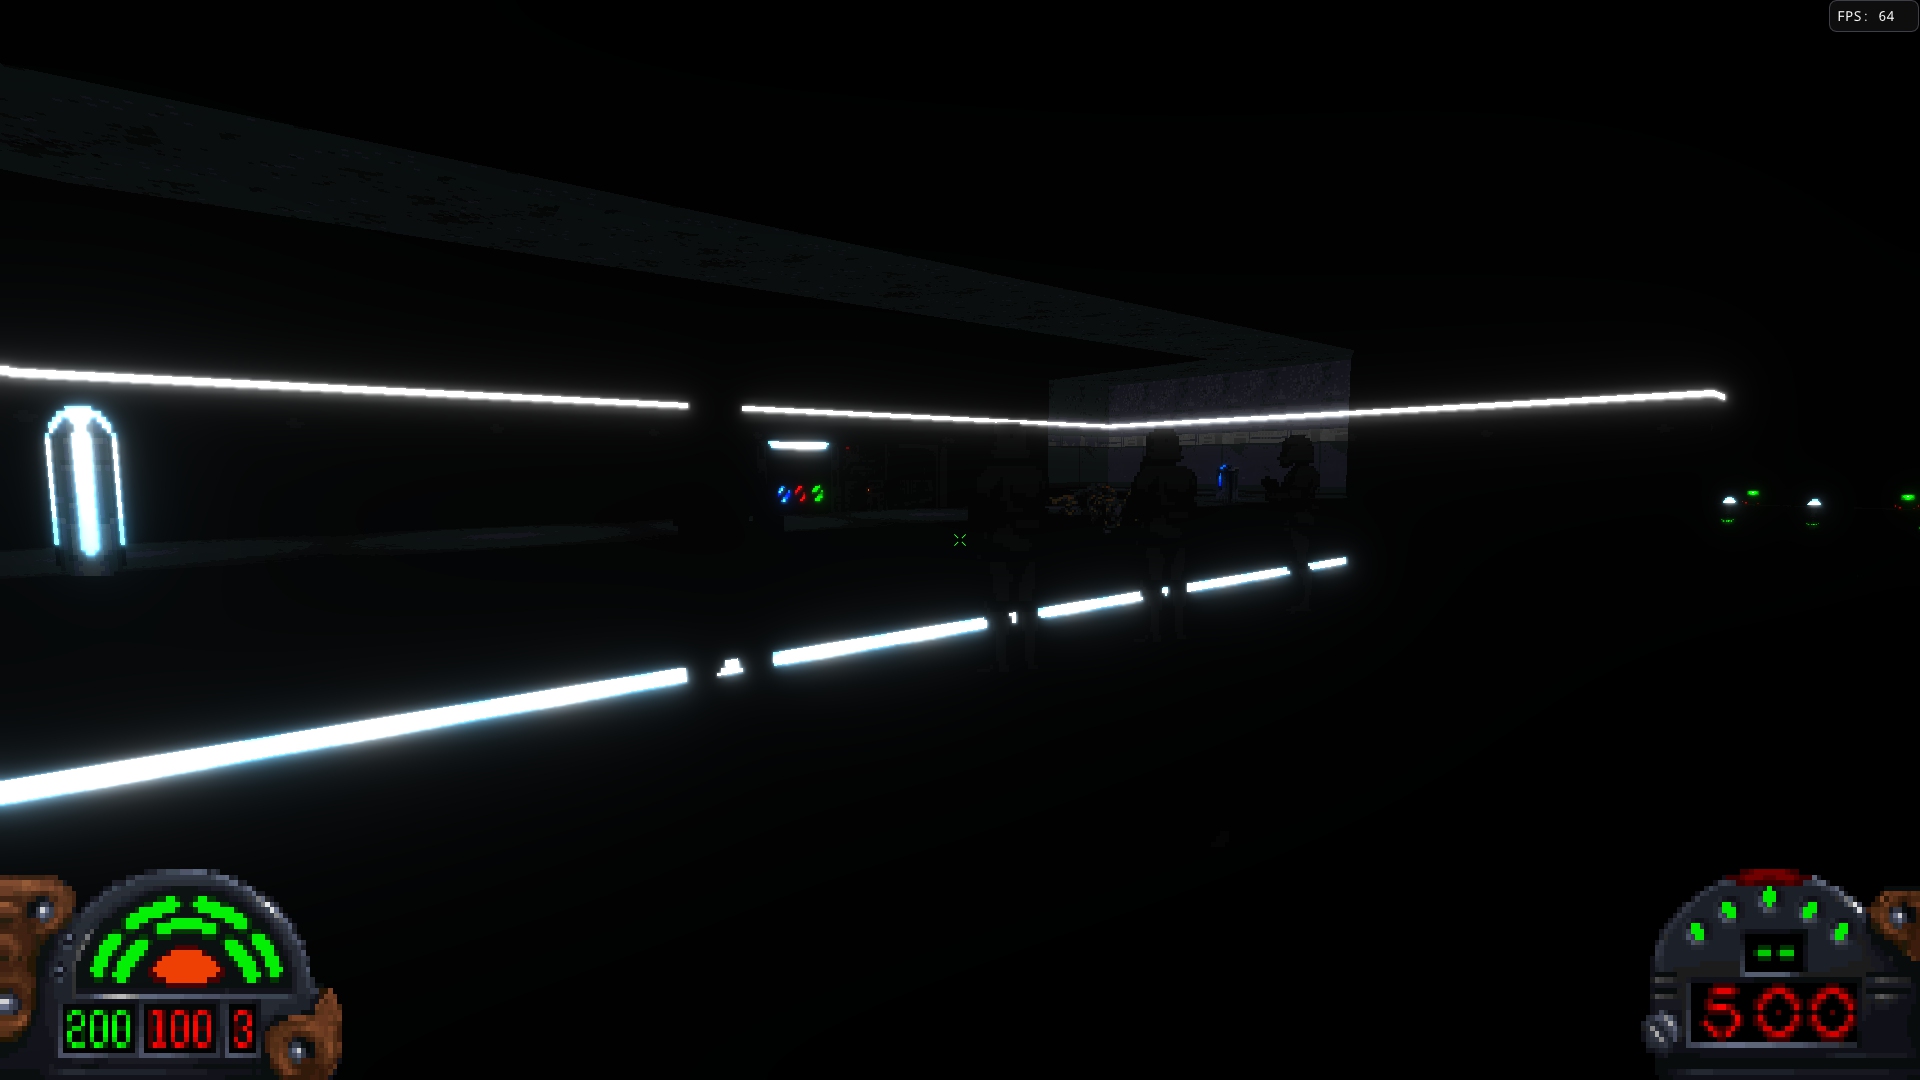
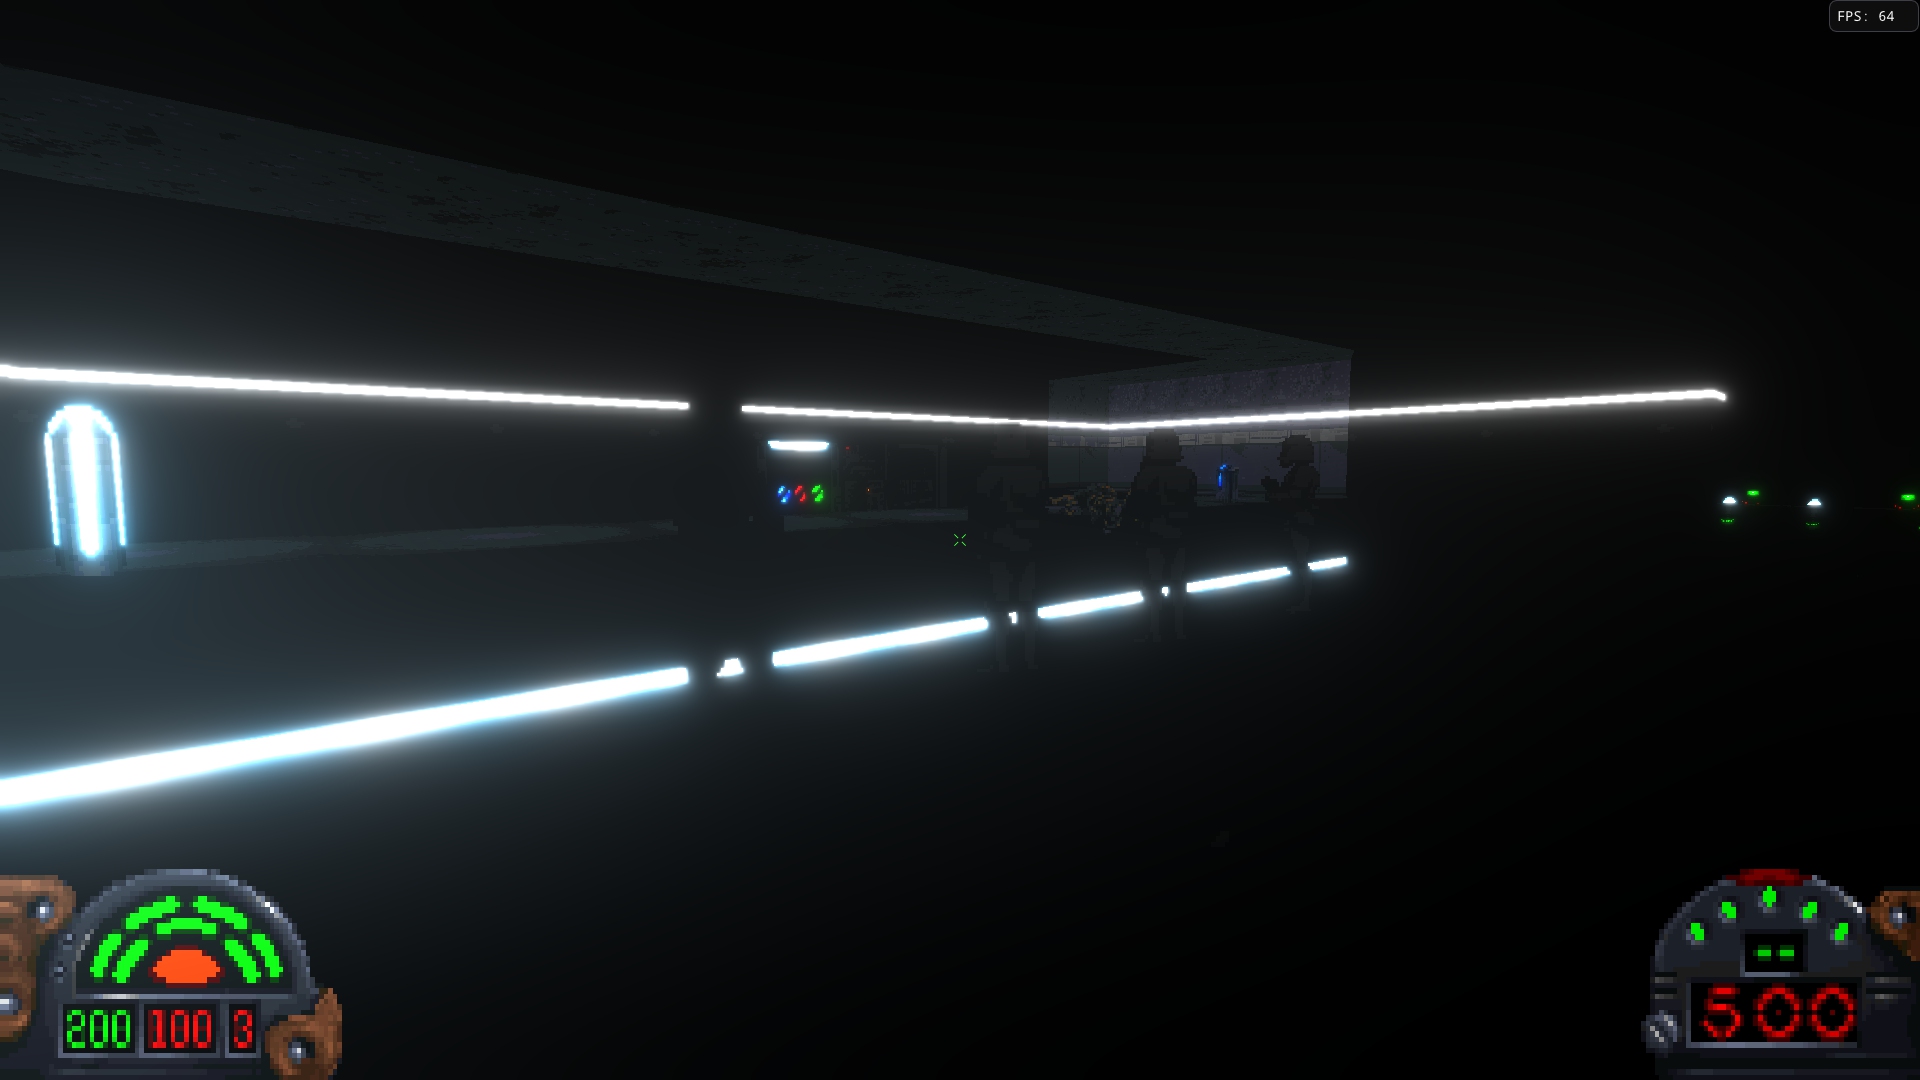
Bloom
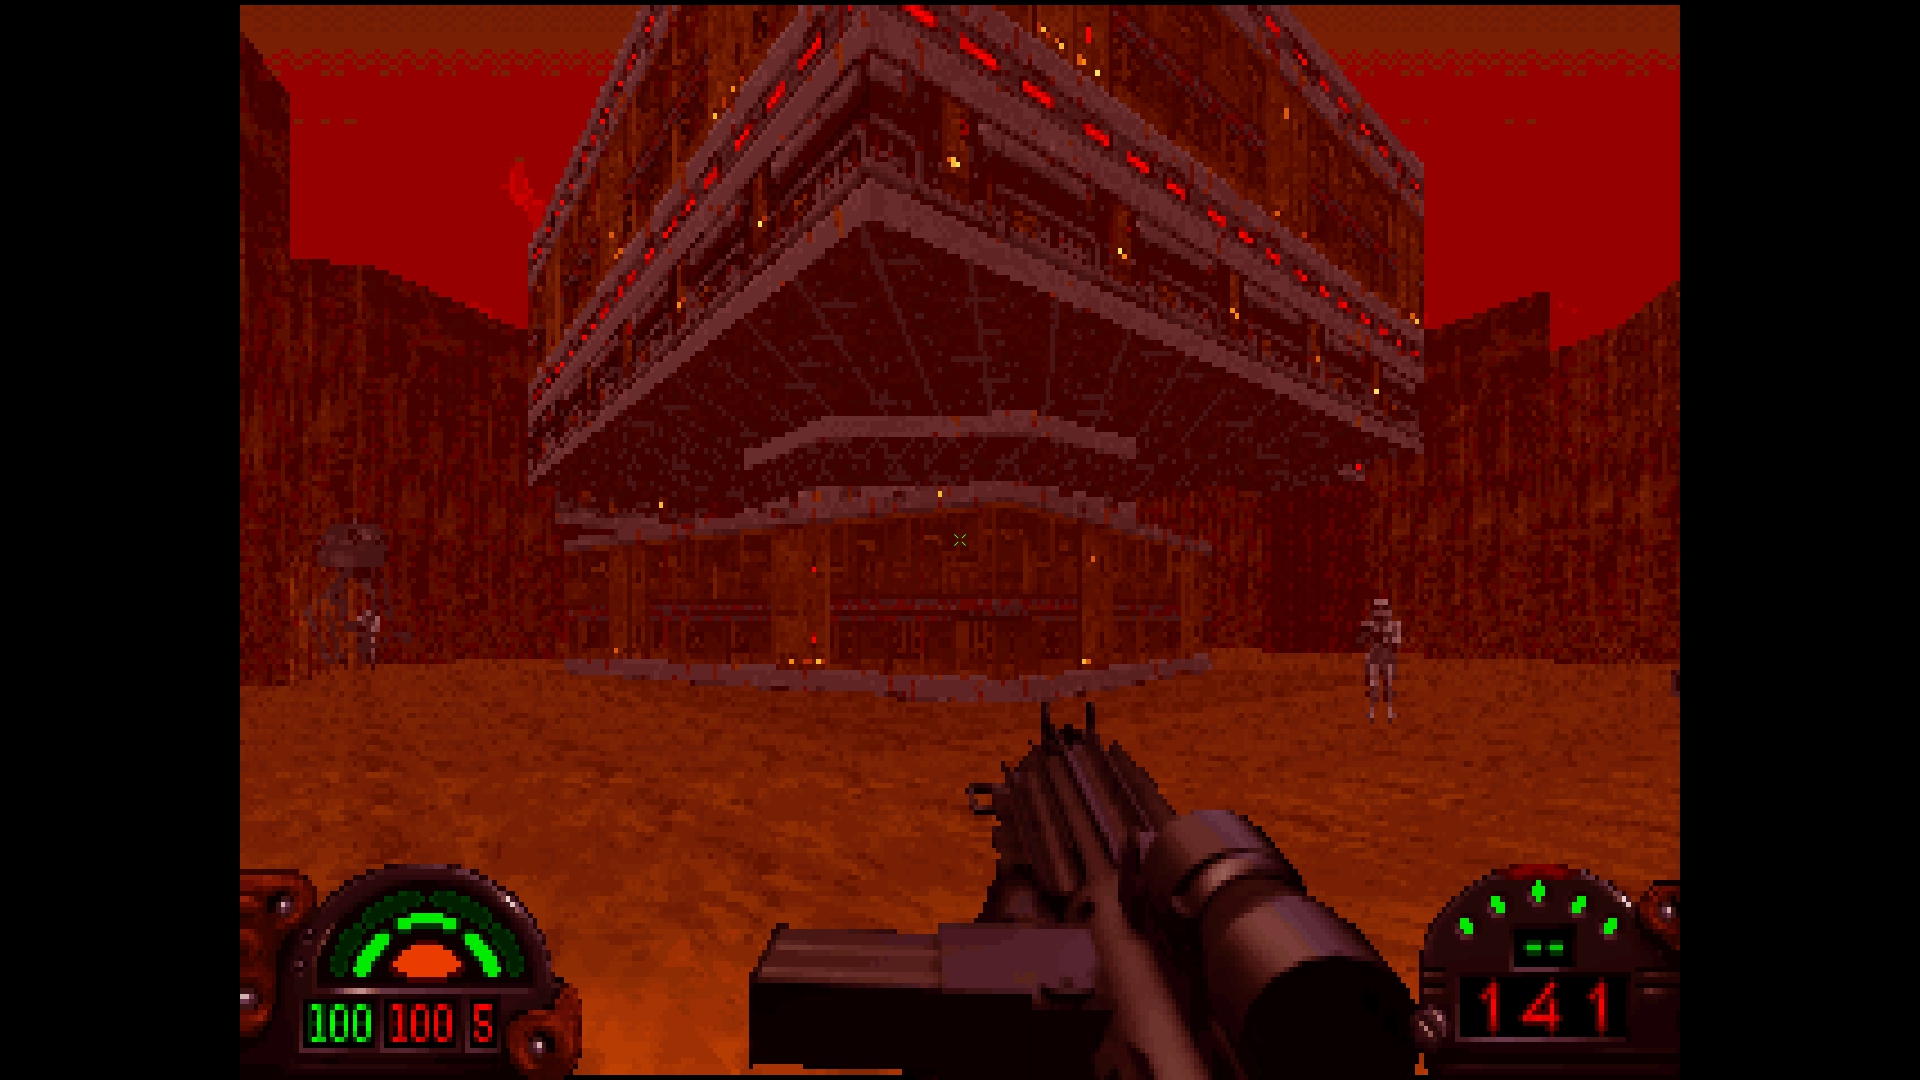
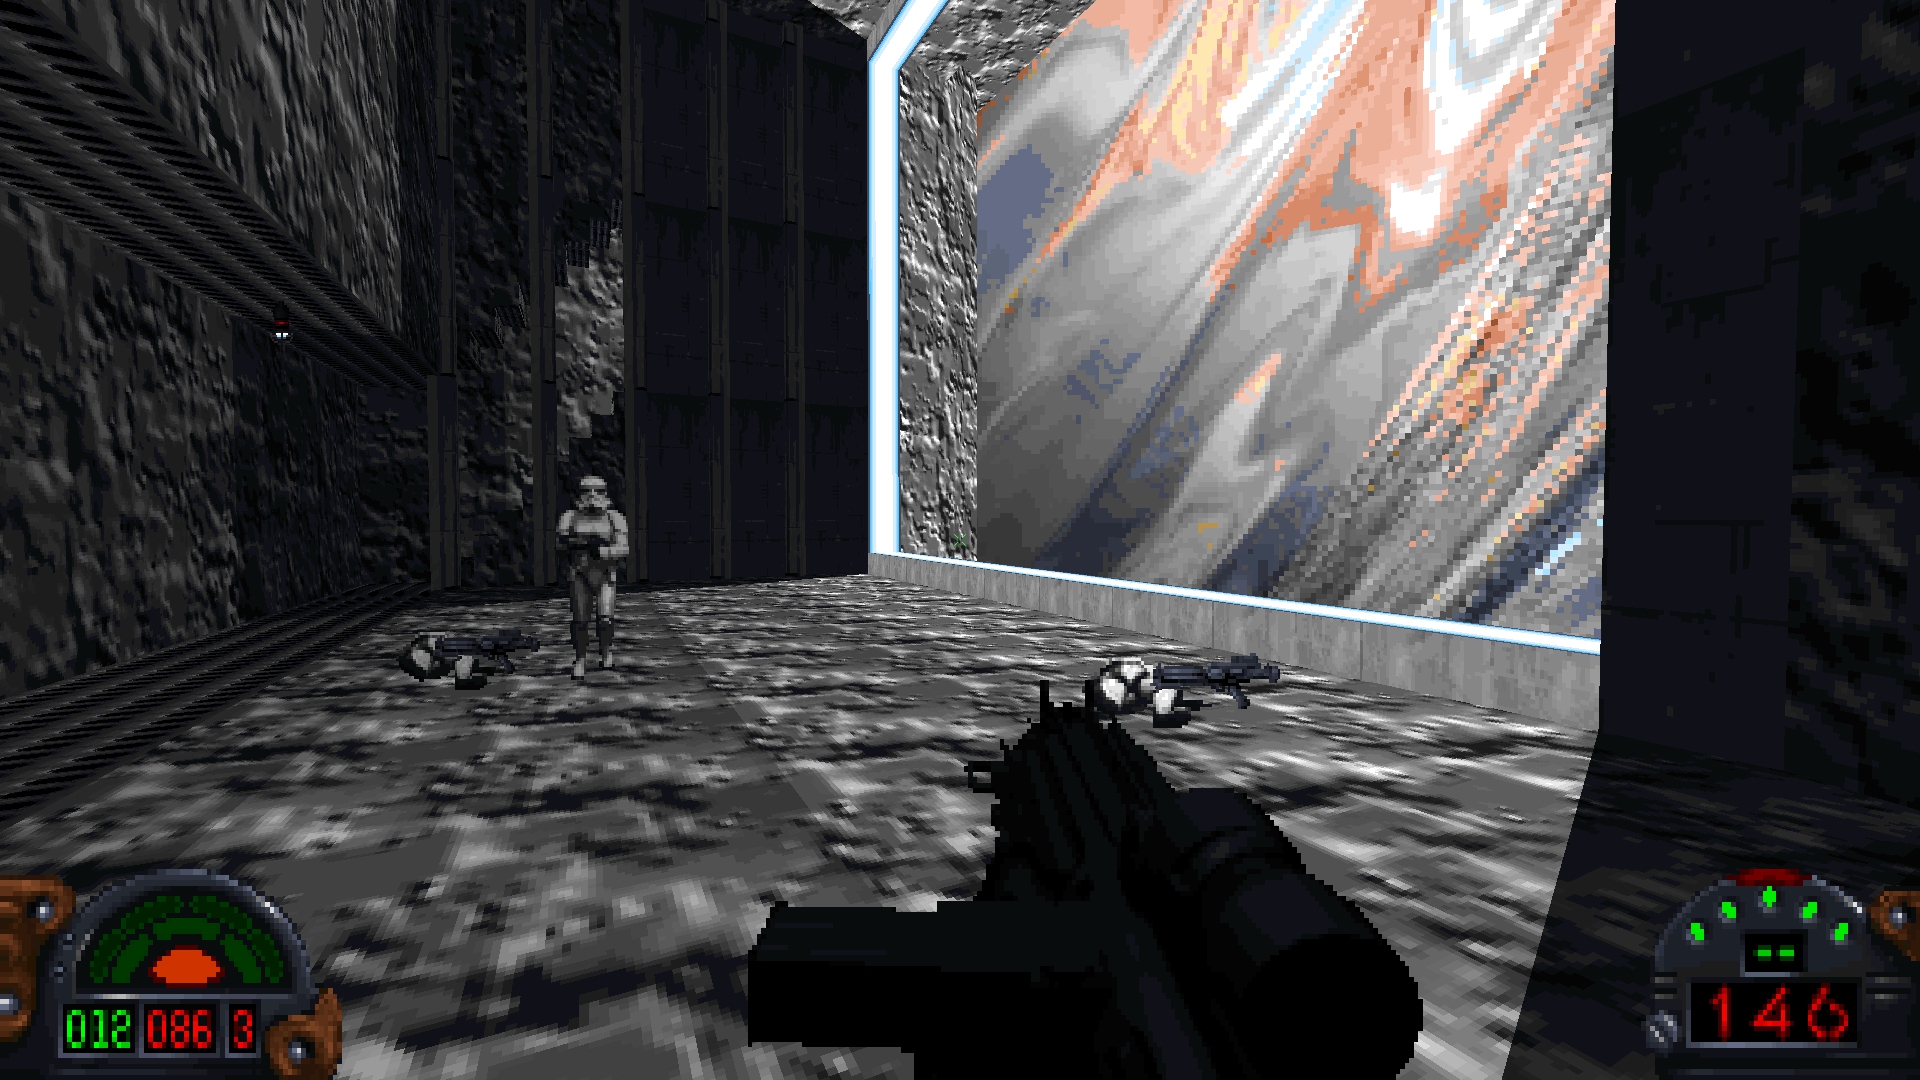
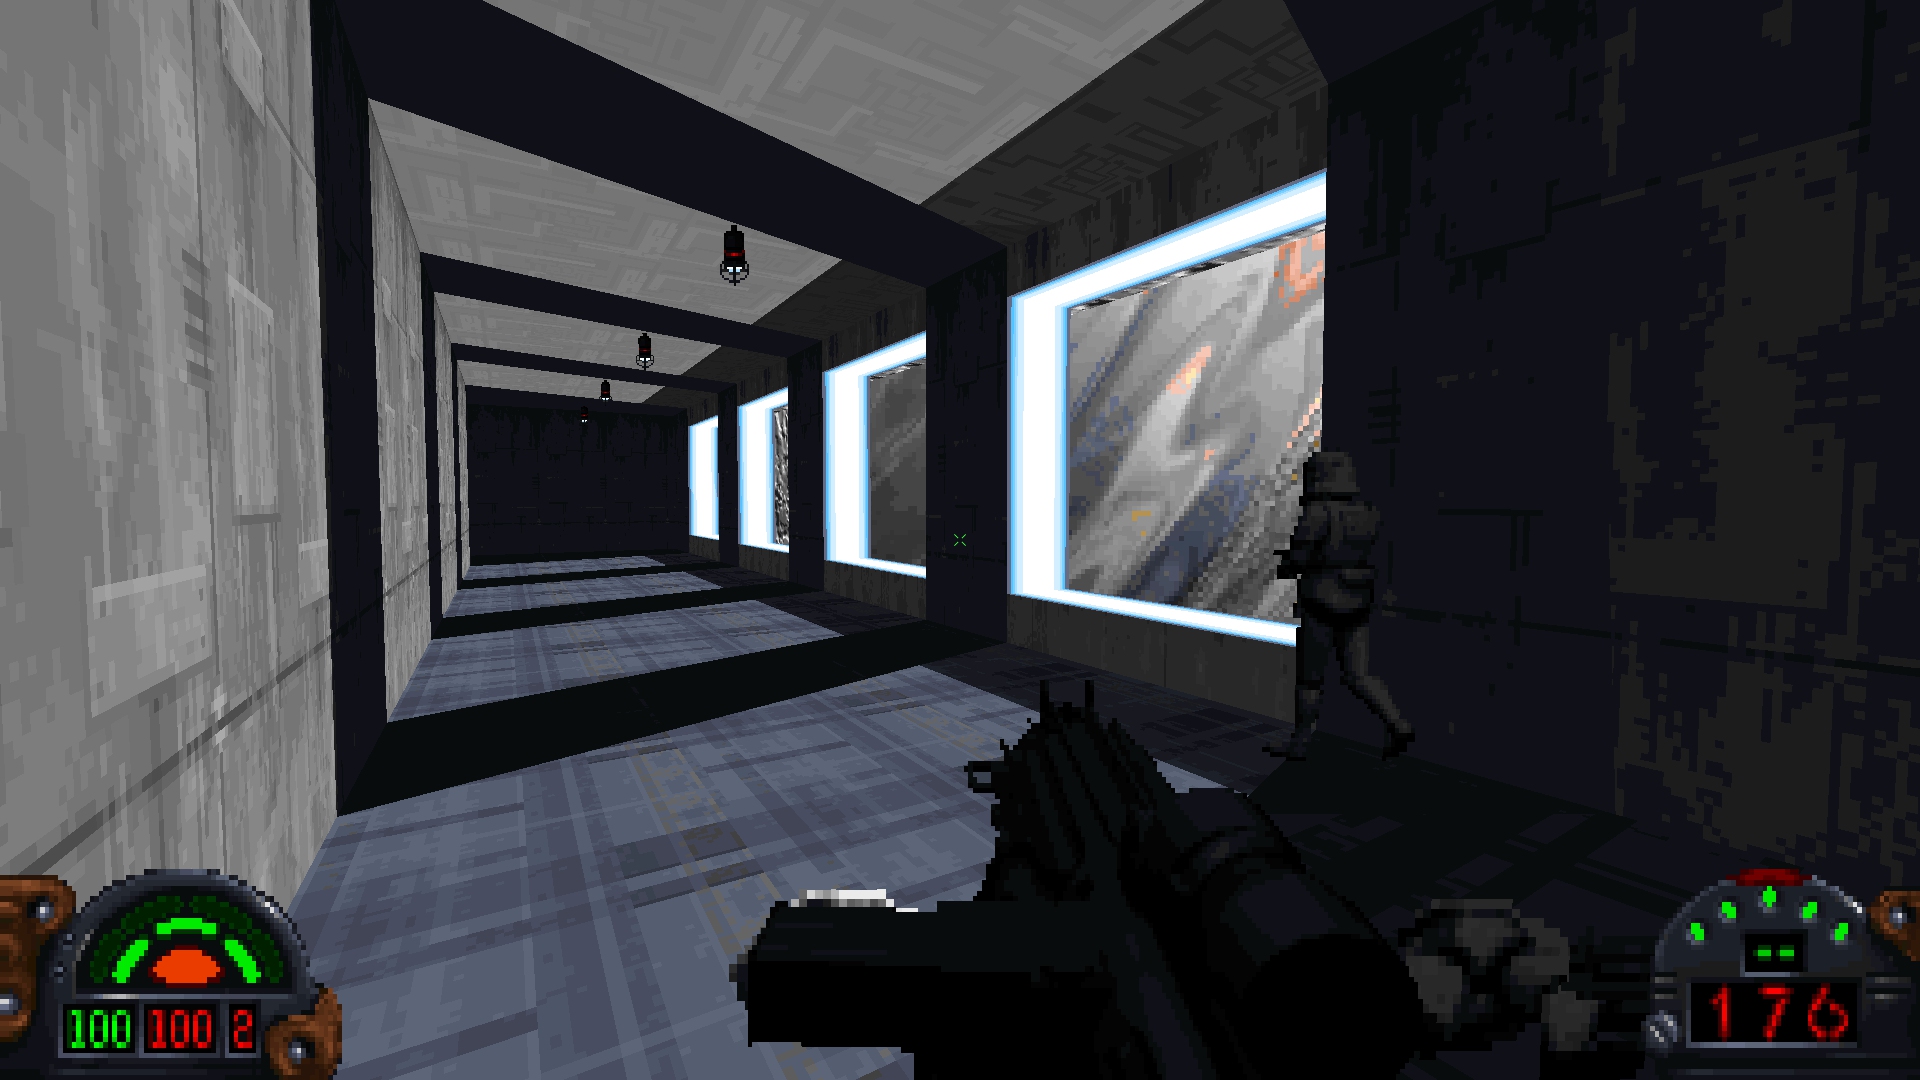
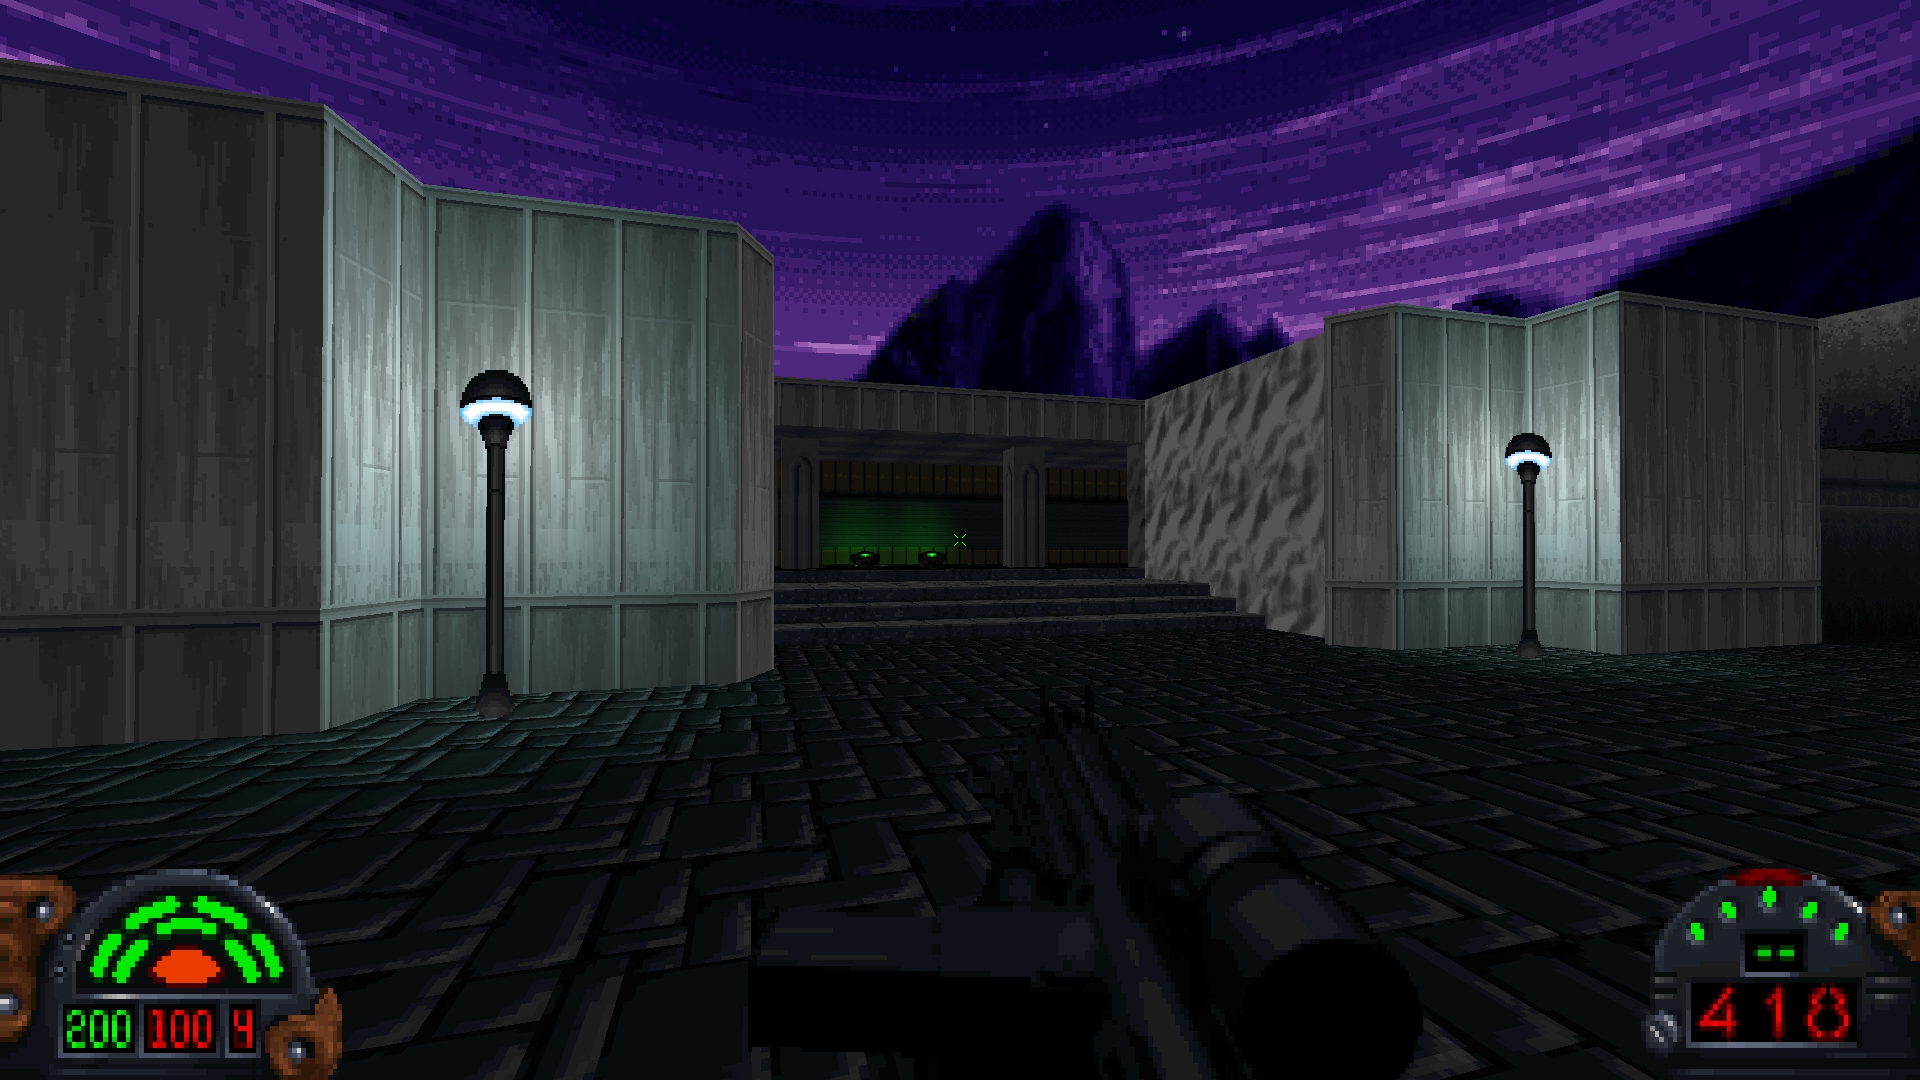
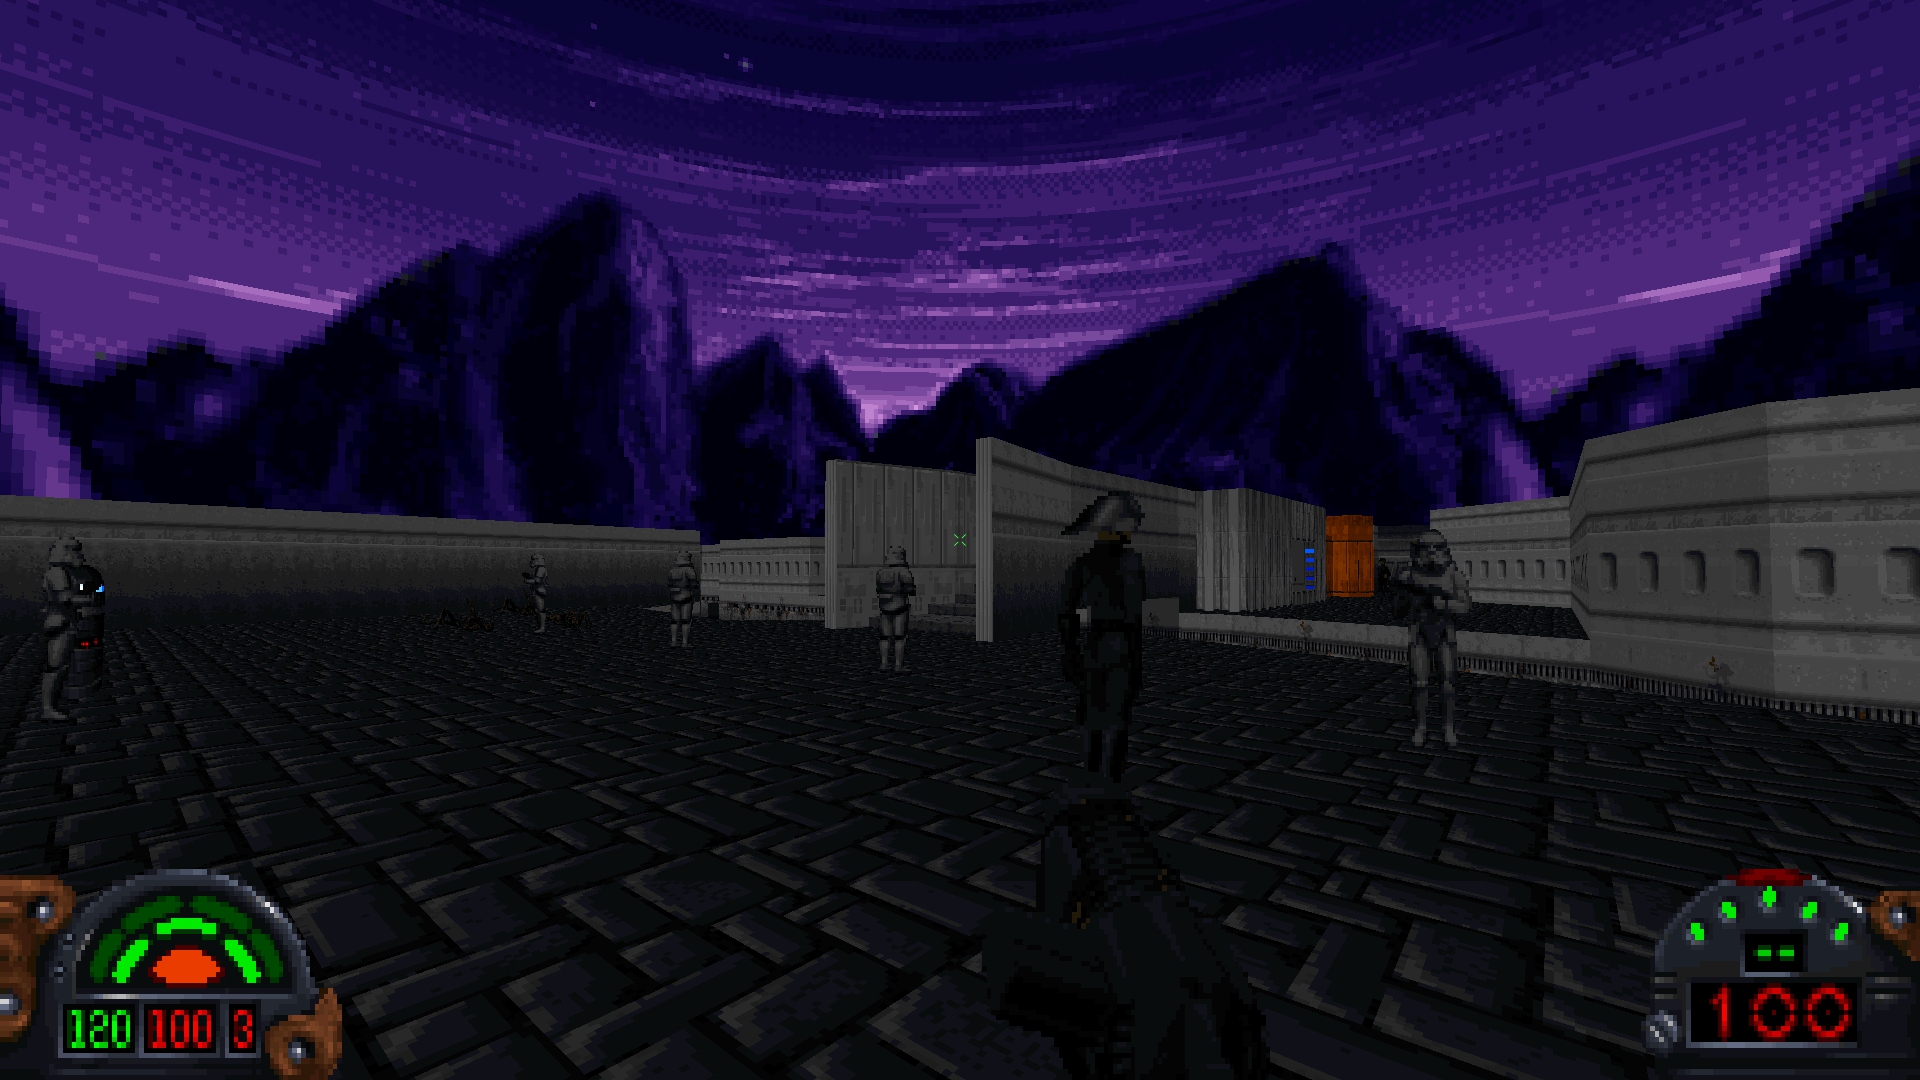
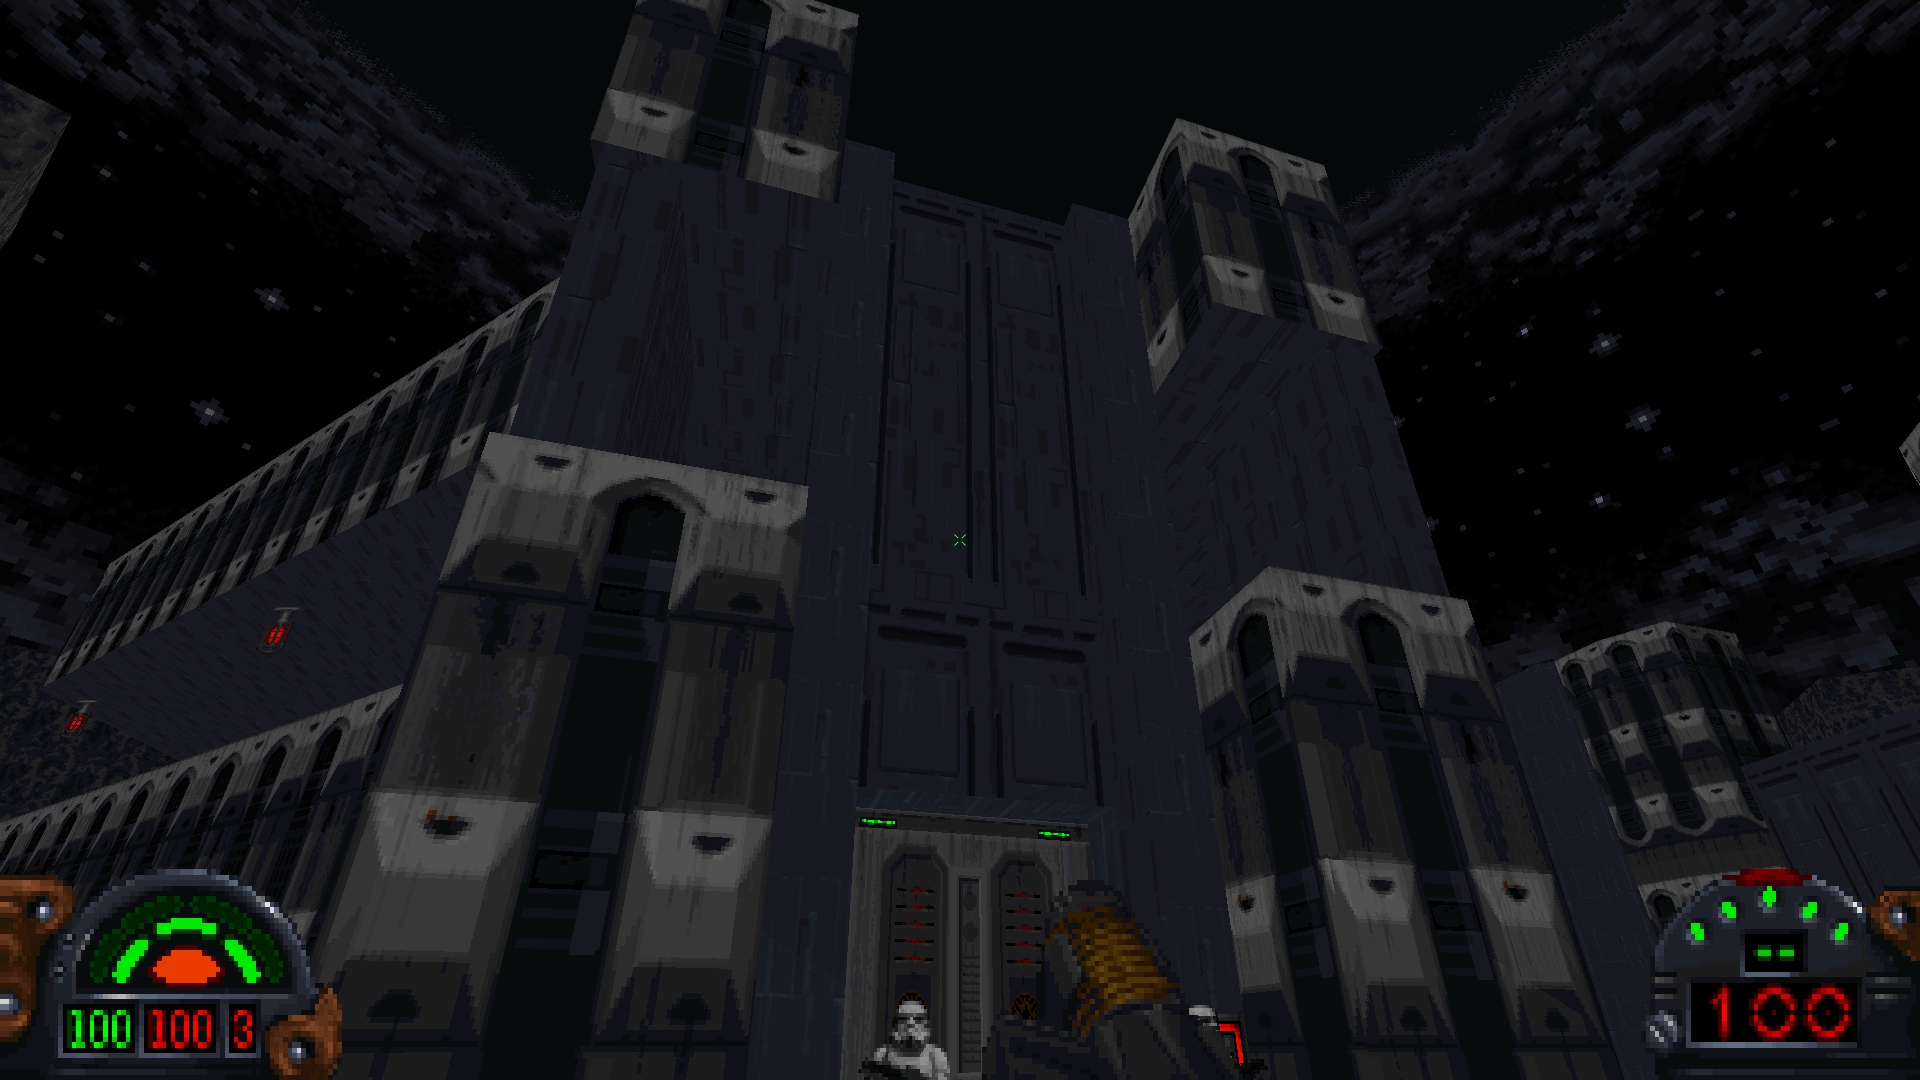
Star Wars environments are filled with glowing panels and lights, and so bloom tends to work really well to simulate this effect. For TFE, I wanted to implement a high quality, tunable effect - so went with a more modern implementation than seen in projects like DarkXL.
Emissive data is automatically generated from the textures, frames, and sprites by assuming that fullbright palette entries map to emissive pixels. This isn’t perfect, but generates very plausible results in the base game. The same mapping is used when decided which solid colors are emissive when rendering 3DOs.
The core technique supports very large blurs, and works as follows:
First a half sized image is generated from the full size color data and emissive data: result = post-conversion RGB * Emissive. A 13-tap downscaling filter is used that utilizes bilinear filtering to emulate a full 36-tap filter, in order to reduce flickering and aliasing.
Then that image is downsampled multiple times using the same filter (though the emissive values no longer need to be used), similar to generating a mipmap chain. Each downsampled texture is lower resolution than the previous, but later upsampling blurs cover a larger area.
Finally the downsampled images are recombined and merged together. At each step a lower resolution merged result is blurred and added to the next highest resolution. The way the frequencies are mixed together changes the spread of the blur.
Threshold/Downsample -> Downsample chain (smallest 8x8) -> Merge from bottom up (8x8 + 16x16 -> 16x16, 16x16 + 32x32 -> 32x32, ...->Final bloom with all frequencies composited
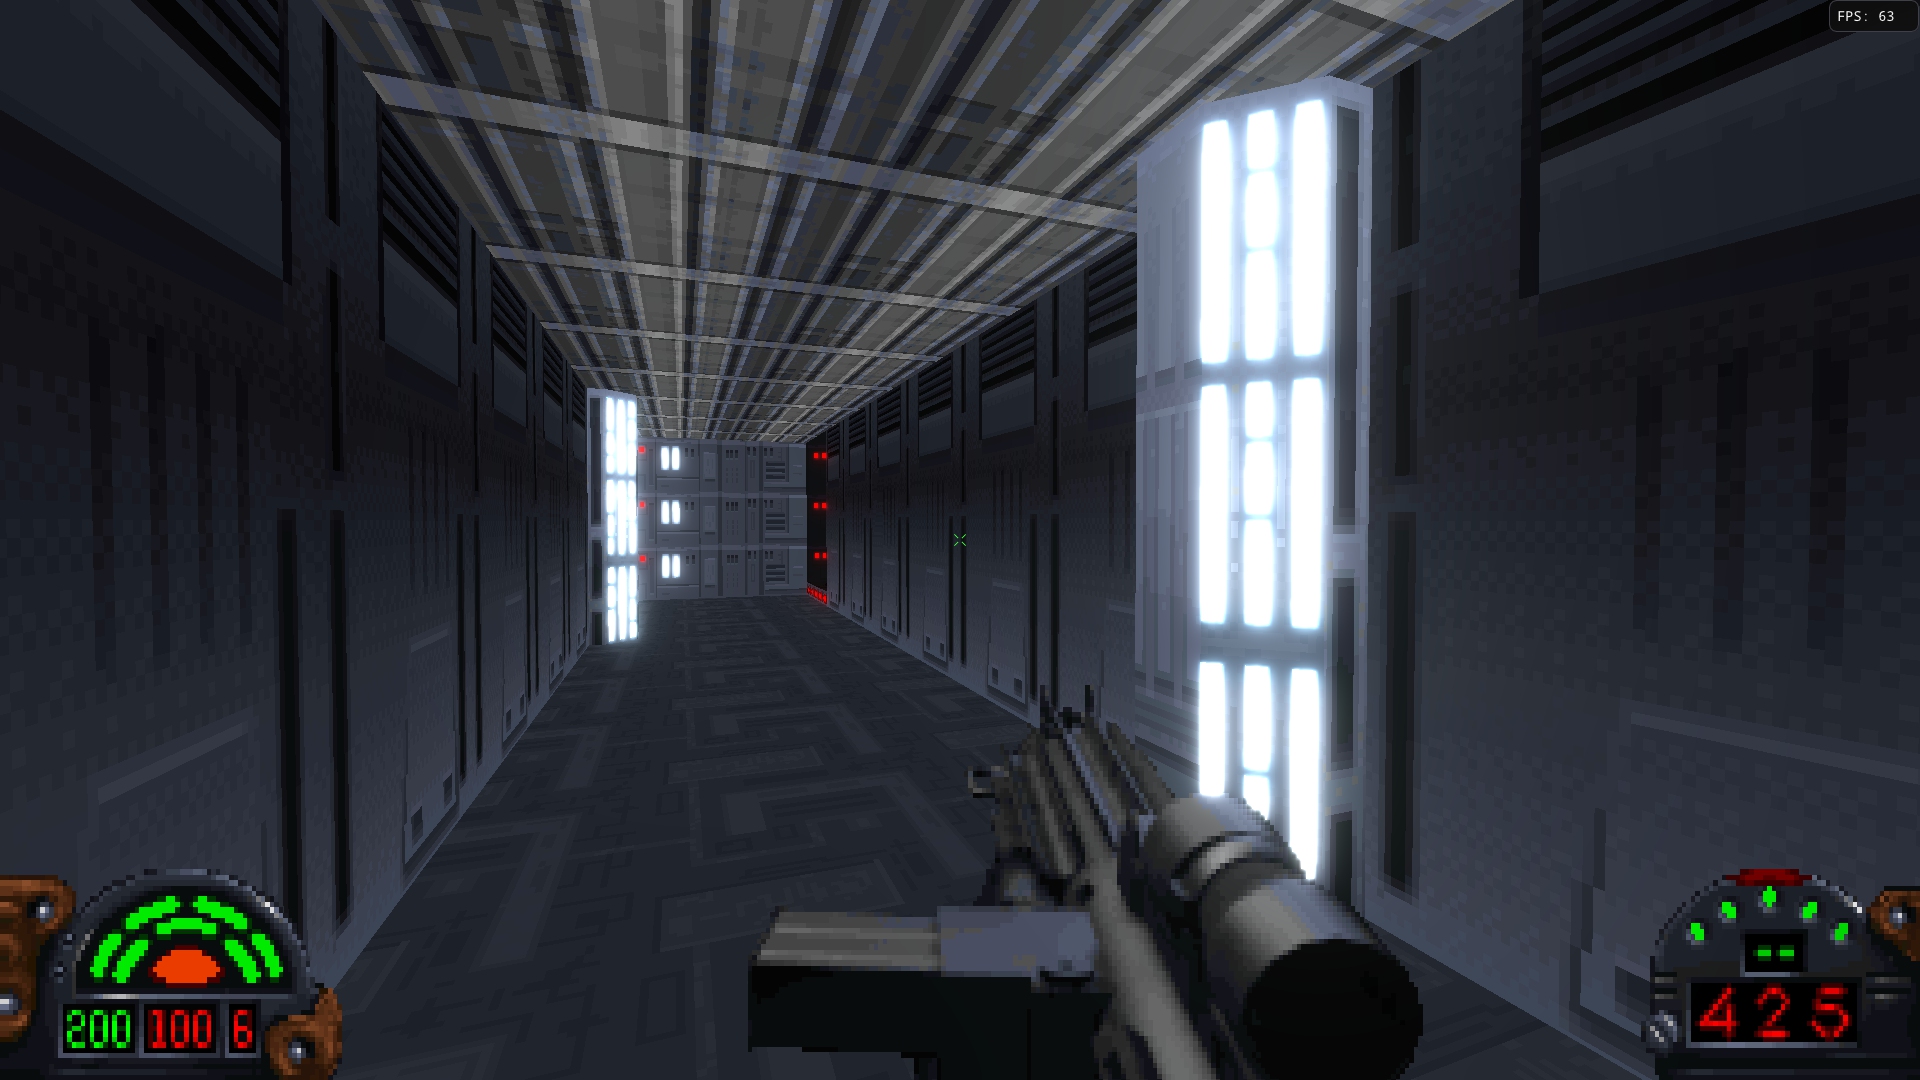
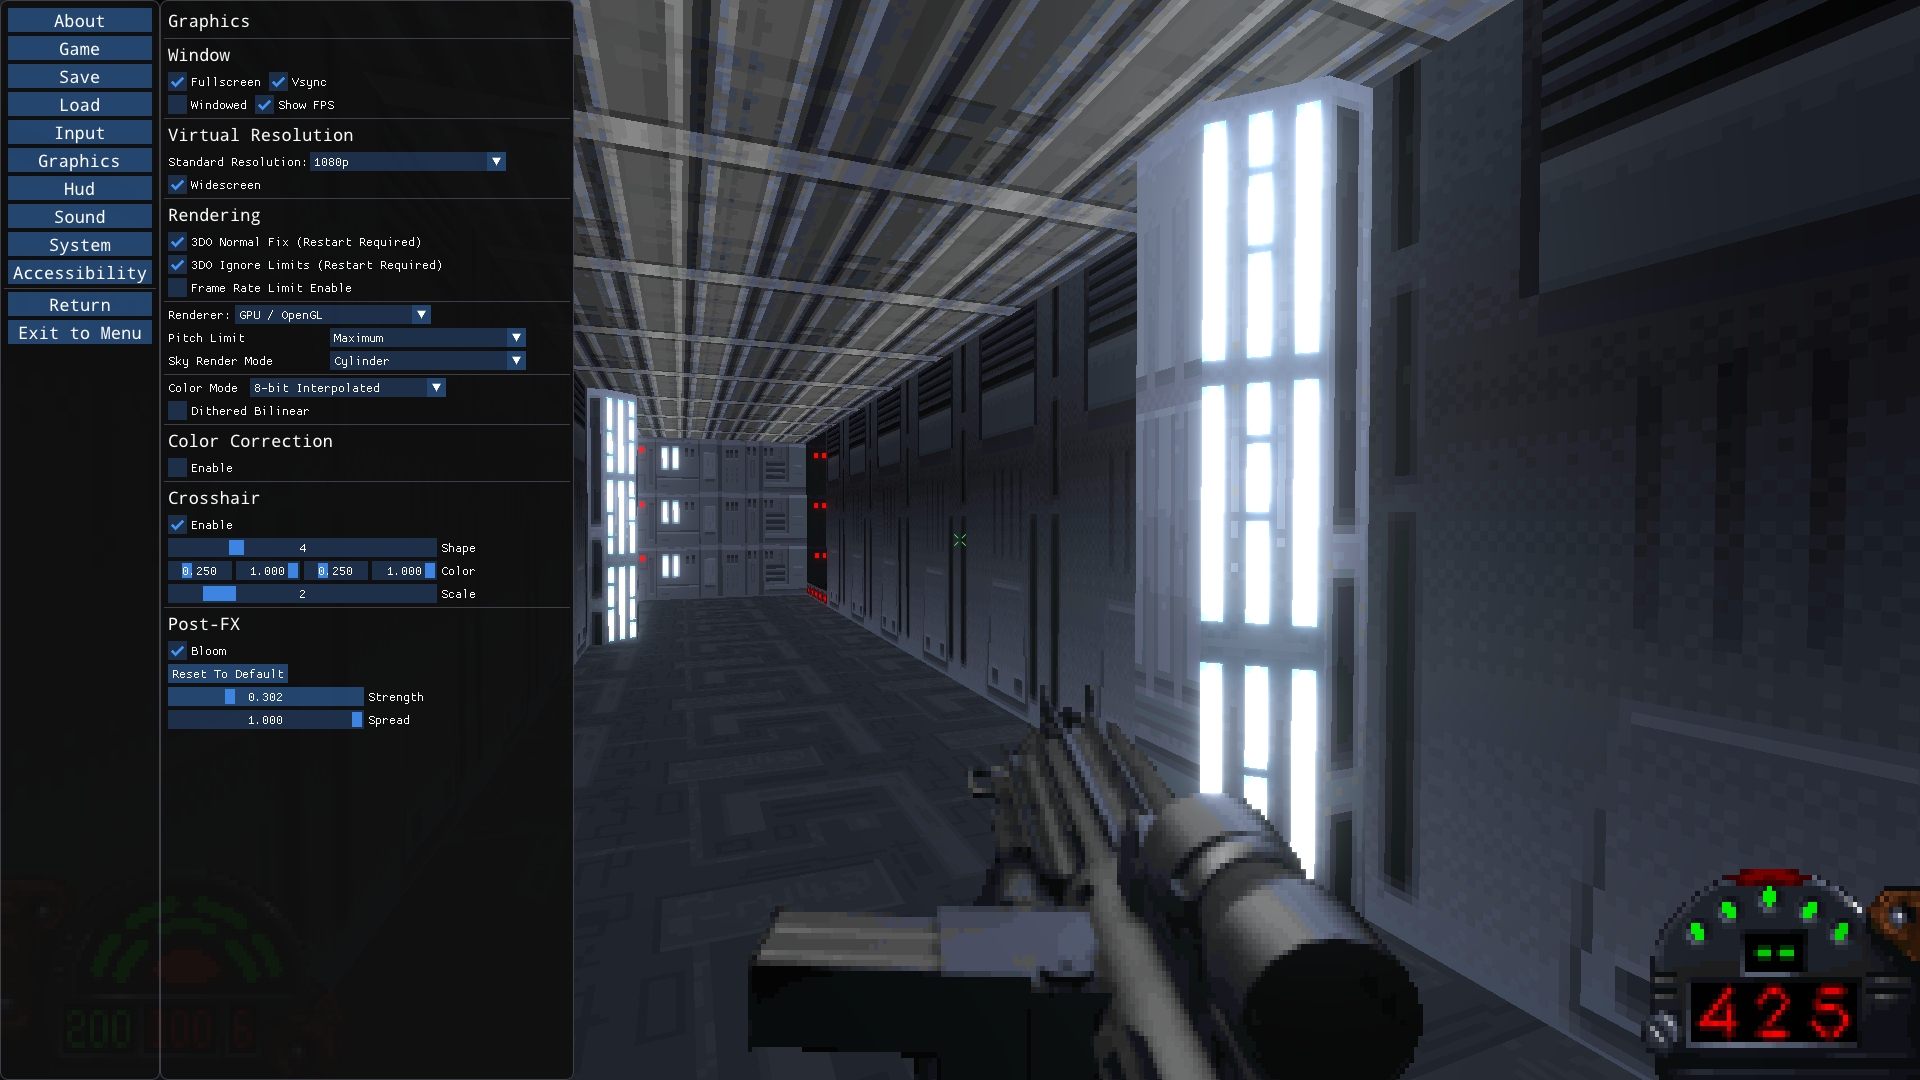
Controls
- Strength - Intensity of the bloom effect.
- Spread - How far the effect spreads, lower spread results in more focused bloom, higher results in more atmospheric/foggy looking bloom.
Emissive Overrides
In a future release, it will be possible to override the generated emissive values for each texture. This is useful for adding emissive pixels where they are missing, to handle True Color assets later for mods, and to remove emissive pixels that are generated by assets that accidentally used fullbright palette entries incorrectly.
Texture Exporting
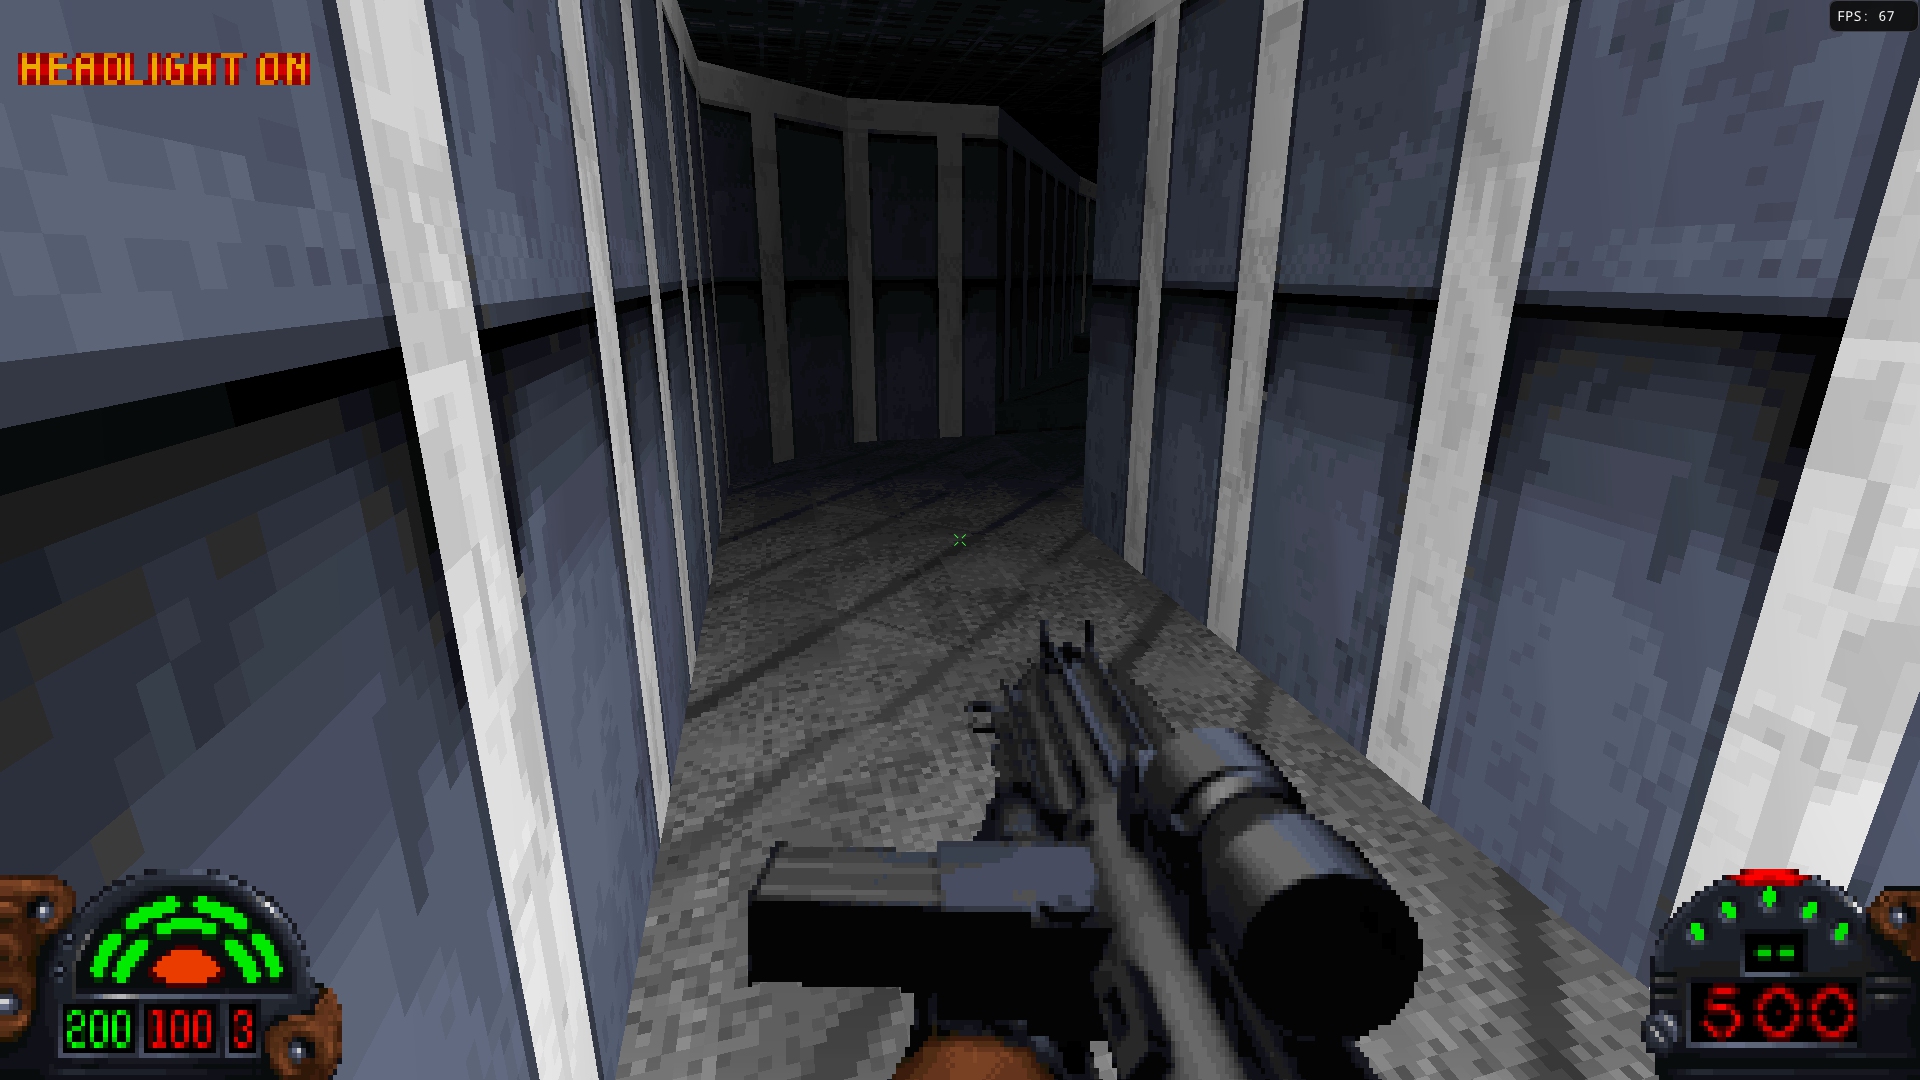
To make creating overrides easier in the future, a new console command exportTexture has been added. To export a texture that you can see, simply look at it (point the crosshair at it, if that is enabled), and the type exportTexture in the console. TFE will write out the BM, a palette converted version as PNG, and finally a “material” PNG that contains the generated emissive values.
No Bloom / Default / High Strength / High Strength + High Spread
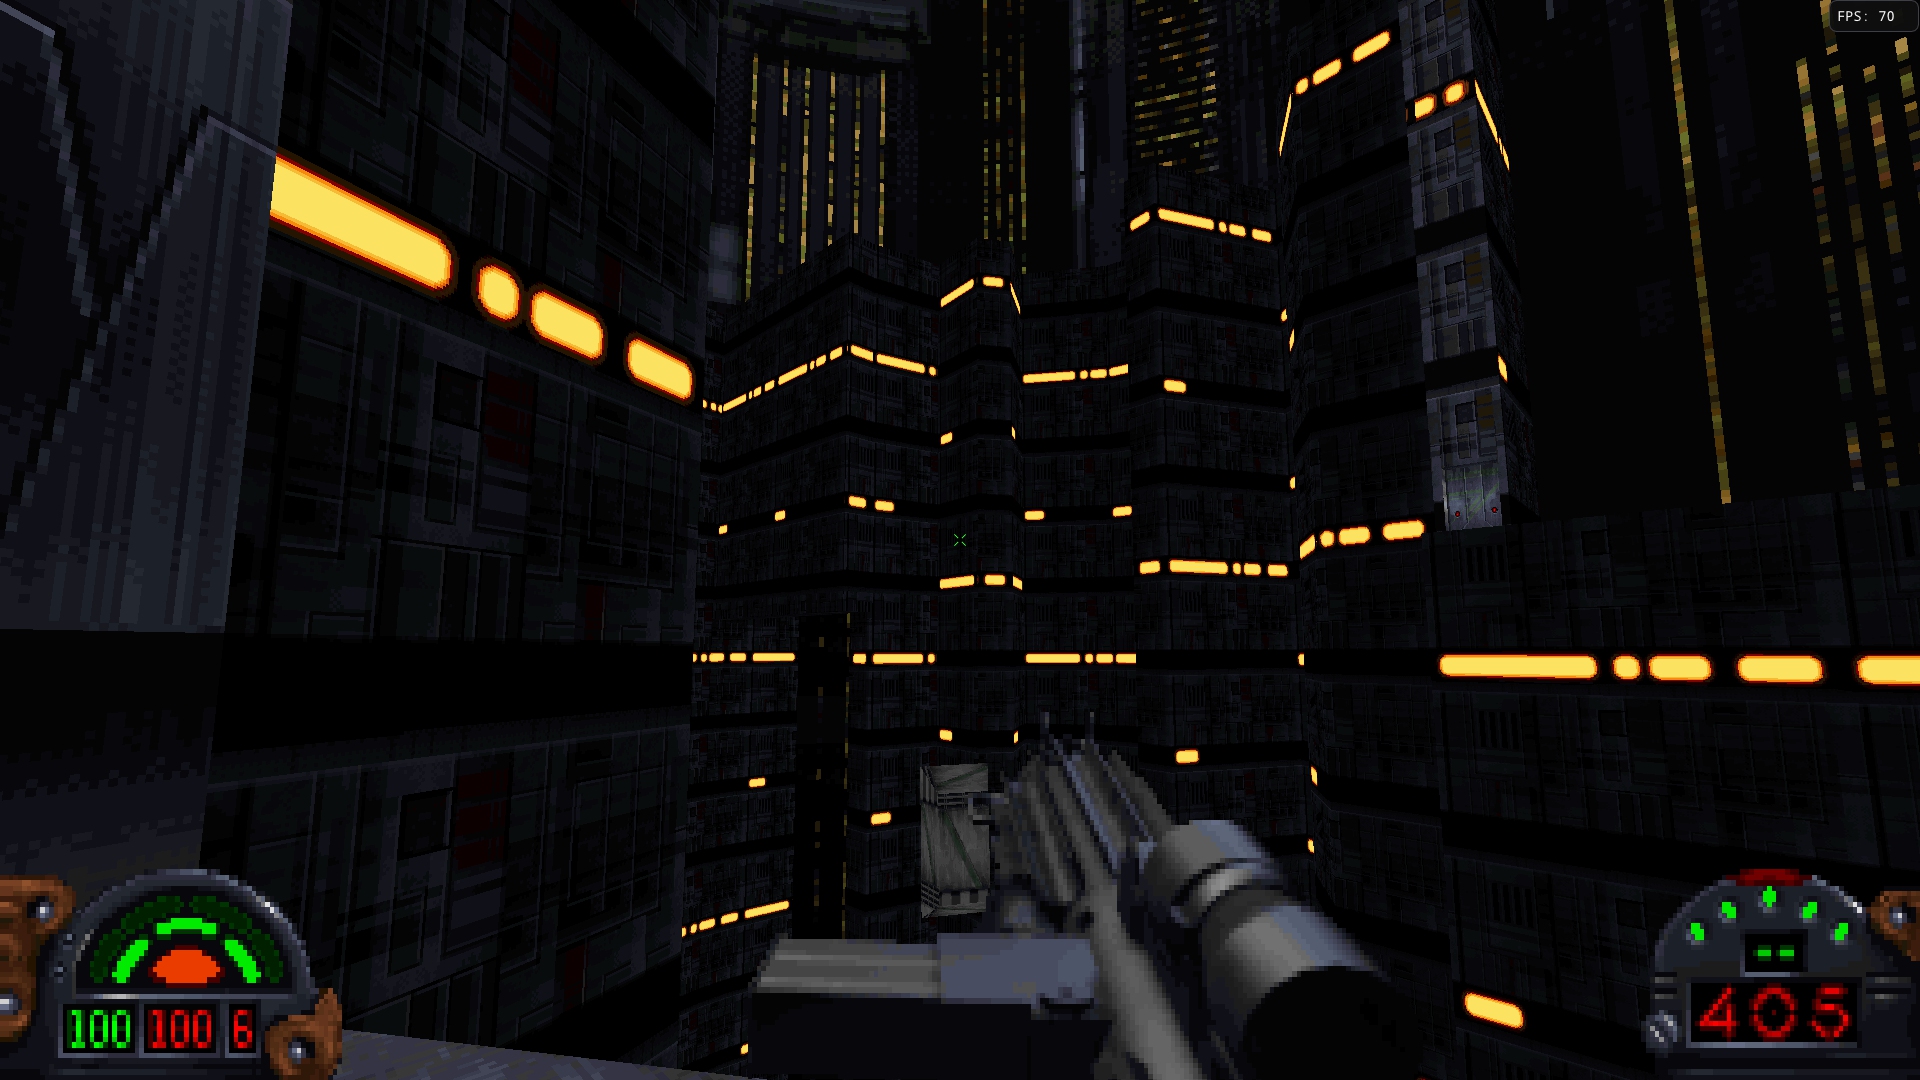
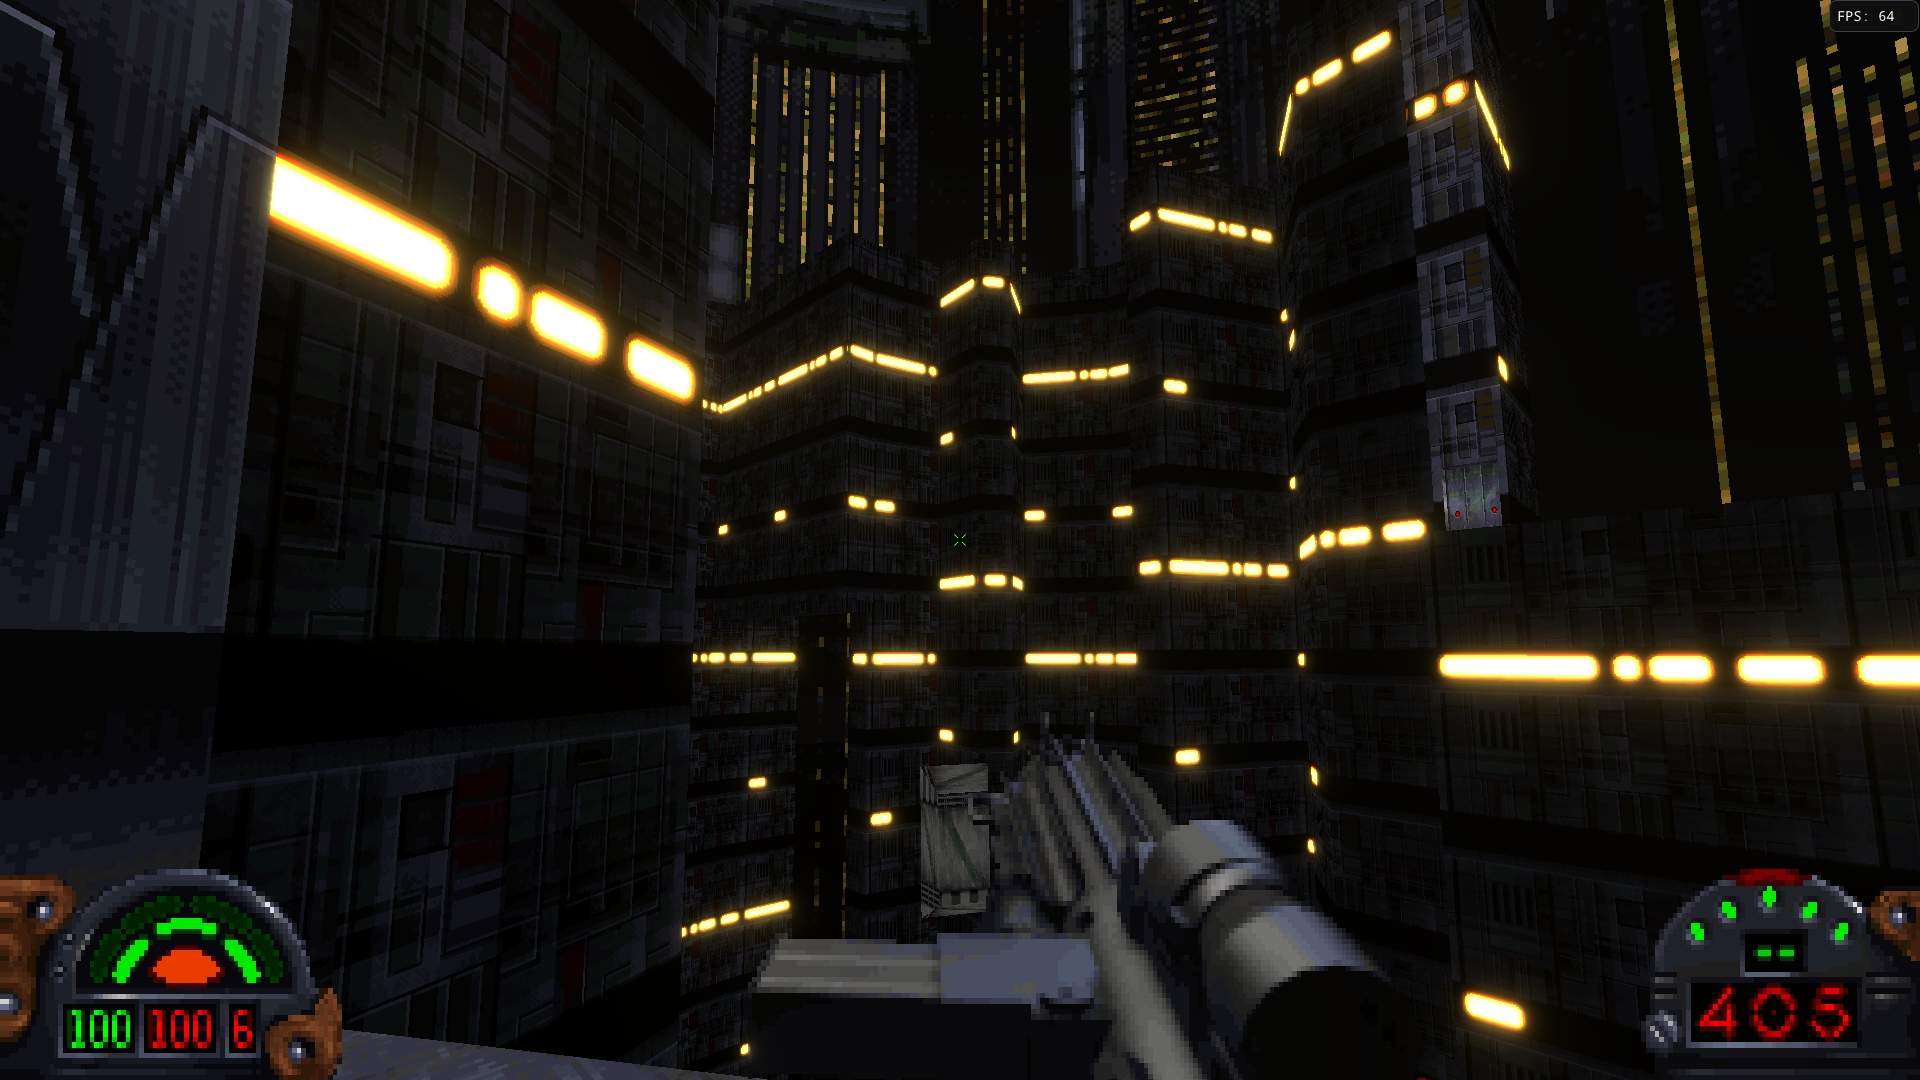
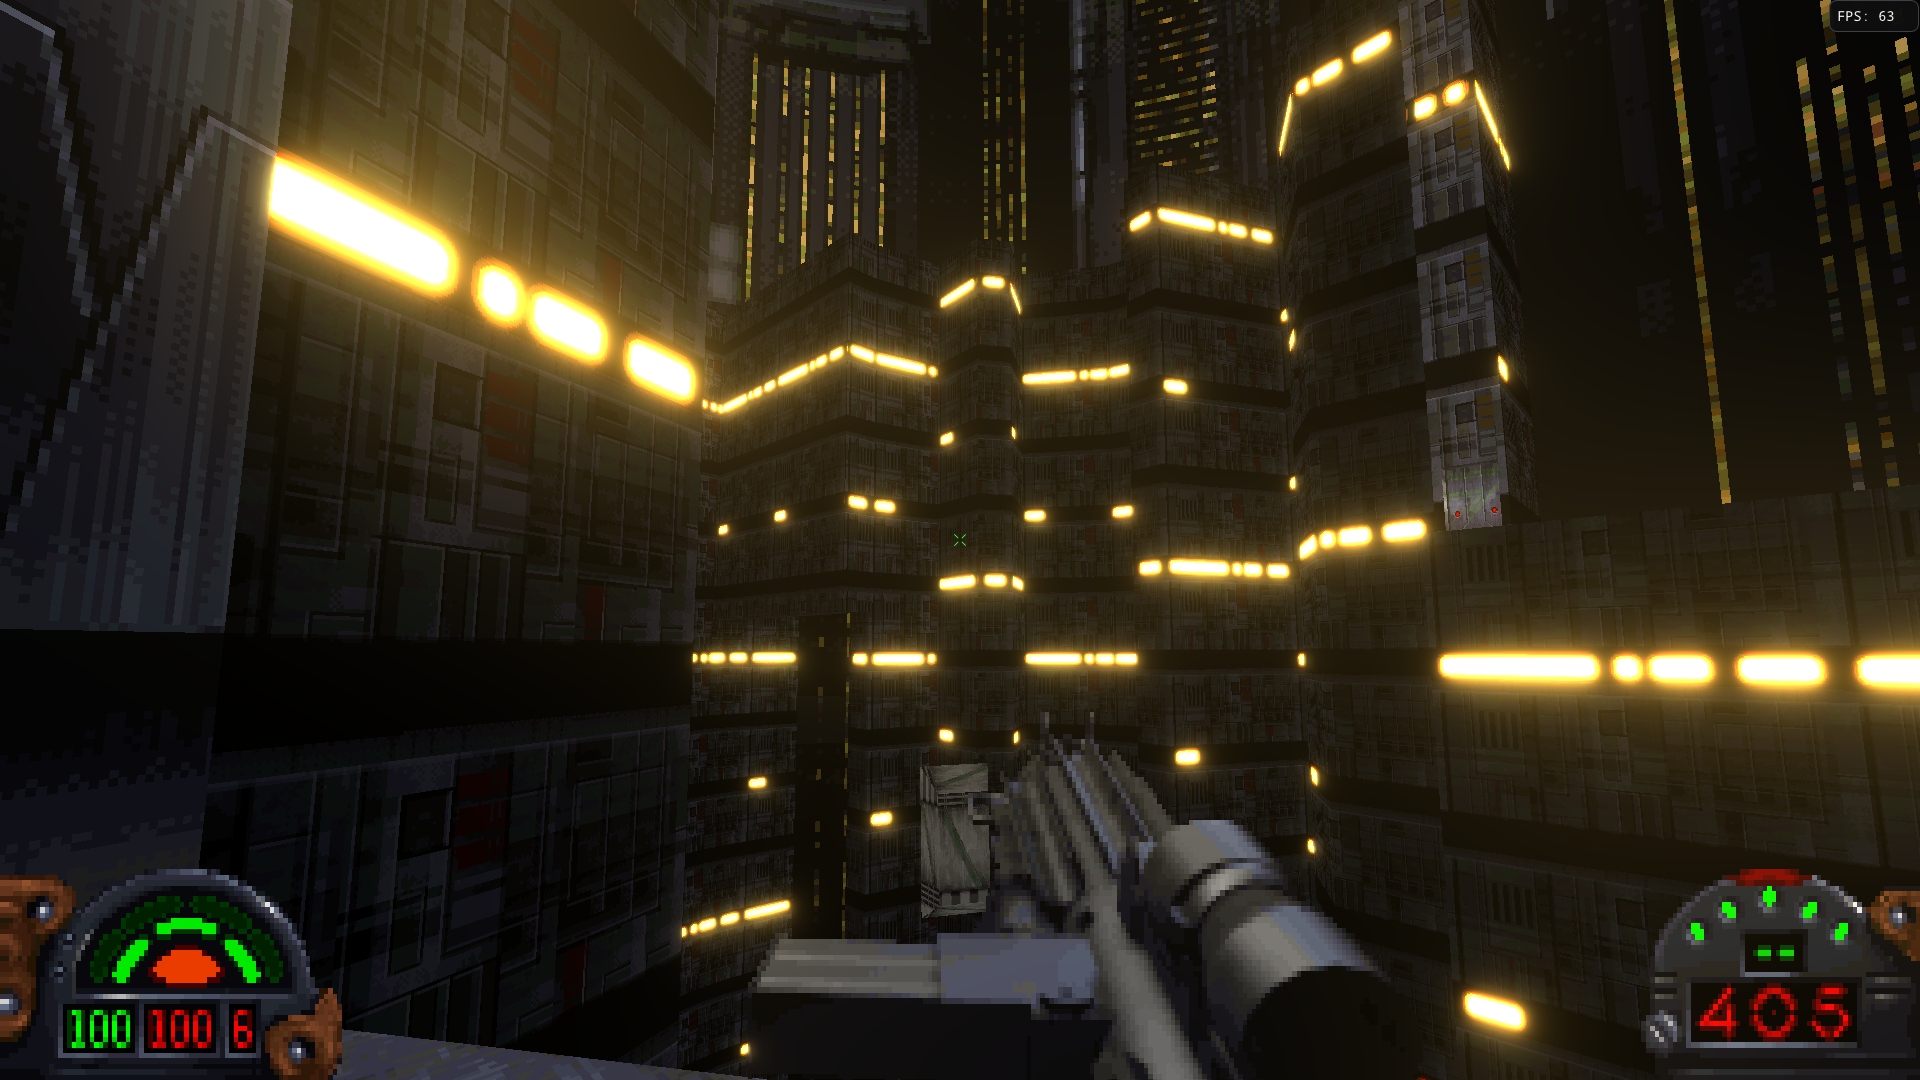
More screenshots are various settings

Smooth Vue Animations
Contributed by Kevin Foley.
A previous project, DarkXL had a feature that smoothed out Vue Animations. For a while now, I have been meaning to implement a similar feature for TFE, but contributor Kevin Foley recently contributed an implementation of the feature.
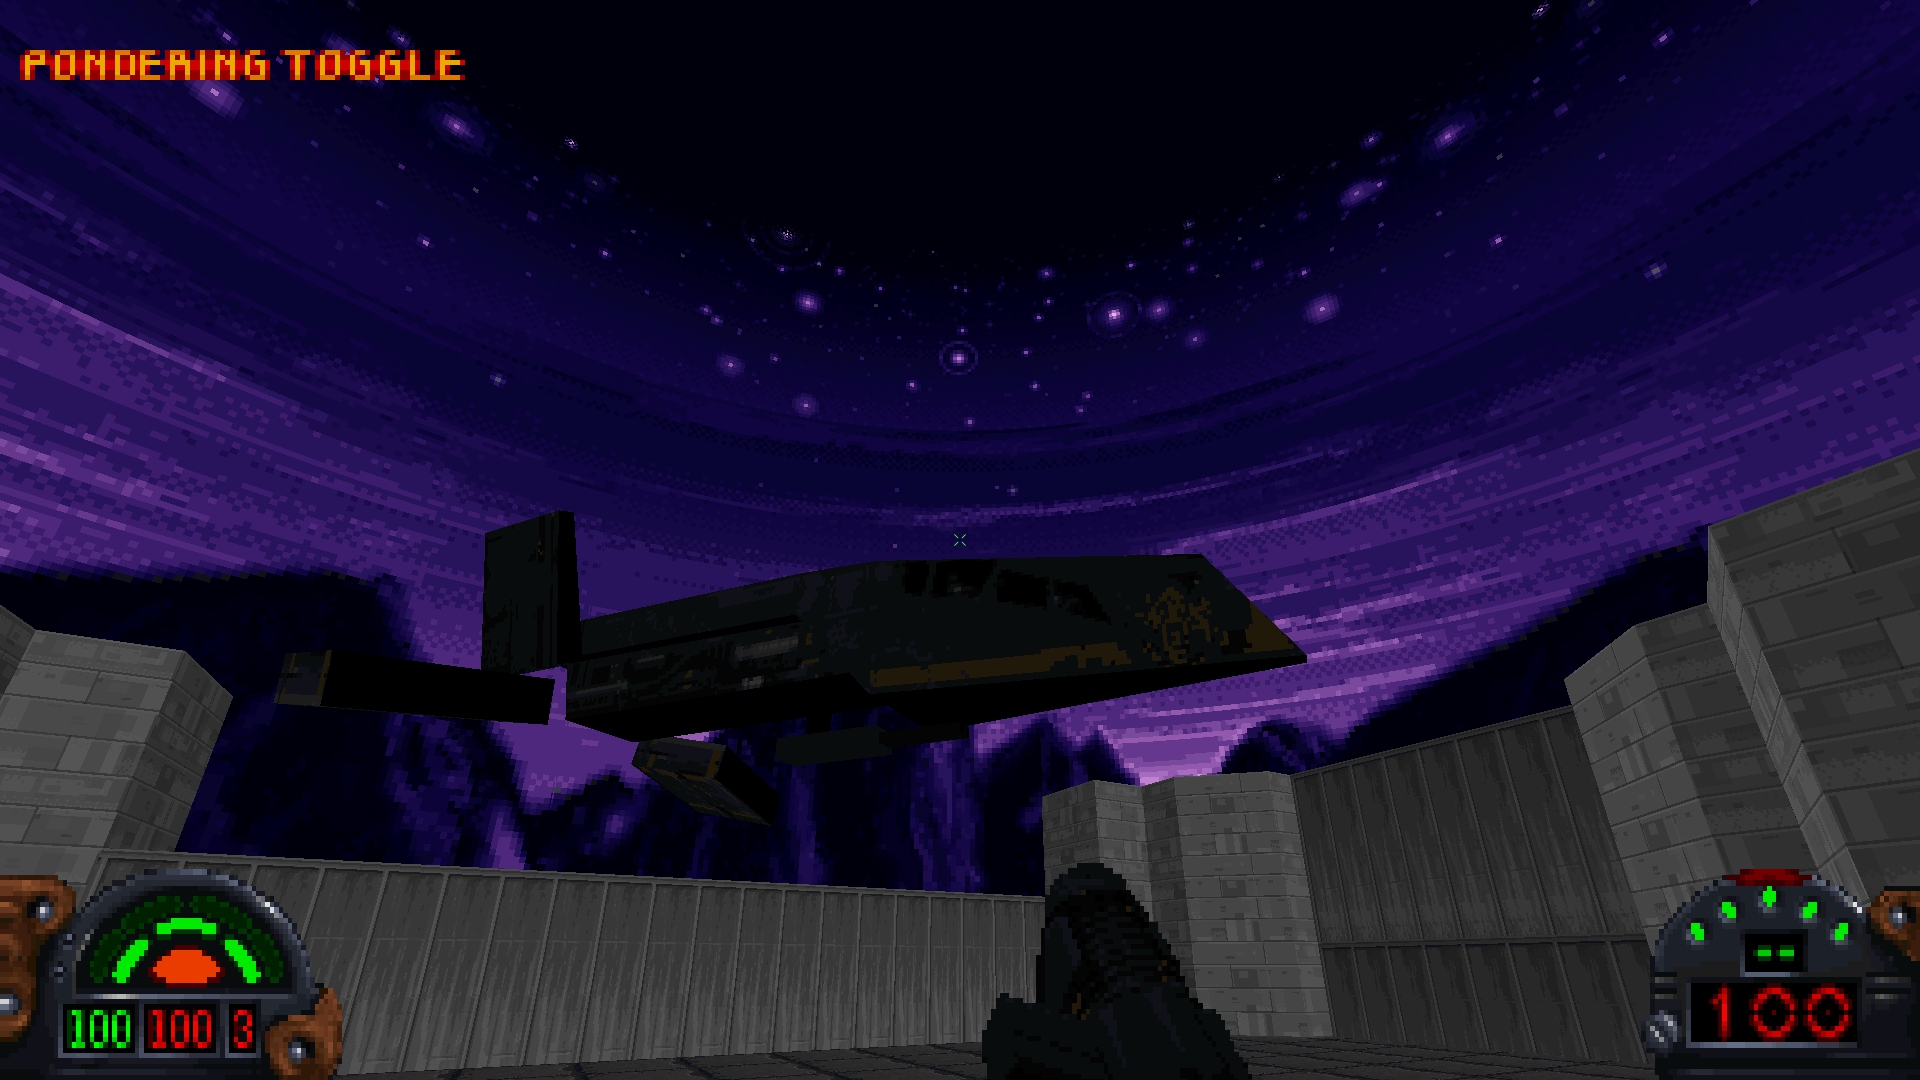
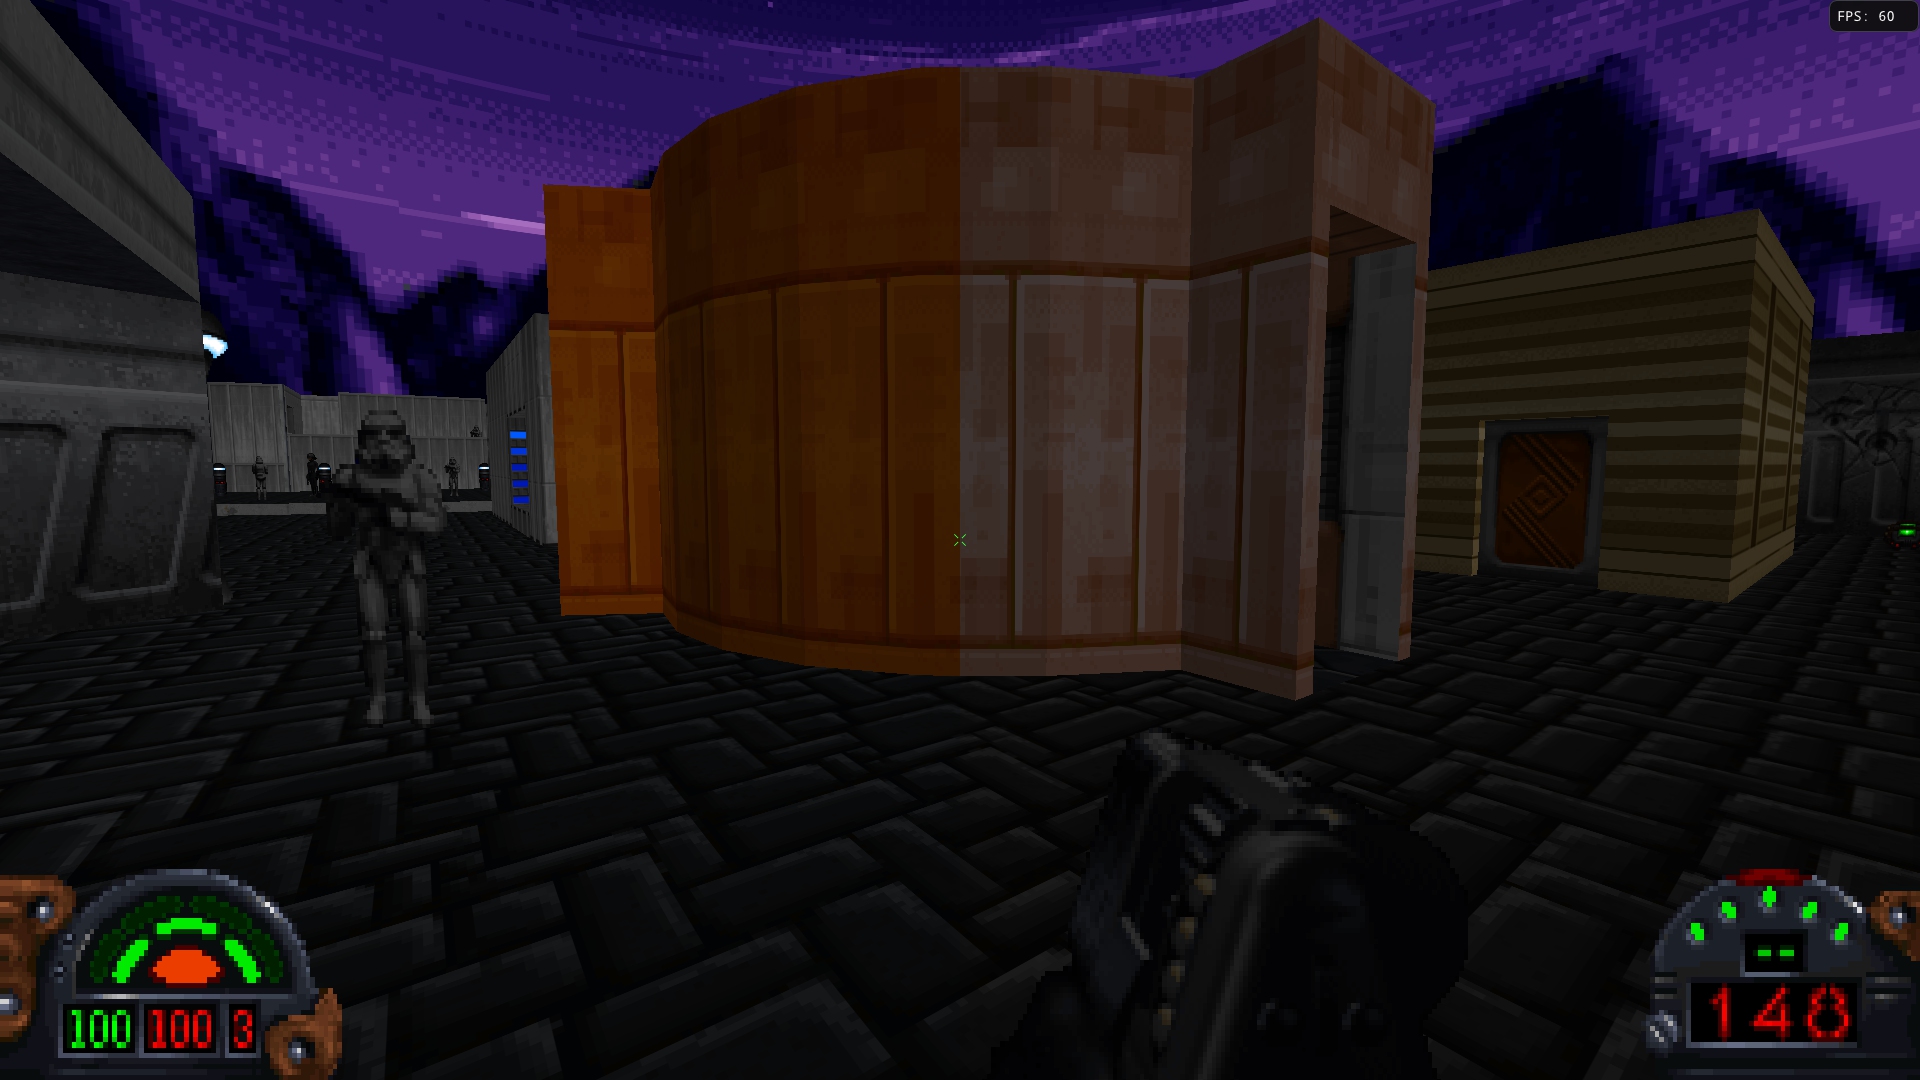
Smooth Vue Animation blends between frames when animating 3D objects or sprites using the Vue System. This produces a much nicer animation and does a far better job of selling the movement of the various ships and cargo containers that fly through the levels of Dark Forces.

Closed Captions
Contributed by Kevin Foley.
Since before TFE version 1.0 was even released, there are been requests for subtitles for cutscenes. And so Kevin Foley has been hard at work implementing a Closed Caption system for TFE that covers both cutscenes and gameplay. As voice lines are spoken or certain sound effects play, the appropriate subtitles are displayed. Kevin implemented a number of options to customize the system, such as changing the font size and color; and disabling captions for different categories of sounds.
There is a lot of upcoming work, such as supporting UTF8 and handling translations, but most of this will not be tackled until Outlaws support is further along, so that we have a better view of its implementation and how the systems interact.
Below, Kevin will talk about what to expect in this release in his own words:
Hey everyone, here are my dev blog notes for the new Accessibility options. First, what to expect with the next release:
- Full subtitles for all voice lines in cutscenes and gameplay
- Descriptive captions for key sound effects in cutscenes and gameplay, such as
[Door clanking] and [Alien hissing]
- New Accessibility menu with many customization options:
- Enable/disable captions and subtitles separately for gameplay and cutscenes
- Adjust font size and color
- Adjust text background opacity, with optional border
- Adjust how many lines of text are displayed during gameplay
- Adjustable volume threshold for gameplay (sound effects that are quieter than the specified volume are not captioned; good for eliminating captions for distant sound effects)
- Subtitles/captions are defined in a user-editable file (please note only ASCII is supported for the next release)

Post-1.10
Level Editor
A major focus, once version 1.10 releases, will be on the TFE level editor and support editors. During this phase some of the new engine features from Outlaws will be integrated and tools developed to use those features. This is the first way that previous and future Outlaws work will be integrated in a visible way. That said, there is little point to implement new level-based features until there are tools that can be used to test them.
There are other long standing features that will be added during this period as well, with tools - such as the long awaited voxel support that was prototyped before version 1.0 shipped.
Outlaws Support
In the background, Outlaws work has already begun. Initial work involve looking at the low-level engine code and loaders, with the goal of being to able to load and fly around in levels. This initial work will be used to integrate some of the Outlaws engine-features into options for new Dark Forces mods as well.
After the initial Level Editor release, most of the focus will shift to Outlaws support, but the level editor and other editors will be updated over time - to iterate on the tools, make improvements, and fix bugs; but also to add more Outlaws specific features for testing.
16 Jan 2023
Version 1.02 Release
Version 1.02 has finally been released, containing many bug fixes as well as several quality-of-life improvements to TFE. With this release, several user-levels that could not be finished are now completable; many INF, collision and jumping issues have be resolved. In addition, the GPU Renderer now behaves much closer to the software renderer in many ways, especially in relation to exterior adjoin behavior. Finally the Sound UI has seen a large improvement, with the ability to select output devices, reset to default. In addition, TFE will attempt to use several different audio APIs when the default does not work due to driver issues.
Version 1.10
This doesn’t solve all of the bugs, of course, but I think it puts the project on solid ground when it comes to playing the core game and most user levels. In the previous post on Upcoming Plans I discussed the early 2023 plans for The Force Engine. I plan on starting on the next step in the plan, Version 1.10 - the official Linux release - this week. The plan is to use the Steam Deck as a test platform in order to ensure that TFE supports the device well. I will be starting from existing Pull Requests (PR) that have already been submitted as well as building in TFE native support for using sound fonts and midi synthesis using the audio system. This will, in turn, require the audio system to be upgraded to handle higher frequency output (either 44.1 or 48kHz) - which will enable support for HQ audio later this year.
Next Steps
During this process, I will still fix bugs, of course, but that won’t be the focus for a while (except for critical issues of course). And once version 1.10 has been released, the plan is to move on to Version 1.11 - which will be full color support, along with various optional visual enhancements and image quality improvements. See the Upcoming Plans post for more details.
Final Words
The Version 1.0 Release of The Force Engine has been a great success overall. Projects like these take time to mature, and people found many bugs and issues - just look at the massive list of fixed issues in version 1.02 - see Downloads for example. Yet the release went really smoothly and many people had a great experience playing Dark Forces using TFE. And, for that, I largely credit the many individuals listed in the credits who tirelessly tested the game and reported the many, many issues they found along the way.
So, thanks everyone for testing!
06 Jan 2023
Version 1.02
I am currently working towards version 1.02 - this post will cover what has already been done and what I am still planning to do. Players have found a number of issues, especially with mods, in the release version. So version 1.02 will be another bug-fix release with some minor quality-of-life improvements as well.
Improvements Already Completed
- Alt+Enter to toggle fullscreen (in addition to F11).
- Secret Percentage update after loading from a save, fixed LADATA save percentage issue.
- Fixed layer keys swapped in PDA.
- Frame rate limiter (still needs the UI).
- Fixed a crash when playing Evacuation of Hoth due to a frame scenery object being destroyed.
- Fixed a bug where sprites didn’t always light up correctly when attacking.
- Fixed a bug where the Probe Droid would stay fullbright after firing.
Improvements Still In Progress
Version 1.10 - Linux Support
The main goal of version 1.1 is to add official Linux support and clean support for the Steam Deck. Mac support is planned but will probably happen a bit later.
- Integrate Linux PRs already submitted.
- Fix sound issues on Linux.
- Add support for midi synthesis and sound fonts.
- Add support for higher audio processing frequencies, to support midi synthesis. This will enable high quality audio support later this year.
Version 1.11 - True Color Support
- DirectX 10/11 render backend to better support GPUs with poor or non-existant OpenGL drivers on Windows, such as some integrated Intel GPUs.
- Vulkan render backend support for better GPU support on Linux.
- True color render support - with options for texture filtering and antialiasing. This will also include support for 8-bit color lighting + color map interpolation.
- Bloom post-fx (optional).
- Better low-end support for the software renderer.
- I might add dynamic light support as well, or maybe wait until a later release. This will depend on how long it takes to get this release out.
Version 1.12 - Voxel Support
- Integrate the experimental voxel loading and rendering code.
- Add GPU voxel rendering support.
- Improve “vox” asset loading.
- Add metadata support for voxel WAX/Frame/3DO replacements.
- Add metadata support for voxel texture replacements (for switches).
- Add “maphacks” equivalent to TFE for fine-tune voxel object positioning.
Version 1.20 - Editor
- Bring back the asset visualization tools (with the idea of making them more fully featured in future versions).
- Bring back the level editor.
- Initial level editor release.
24 Dec 2022

2022 Retrospective
2022 was a hectic year for The Force Engine. With the basic cutscenes working at the end of 2021, I had high hopes for quickly getting iMuse out of the way. As it turns out, there was a lot of change at the beginning of the year and development slowed for quite a few months. But during this initial period, the reverse-engineering process on the iMuse library began, which itself was a massive endeavor. The iMuse library not only handles midi, but also digital audio mixing for Dark Forces. The iMuse system supports blending, fading, conditional loops and jumps, even callbacks into game code. It will even sustain specific notes between songs - in order to smooth out transitions. In mid-May, the iMuse system was finally released as version 0.9. Though the year was already half over I still had high hopes of releasing version 1.0 in 2022.
Once iMuse was complete I made two, somewhat risky decisions - 1) that the GPU Renderer would be part of the version 1.0 release and 2) to also add a save and load system to the release. I felt confident that both those tasks could be completed in the remaining 6 months, though it would certainly turn out to be a close call.
GPU Renderer
I had always planned to add a GPU Renderer and there were several reasons - but mainly to support high resolutions and high framerates. The other main reason was to support perspective-correct pitch, since many found “y shearing” to be uncomfortable with mouselook. I also want TFE to be an attractive target for future mods and Dark Forces development, which means having to be forward looking.
The GPU Renderer itself is somewhat of a strange beast, it doesn’t really act like a modern game renderer. It takes the idea of the 1d-zbuffer in Jedi and extends that to 2d, all the while supporting being able to look straight up and down like a modern renderer. There is no sector triangulation involved, it directly extends the original algorithms into 3d. So what does this do? It allows the renderer to act in a very similar fashion to the software renderer, no sprite or object clipping issues with the floor and ceiling, sprites sort in front of or behind walls like in the original. Portals behave properly, allowing for all sorts of non-euclidean effects. Lighting and shading match the original - even the dithering on 3D objects, which shows up best at low resolution. Color map effects are preserved.
The other aspect that was important is good performance and avoiding OpenGL pitfalls. This meant pushing as much of the work as possible to the GPU and limiting driver overhead and CPU to GPU bandwidth. Final geometry generation, clipping, and shading had to occur on the GPU. As a result, the sector data is uploaded to GPU memory and updated only as needed - and a sort of “display list” of wall, floor and ceiling parts is built that passes along the wall flags, texture ID, and other compacted data. The shaders than read the compacted data, and maps it to the semi-static data stored in memory and then sets up the geometry correctly. Portal planes are read and used to setup GPU clip planes. The textureID is used to look up a texture table that maps to an array of texture atlases (essentially virtual textures).
As a result all sector data is rendered in two draw calls, sprites one or two draw calls, and 3D objects one draw call per object, no matter how many textures or shading modes they use. CPU to GPU bandwidth is minimized and a large amount of the work is pushed to the GPU that would traditionally be done on the CPU. All with the feature set offered by OpenGL 3.3.
Save System
At this point in development, there were a number of latent crashes hidden in the code due to global state issues in the original code. In addition, exiting back to the menu from in-game was fraught with bugs and issues. Something needed to be done to get a handle on all of the global, DOS-style state. And so, I spent a large amount of time cleaning up the global state situation, collapsing state into structures and properly handling setting and clearing these structures to known values. And when thinking about this, it occured to me that I could also handle serialization at that same time. And so, I decided to implement the save system in version 1.0.
In order to build a robust system and avoid save compatibility, I planned out my approach:
- Versioning as a first-class consideration.
- Every read and write specifies the desired version and a default value.
- Read and Writing occur in the same functions, often with the exact same code.
- Serialization to binary data and it should be fast.
- Saves store the mods used, so you can load directly from the save without having to select your mod(s) first.
- Saves act somewhat like save states - full level state, AI state, player state, INF state, and game state is stored. This includes a list of all the per-level assets used. When loading from a save, the original level data is not loaded - it is reconstructed from the save itself. Assets, like textures, are loaded as usual, of course.
The Save System has already paid dividends and made the next phase of development much easier.
The Final Push
In the final weeks, builds were coming out almost daily. Every night, after work, I was churning through the bug list as people found yet more bugs (for which I am grateful). But slowly, things started coming together. I made the final version 1.0 list and within a surprinsingly short time managed to finish it. Many important issues were found and fixed in those final weeks. Some bugs that had been in the project for months or years. And then, after about three years of development - it was finally time to release version 1.0.
Of course the process isn’t over. There are still bugs, though only a few that an affect gameplay. But overall, despite the large increase in testing - the release went really smoothly. And that is mostly thanks to the tireless efforts of all of those listed in the credits - the people who played through the game multiple times, who played various custom levels, who did weird things and got TFE to crash.
2023 Plans
2023 promises to be an exciting year for The Force Engine. Initially there will be a focus on fixing issues with the version 1.0 release. A lot of that has been done already with version 1.01, but there are still some bugs that need to be resolved and features that would be nice to have, such as being able to select audio and midi devices from the menu. There are a few major areas of development that will be the focus for 2023.
I list items in a specific order but in reality I expect more of a mixing. For example Vulkan support might not be done immediately, or Metal support added very late in development. The editors will also be an ongoing project extending well past the point where Outlaws development begins. There will be some parallel development, shifting of priorities and other changes as we go.
And like all plans, things may change in response to other events, findings, or just changes in perspective. None of this is set in stone.
Others have already spent a lot of time to help add support for Linux. My goal is to take that work and make any other changes and fixes needed to make TFE work well on Linux - especially the Steam Deck, as well as OS X. These efforts include:
- Support for midi synth and sound fonts.
- High quality audio support in the engine, as a result of the above.
- Fix other sound issues on Linux/Mac.
- Proper CMake build system.
- Support for Keyboard and Contoller control of the System and Game UI.
- DirectX, Vulkan, and potentially Metal backends. The current renderbackend was designed with this in mind, so I expect this to go fairly smoothly. This will also help with low end Intel GPUs without proper OpenGL drivers as well as newer models with poor or emulated drivers.
During the development of TFE, I had built a level editor to help me visually inspect the data in a friendly way. I integrated the editor directly into TFE for quick iteration and debugging. And I plan on using that for Outlaws. Unfortunately, the editor had to be removed because the engine just changed too much and it was getting in the way of development. So in early 2023 I want to bring it back, refactor the code and get it into a usable state. Various other tools are also in the mix, such as being able to view, import and export textures, WAXes, and so forth.
So why a new editor, why not use WDFuse or even earlier options? Here are the features the editor supports (or will support):
- The ability to directly draw sectors, and place objects.
- CSG support - union, subtraction, clipping, and more.
- Full 3D editing support with the same UI. An entire level can be built using only the 3D editig tools.
- Modern UI and tools.
- Support for both Dark Forces and, later, Outlaws.
- Built-in INF editing with helper tools.
- And more.
True Color Rendering
True color rendering is also planned and needed for Outlaws. This will include new features such as dynamic lighting, antialiasing, and post processing options. This also means that texture filtering wil become available, including anisotropic filtering and mipmapping.
Voxels
Finally taking the prototype voxel work I did during TFE development and make it “real.” The software renderer was basically done, but this includes the GPU Renderer, definition/replacement metadata, and “map hacks” so that objects can be repositioned in levels.
Outlaws
And finally, the last major project of the year. Reverse-engineering work on Outlaws, using the Dark Forces code as a base. Like Dark Forces support, this will start showing up as bits and pieces that can be tested as development continues. Outlaws Jedi Enhancments and features will also be added to the editors as progress continues - and made available for new Dark Forces mods.
19 Dec 2022
After 3 years of development, I am ready to announce the Version 1.0 Release of The Force Engine (TFE). The Force Engine is a project with the goal to reverse engineer and rebuild the Jedi Engine for modern systems and the games that used that engine - Dark Forces and Outlaws. For version 1.0, Dark Forces support is complete but Outlaws is not yet playable. Full Outlaws support is planned in the future, for version 2.0.
For Dark Forces, the goal is for TFE to act as a viable replacement for DosBox and the original executable for most players, to be used to not only play the vanilla levels but also the many user mods developed for the original game - and I believe that goal has finally been met with the release of version 1.0. The Force Engine provides modern conveniences and control methods and removes the need to set up DosBox and deal with cycles-based bugs such as getting stuck on ice or having the missiles that the final boss fires move too fast or not move at all. While TFE supports modern GPU and high resolution software rendering - the original 320x200 fixed-pointe renderer has been preserved - keeping the DOS experience for those who want it.
Like a traditional source port, you need the original game to play. TFE replaces the executable, not the game.
Update
Version 1.01 has been released that addresses several issues in the initial release.
Current Features
- Full Dark Forces support, including mods. Outlaws support is coming in version 2.0.
- Mod Loader - simply place your mods in the Mods/ directory as zip files or directories.
- High Resolution and Widescreen support - when using 320x200 you get the original software renderer. TFE also includes a floating-point software renderer which supports widescreen, including ultrawide, and much higher resolutions.
- GPU Renderer with perspective correct pitch - play at much higher resolutions with improved performance.
- Extended Limits - TFE, by default, will support much higher limits than the original game which removes most of the HOM (Hall of Mirrors) issues in advanced mods.
- Full input binding, mouse sensitivity adjustment, and controller support. Note, however, that menus currently require the mouse.
- Optional Quality of Life improvements, such as full mouselook, aiming reticle, improved Boba Fett AI, autorun, and more.
- A new save system that works seamlessly with the existing checkpoint and lives system. You can ignore it entirely, use it just as an exit save so you don’t have to play long user levels in one sitting, or full save and load with quicksaves like Doom or Duke Nukem 3D.
- Optional and quality of life features, even mouselook, can be disabled if you want the original experience. Play in 320x200, turn the mouse mode (Input menu) to Menus only or horizontal, and enable the Classic (software) renderer - and it will look and play just like DOS, but with a higher framerate and without needing to adjust cycles in DosBox.
Links
The website has additional links to the forums, Discord channel, and GitHub repository.
System Requirements
In early 2023, TFE will gain official crossplatform support - both Linux and Mac. Until then Windows is required.
- Windows 7, 64-bit
- GPU with OpenGL 3.3 or better compatibility
Note that there are plans to lower the requirements for using the classic software renderer in the future. However, the minimum requirements for GPU Renderer support are here to stay. For now only OpenGL is supported, which might limit the use of some older Intel integrated GPUs that would otherwise be capable. There are near-term plans to add DirectX 10/11, Vulkan, and maybe Metal render backends which should enable more GPUs to run the engine efficiently.
Bugs and Issues
Like any project of this nature, and any new release - there will still be bugs. Some of these bugs will be DOS bugs that can be reproduced in the original game - these bugs are unlikely to be changed anytime soon. Other bugs will be TFE related. For those, please report them on the forums or GitHub.
27 Nov 2022
With the recent 0.93 release, The Force Engine is now feature-complete for the version 1.0 release. Since then, I have been busy burning through bugs and issues but there is still work to be done. Now that the build seems to be stable and many AI and INF issues have been fixed, I decided to compile a list of bugs and tasks remaining for version 1.0.
I have made these items checkboxes, so that I can update this list as progress is made.
Version 1.0 Task List
Polish
- [ ] Add a portable option which will cause TFE to store everything (screenshots, settings, saves) in the local TFE directory instead of /Documents/TheForceEngine. (Post 1.0, planned to align with cross-platform work)
General
GPU Renderer
Software Renderer
23 Nov 2022
Save System Release
The main feature for version 0.93 build of The Force Engine is the Save System - and Quick Saves.
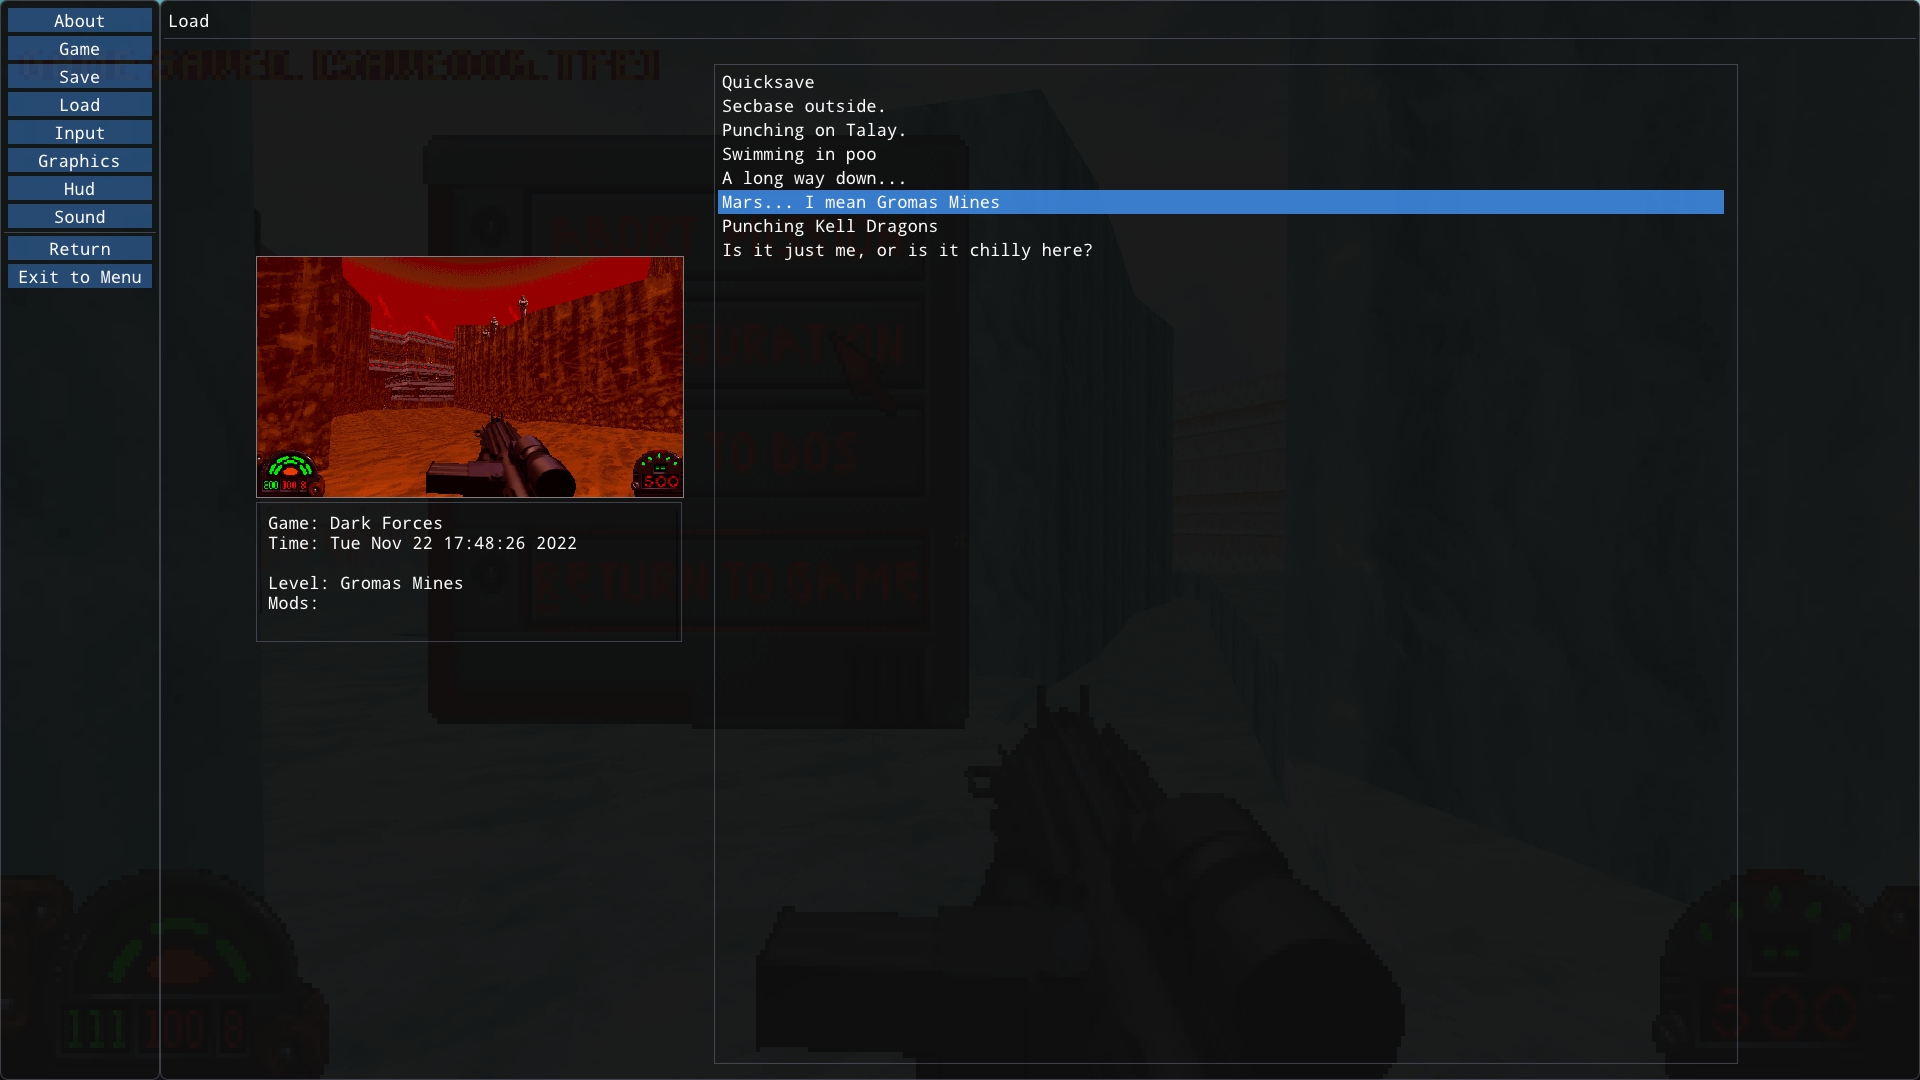
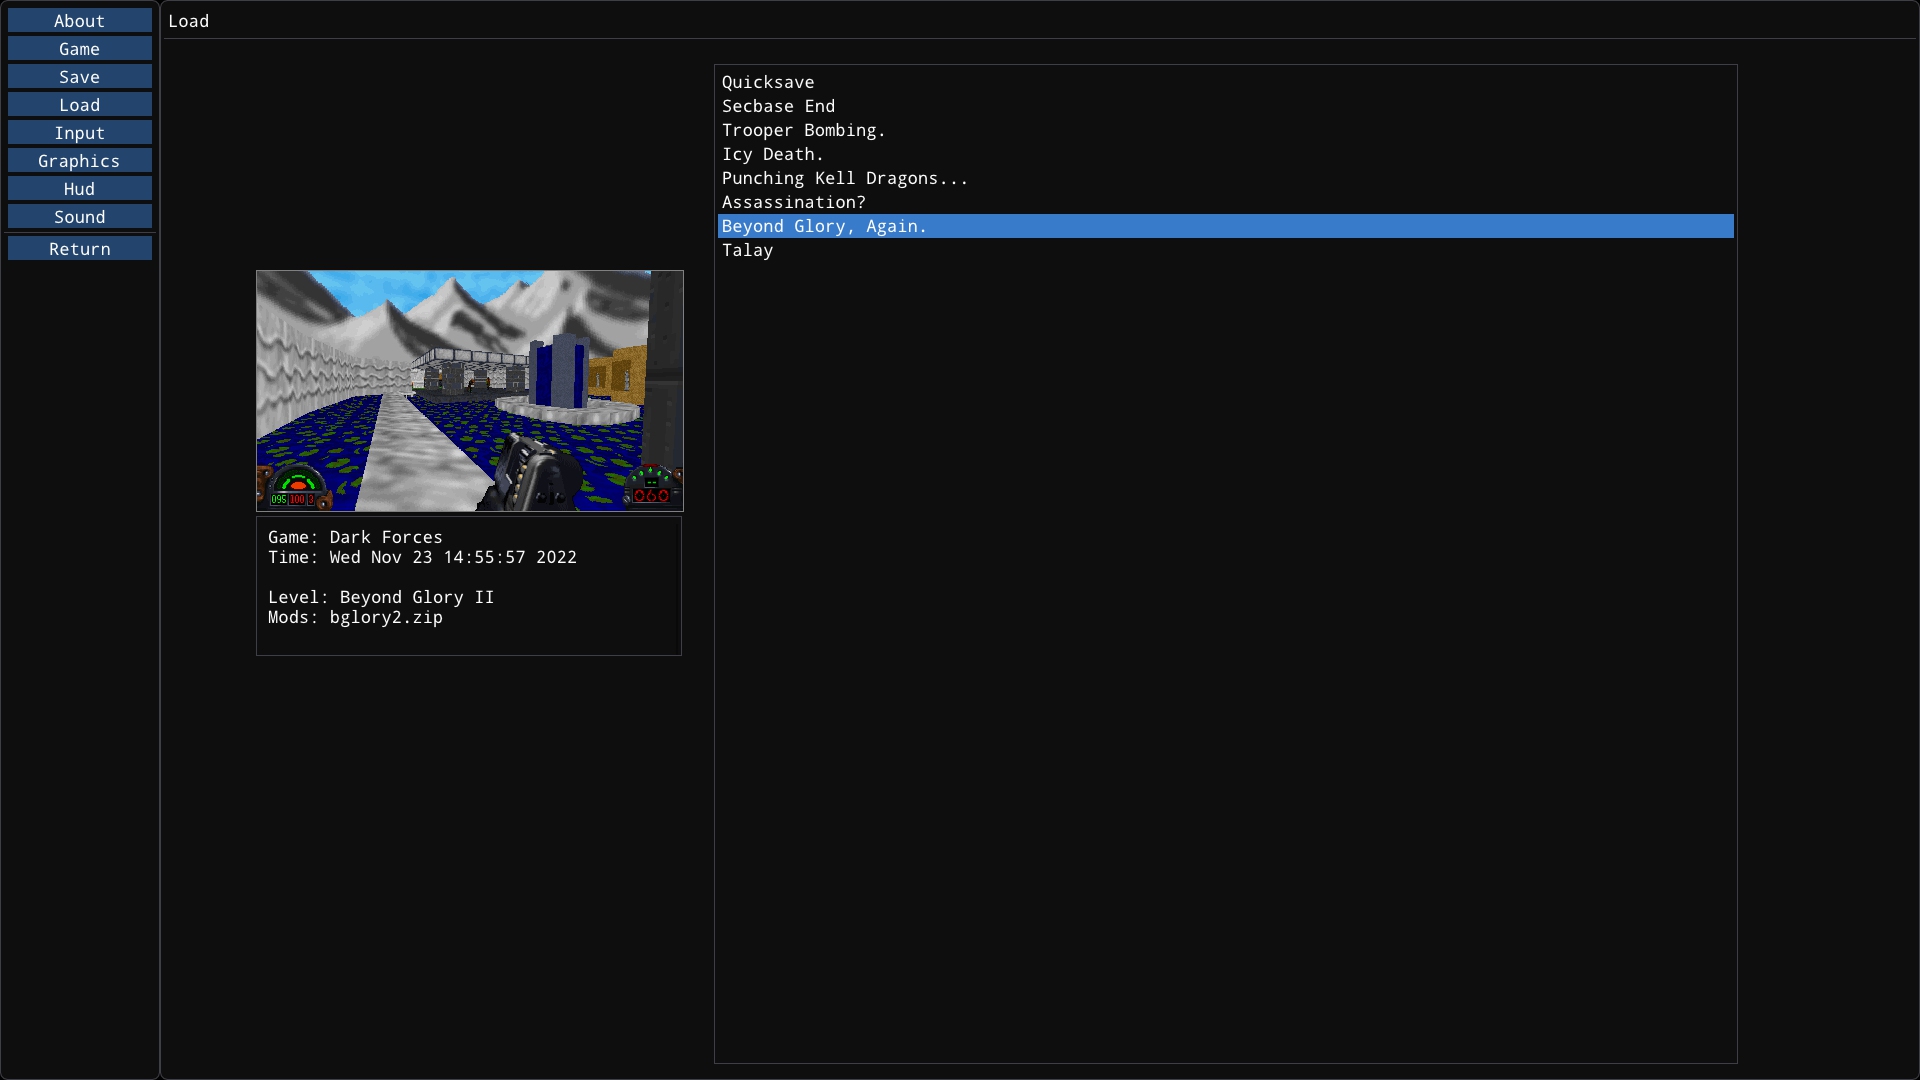
Most of the game and level state is serialized, so that games can be saved and then later continued. It tracks the “Agent” data, which can be reconstructed if needed, so that you can continue the game, abort and play as normal. The original lives/checkpoint system is still there, the save system preserves that data and does not interfere with the core game systems. Using saves and quicksaves is an optional feature and can be completely ignored if desired.
When the game is saved, metadata is preserved - such as the time and date, a small screenshot, the name of the level, and all mods being used. Using this, it is possible to directly load a save even if you were playing a mod, the system will automatically load the same zips and gobs.
Many other fixes were made during this process including:
- Fixed a “random” crash caused by invalid addressing in the sound system.
- Fixed an issue with level progress not being preserved if you exited immediately after completing a level.
- Fixed pitch issues with turrets, they should look much more accurate now.
- Fixed mouse speed issues with the in-game menus.
- Improved the responsiveness of the PDA menu.
- And many other minor fixes.
Version 1.0
With this release, The Force Engine is feature-complete for version 1.0. We are now on the last leg of the journey to version 1.0 - the focus will be on fixing bugs and polishing for the 1.0 release.
30 Oct 2022
GPU Renderer Beta Release
The main feature for version 0.92 build of The Force Engine is the Beta release of the GPU Renderer. The GPU Renderer is a port of the software Jedi Renderer to the GPU utilizing OpenGL 3.3+ hardware.


GPU Renderer
The GPU Renderer has several advantages to help make playing Dark Forces (and eventually Outlaws) smoother using TFE.
- Greatly improved performance when using well supported GPUs - several orders of magnitude improvement on newer GPUs at higher resolutions.
- Greatly improved performance scaling with resolution.
- Perspective correct pitch - meaning no more distortion when looking up and down.
- The ability to look almost straight up and down, depending on settings.
- Cylinderical sky projection to avoid distortion when looking up and down, though the vanilla sky projection is avaiable.
- Perspective correct 3DO rendering - this fixes the texture swim / distortion when using 3DO geometry, which makes 3D objects used as geoemtry - such as bridges - much more seamless.
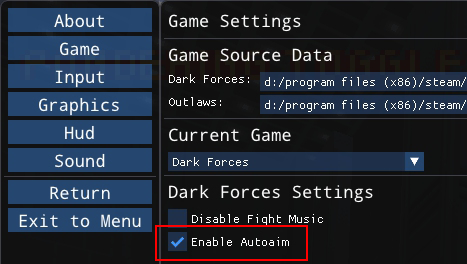
- The ability to disable autoaim if desired. This last option isn’t dependent on the GPU Renderer, but was included anyway.
Known Bugs
The GPU Renderer is still considered Beta and will have bugs. Here are the known bugs so far. These bugs will be fixed for version 1.0.
- The Escape Menu does not show the proper grayscale background when using the GPU Renderer (this still works correct for the CPU renderers).
- There is still some minor incorrect sprite clipping.
- There is at least one place where intersecting adjoins (portals) cause HOM.
- There is occassional z-fighting due to a part size bug.
Version 1.0
The next step, towards version 1.0, is to finish the Quick Save feature. Currently it is roughly 50% complete and I plan on finishing it up next before getting back to GPU Renderer bugs. Once that is complete, TFE will be feature complete for version 1.0. After that I will spend a few weeks going through the bugs, especially any crash or accuracy related bugs, in order to finish version 1.0.
New Features
Renderer Select
To change renderers, go to Configuration in the Escape Menu, and then select Graphics. From there find Renderer, which you can change from Software to Hardware.
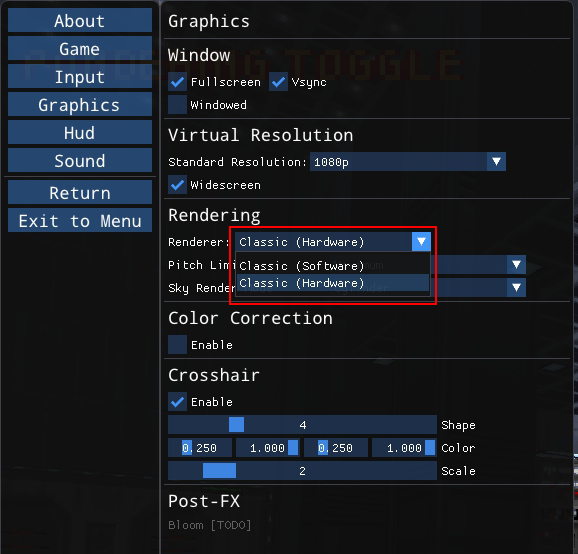
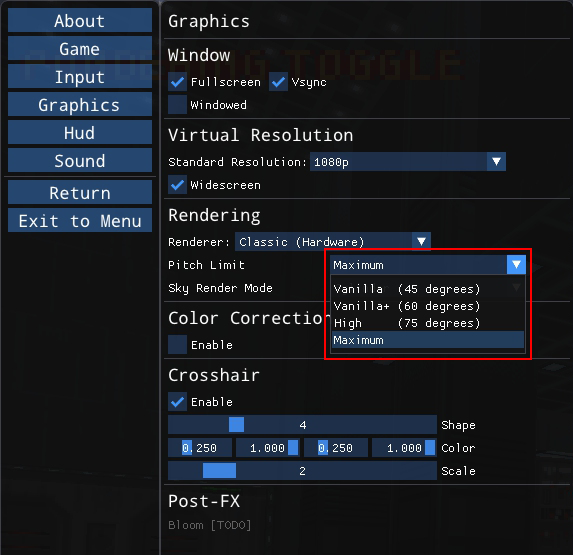
Pitch Limit
Because pitch is now perspective correct, looking up and down can cause sprites to seem flat. To help with this, TFE can limit the pitch to fixed amounts - to give your the freedom to look up and down without distortion but not make the sprites look too flat. The default is Vanilla+ (60 degrees). The Maximum setting allows you to look up nearly 90 degrees.
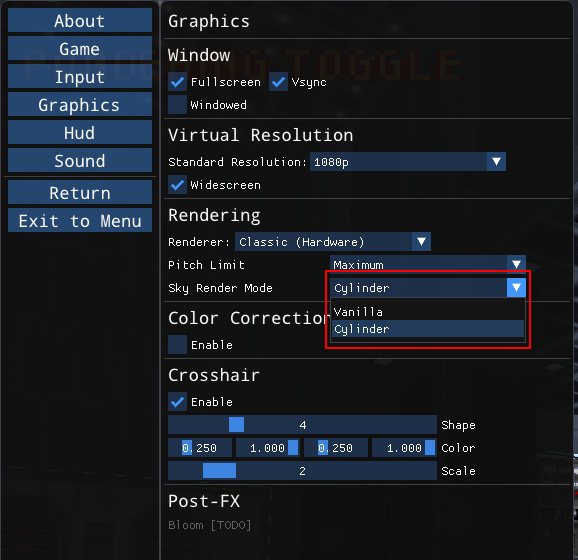
Sky Mode
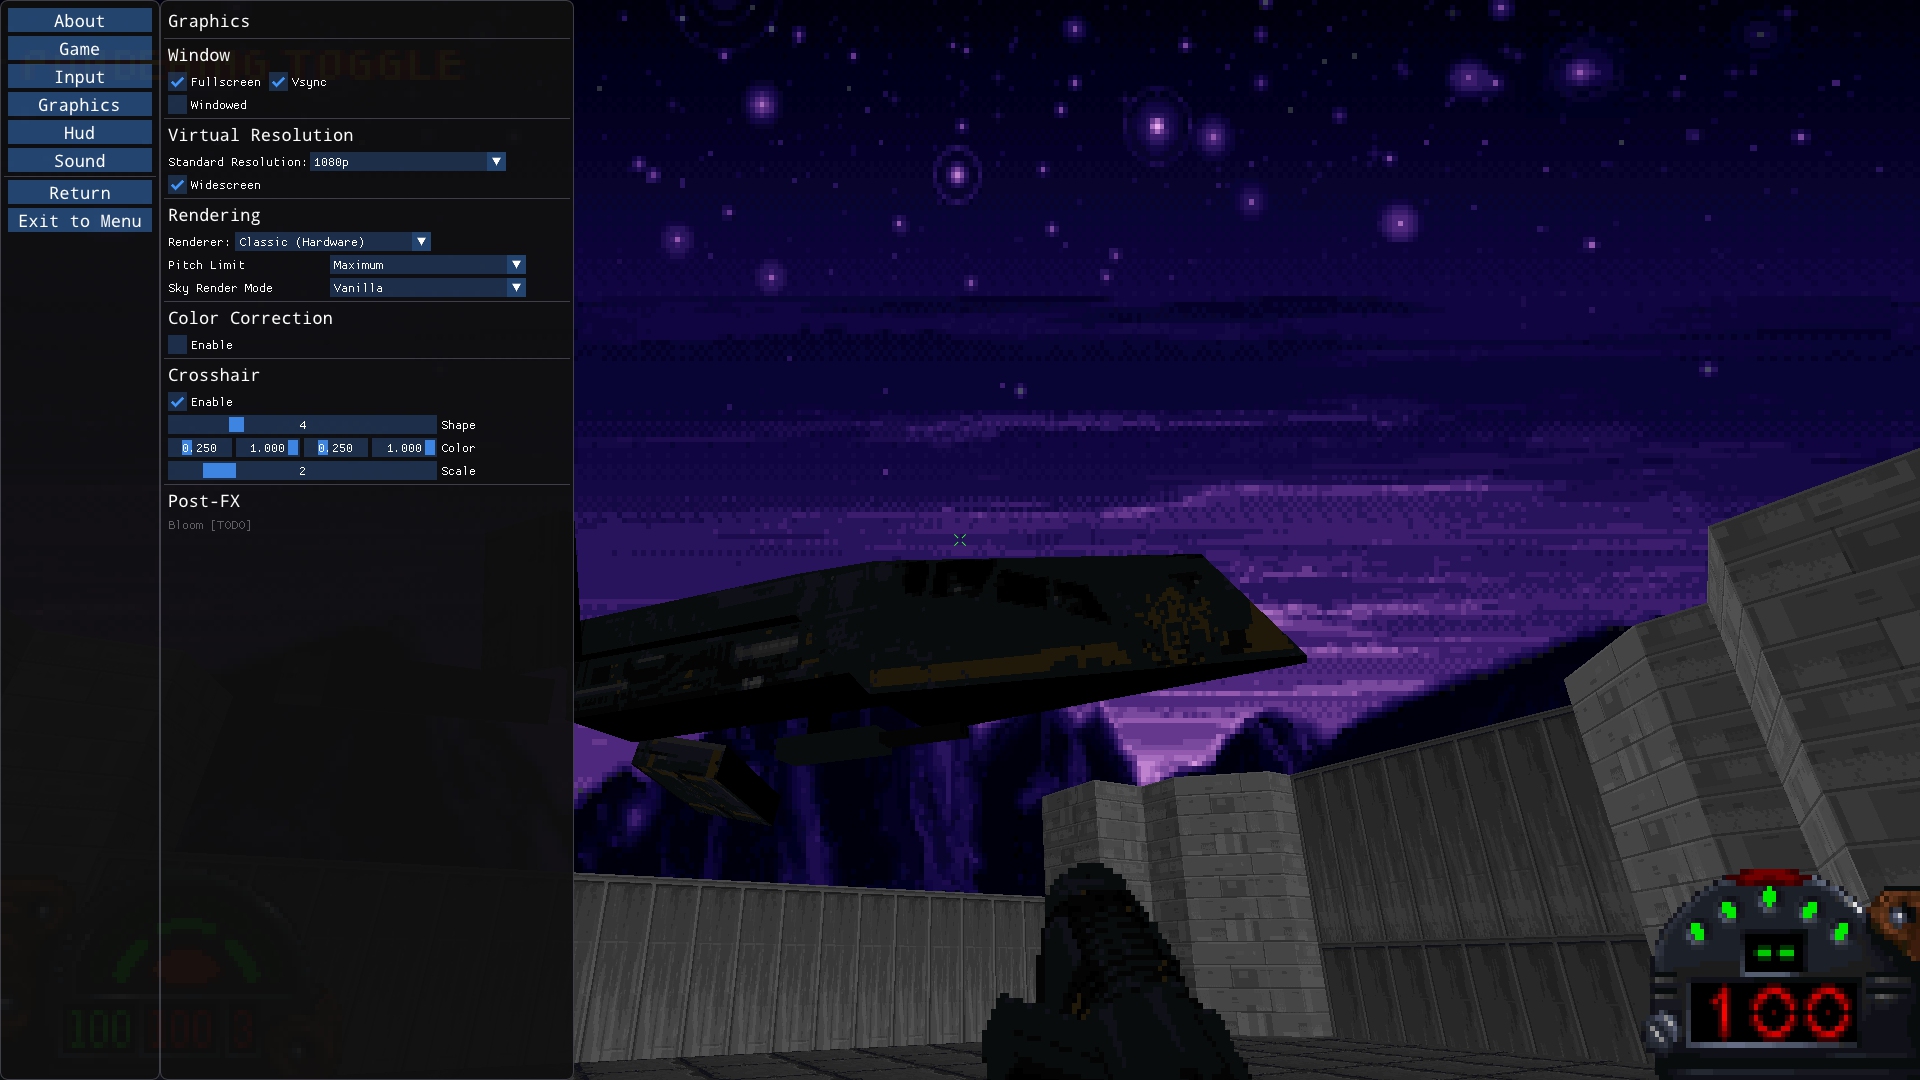
By default the GPU Renderer will use a Cylindrical projection to avoid sky distortion when looking up and down. This feels more natural than vanilla projection but looks different. If you want the game to look closer to vanilla, you should choose the Vanilla option here.
Cylindrical
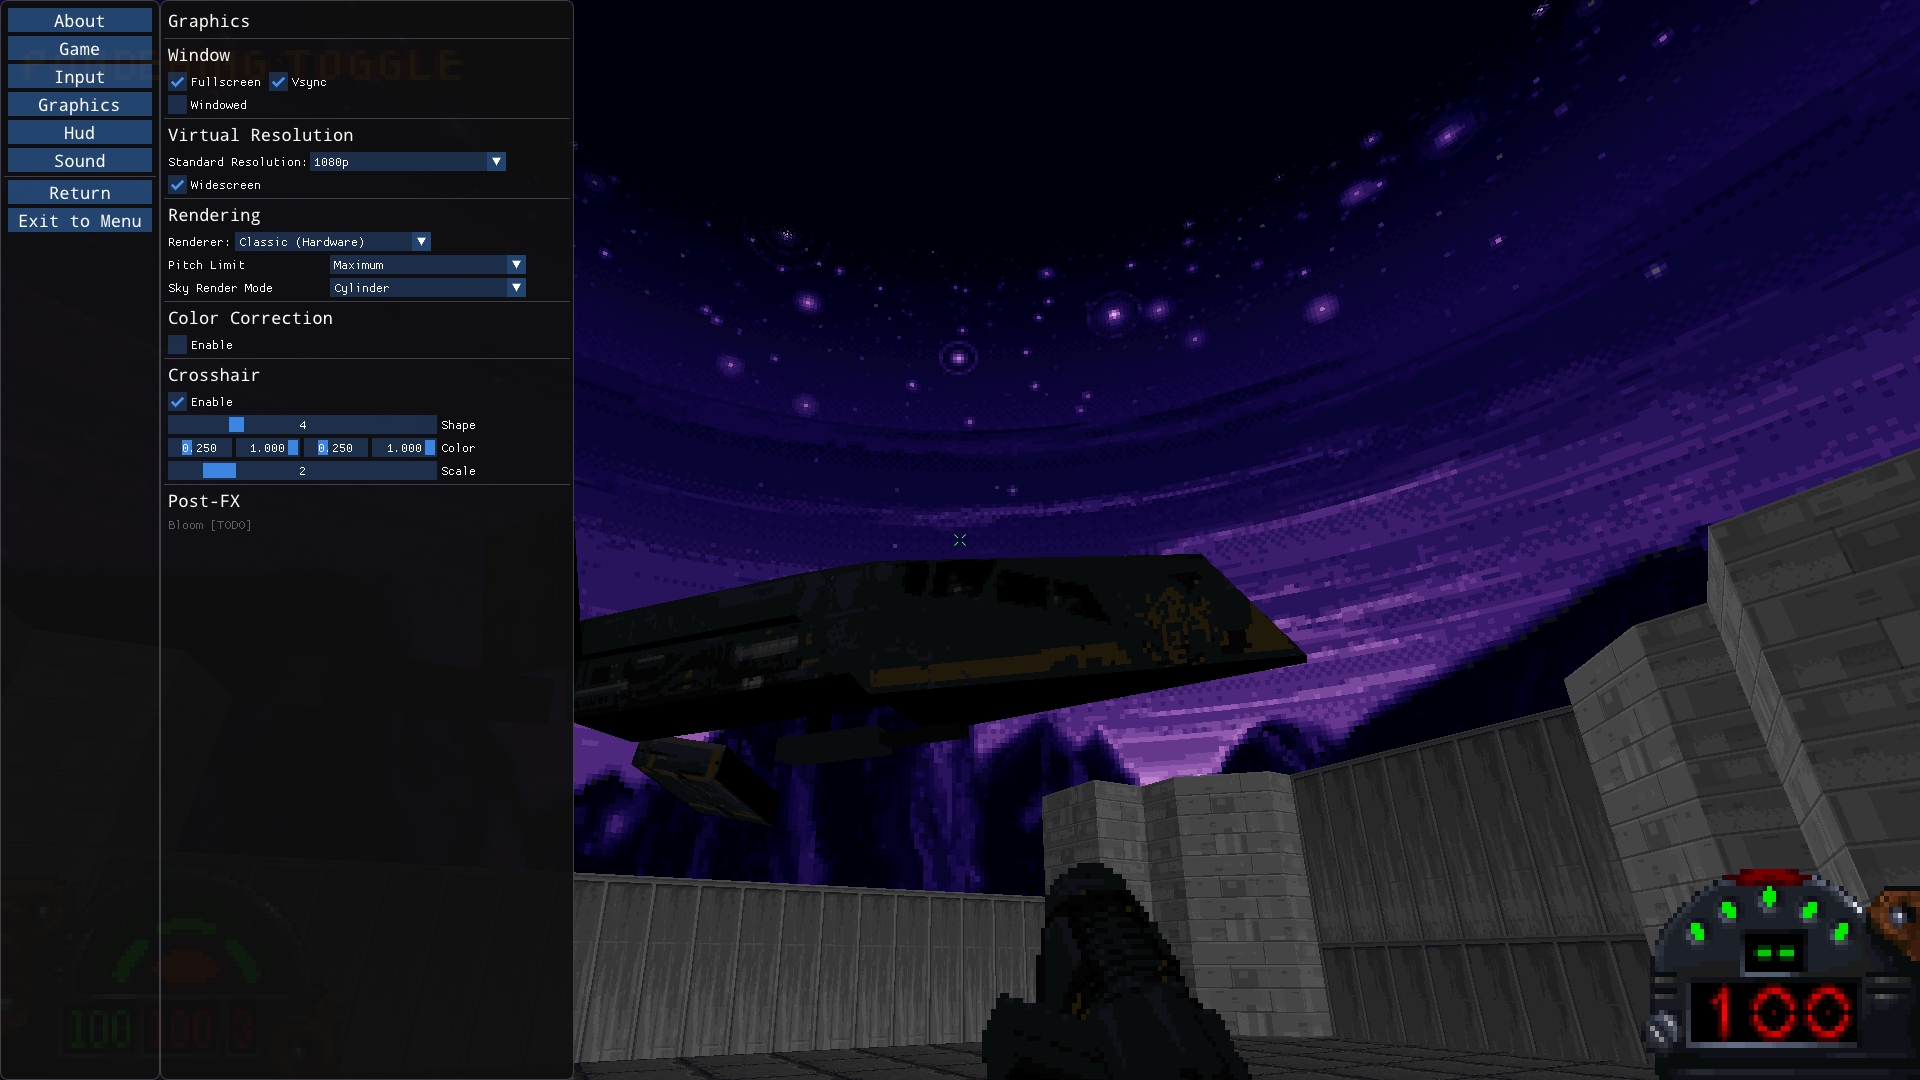
Vanilla
Autoaim
Autoaim is very useful when looking up and down is clunky. But when you can look up and down freely, it can get in the way. So TFE now allows you to enable or disable autoaim in the Game settings.
Videos
17 May 2022
Version 0.9
Version 0.9 has been a long time coming, taking much longer than originally anticipated. Version 0.9 is focused on sound playback and music accuracy, ambient sound support, and a few bug fixes.
iMuse
IMuse (Interactive Music Streaming Engine) was the last system needed to complete Dark Forces support in TFE. It is the dynamic music system that Lucas Arts developed and used in many of their games such as Monkey Island 2, Tie Fighter and, of course, Dark Forces. See https://en.wikipedia.org/wiki/IMUSE for a general description.
iMuse, as used in Dark Forces for music, is basically scripted Midi - the midi data itself contains sysex events, such as jumps (like goto in C). The host (Dark Forces game code) can interact with the Imuse playback, such as manually jumping to different places in the midi, changing tracks, or midi files on the fly.
There are often loops in the midi and the cutscene playback system would set hooks at certain points that will cause IMuse to break out of those loops or jump to new places in the midi at specific points in the cutscene - allowing for musical cues, looping while waiting for an animation to finish, and similar control.
Dark Forces used IMuse triggers to set callbacks when certain points of the midi are hit, allowing for smooth transitions between tracks (“stalk” and “fight”) based on what is happening in-game. A level starts with the stalk track playing and when a certain number of enemies become agressive for long enough, the music transitions to the fight track by taking the next transition and then looping. Finally, when things have calmed down, the music transitions back to the stalk track. To help with transitions, IMuse can intelligently sustain individual notes from one track while the next track plays, so that the notes don’t suddenly stop too early.
Imuse has a variety of other features such as fading and panning sound, playing multiple tracks at once, and a variety of other features not used by Dark Forces - such as the streaming music.
Games did not link in IMuse directly, but rather the IMuse binary was shipped with the game data. The code used a header file along with some code to commuicate with the IMuse binary, similar to modern DLLs. The game would call IMuse functions specified in the header file, which then called an internal command dispatch function which finally called the internal equivalent to the requested function.
TFE simplifies the system, integrating the IMuse code into the project directly and removing the command dispatch system - instead the game code calls the IMuse commands directly. IMuse features that are not used in Dark Forces are stubbed out for the most part, mostly because I have no good way to test them.
Rather than call into the driver directly, the iMuse code sends midi commands to the TFE low-level midi player which handles the midi device, acting as the driver layer for iMuse. In order to run in the background as the game played, iMuse setup an interrupt handler running the update every 6944 ns, or about 144 Hz. For TFE, instead of an interrupt handler, I added support for a callback on the midi thread - in order to avoid thread contention - which fires at a fixed time step. Of course this caused complications, such as interactions between the Landru/Cutscene thread (with updates running at ~291.3 Hz) and iMuse, necessitating the use of atomics for a few of the iMuse state variables.
iMuse is also used for low-level digital audio playback and normalization, linking to the TFE AudioSystem thread for updates in a similar way that midi was implemented. In the original code, the digital audio updated occured in the same interrupt handler as the midi update. The way it worked is that it would query the driver if it was ready for the next set of sound samples (512) and if not, skip the update. For TFE, the iMuse digital audio update is instead called by the low-level audio thread to provide the samples instead. Interestingly iMuse features such as sound fading and triggers work the same way for digital audio as music tracks.
In terms of complexity, iMuse is very similar to the INF system - which is also a pseudo scripted system. Fortunately, iMuse is the last major system needed to support Dark Forces. Except for bug fixes, the reverse-engineering phase for Dark Forces is complete.
Game Sound
On top of iMuse, Dark Forces basically implements two sound systems - one for Landru (cutscenes), most likely directly from Tie Fighter, and the other using Dark Forces game data and Jedi math functions to handle in-game sounds. Because there are only 8 ditigal audio channels available, though iMuse (and now TFE) support 16, sound priority is very important and every loaded in-game sound is provided a prority so that you always hear the most important sounds.
The sound falloff in TFE was approximated up to this point, but I knew it would not be accurate. 3D Sound in Dark Forces can be heard from up to 150 units away and will play at full volume at 30 units. Between 30 and 150 units from the eye, the volume is linearly interpolated.
Ambient sounds were also implemented. These are objects placed in the world that emit 3D sound that loops continuously. They are used for effects such as the wind ambient sounds in Nar Shaddaa.
Other Features
Other features that were implemented include the ability to bind the mouse wheel to controls, such as switching weapons (the new default), the use of mouse wheel as an option in various game screens - such as mission briefings, System UI scaling to better support 1440p and 4k, a proper crash handler to write out minidumps on event of a crash, and a variety of fixes. In addition the System UI sound panel is now working and gives you the ability to adjust sound fx volume and music volume separately for cutscenes and in-game. The Sound config also has an option to enable 16-audio channels for iMuse, and the Game config allows you to disable the fight music in-game if desired.
Version 1.0 Plans
With version 0.9 finally released, the next major release will be version 1.0 - complete support for Dark Forces in TFE. Unlike the 0.9 release, the plan is to split up the release into several smaller releases. There will be 2 main parts:
- Bug Fixes. I plan on splitting bug fixes by system and do one or more 0.9x release for each system. Examples include AI bugs, weapon bugs, collision issues, INF issues, etc..
- The GPU renderer - the last major feature for version 1.0. The GPU renderer will support both shearing for looking up and down (which emulates the software renderer) and accurate perspective projection to allow the player to look up and down further without distortion like modern 3D games. Initially it will support 8-bit color emulation with optional colormap interpolation to remove banding. Later, after version 1.0 is released, true color rendering, dynamic lights and other features will be added.
24 Dec 2021
Version 1.0 Release Delayed
This is obvious by now, but The Force Engine version 1.0 will not hit this year. There has been a lot of progress towards completing the iMuse reverse-engineering work for version 0.9, but that will spill into early January.
2022 Plans
The iMuse work is roughly 70% complete, which means that version 0.9 is expected to land in the second week of Janurary. At that point, Dark Forces support in TFE will be feature complete and the reverse-engineering process for Dark Forces will be finished. The following few weeks will be dedicated to bug and inaccuracy fixing, with version 1.0 planned for late January or early February.
February will be spent finishing the GPU Renderer, which will handle looking up and down with proper perspective by default - though the shearing effect will be available. The initial release of the renderer will only allow for palette emulation with true color options and other effects coming later. I will talk more about the GPU renderer in a future post. In short it will allow for much better performance when running at high resolutions and refresh rates but maintain the proper look, including the way objects sort with the floor and ceiling, the way they sort with walls, the way portals enable “non-euclidean” geometry in some cases. At this point, the voxel code will also make its way into the master branch, finally properly adding voxel support.
March will see the release of an early version of the built-in level editor and other asset tools, including some initial basic support for voxel replacements. These tools will be expanded even further when working on Outlaws, including support for Outlaws engine enhancements and non-vanilla Dark Forces mods using those enhancements. Finally there will be smaller quality of life enhancements, and bug fixes. Early March will also be spent working towards the Mac and Linux release, with the help of gilmorem560 (Matthew Gilmore) and others.
Finally, once the Mac and Linux ports are working and the initial tools have been released it will be time to focusing on adding Outlaws support to TFE. Like I mentioned previously, this will include adding support for Outlaws Jedi enhancements to the level editor and support for Outlaws formats in the asset tools.
2021 Retrospective
I thought it would be interesting to look back at the 2021, in terms of TFE, and see how far we have come.
Early 2021 saw just a few commits to master. There were some improvements to the perspective correct 3DO texturing code. This feature, while it looked great, was not moved into the final code for performance reasons. There were also a few experiments with scripting, though mainly for future work. The main focus at this point, however, was the reverse-engineering work. At this point I was working in two locations - a branch of the main TFE code base, and the “code document” where the raw reverse-engineered code lived before being refactored and cleaned up for TFE.
Breaking Everything
TFE had existed in this strange state for some time where things seemed to be working fairly well but most of the code placeholder. I had originally written a sector renderer based on what was known about the Dark Forces formats, and then added the reverse-engineered classic renderer in late 2020 - but you had to use a console command to use it. I had an INF system built based on my existing understanding. But none of it was “real”. It was there so things could be tested, and initial tools could be built.
At this point, it was time for it to become “real” and, so, in early February 2021 I ripped out the renderer, the INF system, the previous object system and initial scripting support - breaking everything.
The INF System
With the old code gone, I had to spend some time to get things compiling again. During this period there was no rendering, but I could test things through the debugger. In mid to late February, I stubbed out the Dark Forces sound system and started integrating the INF code I had previously reverse-engineered. This process was not yet complete, in terms of INF, but the larger structure were there and I could finally compile and begin testing the code.
During this process, I found that the INF system also touched a lot of level data, so I begun stubbing out those interactions. Late February saw those sector functions getting integrated and becoming “real.”
Gap
Between late February and late March, there was a gap of about 1 month. Here I was focused purely on reverse-engineering the code, filling in missing pieces of the INF system, level loading, and more.
Level Loading
The last few days of March were spent porting all of the reverse-engineered Dark Forces level loading code to TFE. This meant moving code to the correct locations, such as moving code out of the INF system involving sector functions. During this phase I split out the “level data” from the renderer, INF system, and collision system. I had previously reverse-engineered the sector renderer, and it had been accessible in TFE using the console, but making it “real” - hooking it up correctly - meant finding code I missed and correcting past mistakes.
Reverse-engineering the INF system was a massive undertaking. And I wasn’t done yet. Early April would show how much work was left digging through the INF code in Dark Forces, merging the new code into TFE and fixing a seemingly never ending stream of INF bugs and issues.
Gameplay
By mid-April I had move on to the game code. Mid-April saw the integration of the player inventory, which originally had pieces of the structures in the INF system since it needed them to be stubbed out (keys and the like). April would see the introduction of the logic system, though there was still a lot more to figure out here. The player finally got its own file and the game code started to take shape. At this point the way that Dark Forces handled timing became much more clear and now the game ran at the correct speed. Mid April to mid May were dedicated to reverse-engineering the gameplay code in prepration for what was to come. But there was little activity in the TFE branch.
Collision Detection
Mid to late May was spent integrating the reverse-engineered collision detection code from Dark Forces. So far I have spoken about “moving code” and integrating as if it is a one way process. It is not. As reverse-engineered code is integrated, it needs a place to live. Because I don’t have access to the original files, function names, variable names, structure or member names during this process - it all lives together in my “code document” as a mass of code. As I integrate it into TFE, I have to figure out how to organize the files and integrate the code with already existing code. Then I see what I missed, what parts I forgot to reverse-engineer, or mistakes I made. Then I would go back to the “code document” and original game and then work through my mistakes or missing code.
Hit Effects and Projectiles
During this period the Hit Effects system was also integrated - this is the system that allows projectiles and other systems to spawn animated effects on hit. It handles explosions, “puffs” as projectiles hit, and splashes when objects hit water. The other side of this was the projectile system, which is responsible for spawning projectiles, updating them, handling collision detection, and then spawning hit effects. Projectiles use an update callback which gets assigned when they are created. This allows thermal detonators to arc, mines to falls, and updates blaster bolts as they move. In late May the Sound System was finally fully stubbed out and the API took shape.
Logics and Pickups
In April there was some initial work with object logics and this work continued into June. During this period the animation logic was added, which allows objects like the shield pickups to animate. The projectile logic function fully formed, connecting projectiles to the logic system. In Mid-June I finally factored out the object/INF messaging system from the INF code. Originally I thought it was an INF feature since a lot of INF interactions are done by passaging messages to sectors, lines, and triggers. But it turns out the system is also used to pass messages to objects.
Late June saw the integration of the “pickup” update function, which meant it was now possible for the player to pick up objects, such as ammo and shields.
The Task System and Game Loop
During the previous few months of work, it was becoming increasingly clear that game behavior was too dependent on the original “task system” for me to ignore it. It was, at this point - now July - that I began the very painful task of reverse-engineering and integrating the task system. Late July saw the introduction of the main game entry point - “darkForcesMain”. This was using the new “game system” that will allow TFE to run different games. This month saw a massive refactoring to use the proper reverse-engineered game loop. By the end of July the core game loop was taking shape.
The first two thirds of August was spent reverse-engineering more game code but also saw the file searching abstracted to make file handling simpler and to handle mods. But towards the end, there was a massive amount of code integrated into TFE. This included a lot more refactoring, moving Jedi related code TFE_Jedi/, converting the various engine-level namespaces to TFE_Jedi, and cleaning up the Jedi Renderer.
Towards the end of August there was a lot of work integrating HUD code, including off-screen buffers that Dark Forces uses while updating the HUD to avoid redrawing all of the HUD elements every frame, moving over more Jedi memory management code to make porting reverse-engineered code easier, starting to properly load data and startup various systems and finishing up the Dark Forces game startup.
The end of August saw the player controller integrated, as well as initial weapon code. The automap was also integrated. I also spent the time converting many systems back to tasks, which continued to have issues. At this point, level loading was finished, object in sector assignment issues were fixed and the level loading screen was displayed. Some of the AI code was integrated, though there was still a lot of work to do here.
Core Game Loop
During September the core game loop started really coming together. The code was switched to using the original sin/cos tables, which fixed various rendering issues with the Automap, palette based effects were integrated, and the HUD code was fully integrated and displayed properly. The classic renderer, reverse-engineered many months prior, was finally properly hooked up. It was finally “real.” I could see again - after almost 7 months of most of the game not displaying properly because the data was not in place and the renderer not hooked up.
With so much reverse-engineering work already done and all of the main systems coming online, things started to move quickly from here on out.
In early September the cheats were mostly finished, and the general “mission controls” were working - meaning the automap could be properly toggled, the headlamp worked, and various other features were accessible. Weapon drawing and animation were integrated. Player controls were then integrated, and then player physics and collision. At this point, I was finally able to run around the levels again with proper controls and collision. Finally the rest of the Player controller was finished. On September 12th, I posted the “TFE Core Game Loop Release Preview” video - just days after hooking up the renderer again.
The player weapon system was integrated at this point, but the individual weapon fire functions still needed the be reverse-engineered and brought over. On the 14th the Fist was itegrated, which led to fixing various bugs. At this point, I moved everything to using the TFE allocator system, so that levels could be flushed and reloaded. On the 15th the Mortar was integrated. The 16th and 17th saw the other weapons also integrated, as the general patterns became more clear.
On the 17th, after getting through most of the player weapon handling code, I posted the “TFE: Dark Forces Weapons” video.
AI
At this point I started to focus on the AI, splitting off the basic actor code I already integrated - knowing that the AI code would soon get much bigger. Initial AI work revolved around the mines - which are in essence both an AI actor and a projectile. Once mines worked, it was time to move on to exploding barrels and then generalize to exploders. Next up was scenery, which is also considered AI because it can animate and reacts to damage, causing it to change states. The mouse bot was partially completed, and then I made a slight detour to prepare for version 0.7.
TFE needed a system to remap keys to actions, which had been implemented previously. What hadn’t been implemented yet is the UI. So the UI was created, though not fully hooked up yet.
More AI
Late September saw a lot more AI work, with more reverse-engineering time required as gaps became evident during the integration process. Along with the AI, the Task system was being cleaned up and simplified. Finally the mouse bot was completed, but the AI journey was just getting started.
In Dark Forces, AI agents are split up into a number of actors, which all have little bits of functionality. With the introduction of the “troopers” - more of this functionality needed to be integrated.
On September 30th I posted the “TFE: AI System” video. By this point the “trooper” AI was complete, as well as the mouse bots, land mines, exploding barrels, and scenery (like the red lights in Secbase).
Flyers and Bosses
In early October I started work on “fliers” - which have yet more “actor” structures and code. At this point the AI code was complete enough that I was able to add several more enemies that had very little custom code. Then came the Sewer creature, which doesn’t use completely unique code but shared less code that any other enemy so far.
Next was the Kell Dragon, which was the first “boss” enemy to be integrated. These enemies are different than any so far in that most of the code is custom. Most of the regular enemies share code, with their initial settings determining their behaviors. But the bosses change that.
Turrets, Generators, and Vues
The Welder and Turrets were integrated, which also use mostly custom code. Fortunately they use fewer states and less code than the bosses. I also fixed some latent rendering bugs in this period and removed a lot of no longer used code. Finally VUE animations and Generator logic were integrated.
On October 14th, I posted the “TFE: VUE Animations, Enemy Generators, and Fixes” video.
Level Reloading
So far, you could only load a single level and then restart the program and load another. Mid-October saw that finally fixed with level skip cheats and by fixing level reloading issues. It also saw the ability to add new agents using the in-game UI. In late October player death and respawning was integrated, making the game loop feel more real. Jabba’s ship was now properly handled, the code for it had been previously reverse-engineered but never integrated until now.
At this point I started uploading “Pre-Core Game Loop” releases, with the idea of updating them regularly for testing until the Core Game Loop release was finally finished. When I had previously ripped out all of the old code, including the reverse-engineered classic renderer (until it could be hooked up properly), various problems were fixed and corrections made to the classic renderer. As a result, it was parred back to the original fixed-point renderer - meaning builds were in 320x200 only.
People quickly found numerous bugs, some of which are still waiting to be fixed. Work on the boss AI continued, with new pre-release builds often coinciding with a new enemy being integrated. The Input Remapping was also finished during this period.
By early November, all of the enemies were finally integrated.
Towards Version 0.7
With the enemies all in place and the core game loop complete, it was time to re-implement the floating-point version of the Jedi renderer. I used the code from my original version of the floating-point classic renderer as reference, but I re-implemented it directly from the fixed-point renderer in order to capture all of the fixes and changes in 2021.
On November 14th, I posted the “TFE: Widescreen & High Resolution Rendering” video.
Once the floating-point renderer was complete, it was time to finally prepare for the Core Game Loop release. This involved fixing more menu code, fixing crashes due to resolutions not divisible by 4, fixing various 3DO model rendering bugs, and many other issues. But the biggest new feature was the mod loader - it was finally possible to play mods using TFE.
On the November 18th, version 0.7 was released and the core game loop was complete.
Version 0.8
With the Core Game Loop complete, it was time to tackle the cutscene system. During this period I also fixed many bugs, and cleaned up the renderer code. But most of the time was working through the “Landru” system. The Landru system uses its own “actor” model for handling images and sounds. It also has its own sound and music management code. Even the display code is different then the rest of the game. There were numerous systems, such as the fading system, that needed to be converted from DOS-style while loops to state machines.
And, finally, on December 5th, I posted a video and posted the official 0.8 release.
Today
That brings us to today. I have been spending the last few weeks reverse-engineering the iMuse system, and prior to that had successfully integrated the game music module that interfaces with iMuse.
It has been a long road and a wild ride. We didn’t quite make it to version 1.0, but we came really close. The renderer, AI, INF system, in-game UI, cutscenes, game systems - all of it derived directly from the original executable using reverse-engineering, which is almost complete.
You can now watch the cutscenes, though the music still has issues, create a new agent and play the game from beginning to end. You have all of the relevant in-game UI, the mission briefings, the gameplay. Within mere weeks we will finally reach version 1.0.
18 Nov 2021
Version 0.7
After a long time in development, the Core Game Loop Release, version 0.7 is finally available. All of the weapons, items, and AI has been integrated. Dark Forces can be completed from beginning to end user The Force Engine. TFE continues to support the original, 320x200 fixed-point renderer but now properly supports high resolution rendering, and widescreen (including Ultrawide). TFE can load mods directly from ZIP files, you can drag and drop them onto the executable. It also has a built-in Mod Loader, accessible from the main menu.
To get mods to show up, simply create a Mods folder in your TFE directory, the Dark Forces game data directory, or under /ProgramData/TheForceEngine. In that mods folder you can put the zip files, one per mod, or extract them to one sub-directory per mod.
Below is a video that marks the release of version 0.7 - the Core Game Loop release. This video shows part of Detention Center, and then small parts of three user levels from “back in the day.”
Note that mod support is currently in “Beta”, not all mods fully work, and some may even crash. However, these issues will be resolved in future versions. There are still bugs and issues, but the Dark Forces can be finished from beginning to end using TFE.
Click to watch.

What’s Next
Now that the CGL release is done, it is time to move to the next milestone on the Roadmap - Cutscenes, Mission Briefings, and completing the in-game UI (PDA). That will be version 0.8. The rest of this year is dedicated to finishing version 0.8, 0.9 (sound and iMuse) and finally version 1.0.
18 Sep 2021
The Core Game Loop release is proceeding at a brisk pace, with work on integrating the AI code about to start - which will be the focus of the work next week. Here are two videos that show the current state of the build:
Core Game Loop Release Preview
Weapons Complete
(with a few bugs)
30 Aug 2021
As The Force Engine (TFE) approaches the Core Game Loop Completion milestone, I thought it was time for another update and to talk about plans for reaching TFE version 1.0 and beyond.
Contents
Update
All of the major systems are structurally complete, with only smaller “loose ends” left to deal with in terms of reverse-engineering. Thus I recently switched over to the integration process and getting this reverse-engineered code into TFE with all of the necessary refactoring. Here is the integration process for various phases:
- Dark Forces startup - “main”: Finished.
- Main game loop: Finished. This release is skipping cutscenes and mission briefings, so technically the loop still has some incomplete elements, but it is done for this release. * Agent Dialog: Finished. It now works properly with save game data (DARKPILO.CFG) - reading and writing save data. You can create and remove agents and select levels. Using save game data also means it will be now possible with progress properly through the game.
- Level Load: 95% Complete - loading geometry, objects, and INF is complete. Loading the “goals” is a loose end, though it isn’t strictly necessary for this release.
- Mission Startup: Finished. This includes creating the “main task,” creating tasks such as player task, loading the level, setting up the HUD, setting up the projectile system, clearing out screen effects, displaying the loading screen, and similar tasks.
- The Main Task: The structure is complete, but this area is still a work in progress. My goal is to have the Main Task complete this week.
The goal is to be testing levels properly with the fully reverse-engieered game loop this week. Once I have tested out the already completed systems, such as INF and the player controller, then I can go back and finish the loose ends and prepare for the release. The loose ends include some of the weapon firing functions (each weapon gets its own), some AI routines, and whatever else I find during the integration or testing process.
Core Loops
Note: this section goes over some code, though it is mostly pseudocode and isn’t too complicated. However, if you would rather skip ahead to Plans below - I will understand.
Going into detail about all of the work that has gone into reverse-engineering and rebuilding Dark Forces and the Jedi engine would take a long time, I thought it would be interesting to show what the “core loops” look like. The two most important loops for this release are the “Main Loop” - that is the loop that runs in main() and controls the game flow and the “Game Loop” - the “Main Task” that runs using the task system, and controls the rendering and general input. To make things more confusing, the “Player Controller Task” is separate from these, and this is what handles general player control, input, player collision, etc. - but I will save that for another day.
Main Loop
Here I will show the main loop in pseudocode:
while (1)  // <- This is replaced by the function call from the main TFE loop.
{
	// TFE: This becomes a game state in TFE - where runAgentMenu() gets an update function - it can't loop forever.
	s32 levelIndex = runAgentMenu();  <- this loops internally until complete and returns the level to load.
	updateAgentSavedData();	// handle any agent changes.

	// Invalid level index just maps back to the runAgentMenu().
	if (levelIndex <= 0) { continue; }  // <- This becomes a return in TFE, back off and try again.

	// Then we go through the list of cutscenes, looking for the first instance that matches our desired level.
	s32 cutsceneIndex;	// <- this is the index into the cutscene list.
	for (s32 i = 0; ; i++)
	{
		if (cutsceneData[i].levelIndex >= 0 && cutsceneData[i].levelIndex == levelIndex)
		{
			cutsceneIndex = i;
			break;
		}
	}
  // Then do some init setup for the next level ahead of time; the actual loading will happen
  // after the cutscenes and mission briefing.
  setLevelByIndex(levelIndex);

  // The inner most loop - this cycles through the cutscene entries, each of which lists the game mode.
  // TFE: Again this becomes a game state, where each iteration through this loop is from a single
  // function call into loopGame().
  while (!s_invalidLevelIndex && !s_abortLevel)
	{
		GameMode mode = cutsceneData[cutsceneIndex].nextGameMode;
		switch (mode)
		{
			case GMODE_ERROR:
				// Error out.
			break;
			case GMODE_CUTSCENE:
				// TFE: Cutscene playback becomes a state.
				// Play the cutscene
				cutsceneIndex++;	// <- next loop, this goes to the next cutscene or instruction.
			break;
			case GMODE_BRIEFING:
				// TFE: Briefing becomes a state.
				// Handle the mission briefing.
				cutsceneIndex++;	// <- next loop, this goes to the next cutscene or instruction.
			break;
			case GMODE_MISSION:
				// TFE: In Mission becomes a state, but here the Task System will take up the slack
				// (which will act very similarly to the original game).
				// Create the loadMission task, which will then create the main task, etc.
				// Start the level music.
				// Read saved game data for this agent and this level.
				// Launch the level load task.
				// After returning from the level load task, stop the music.
				// If not complete set abortLevel to true (which breaks out of this inner loop) otherwise

				// Save the game state and level completion info to disk.
				cutsceneIndex++;	// <- next loop, this goes to the next cutscene or instruction.
				levelIndex++;
				// Prepares the next level for when we get to it after the cutscenes and briefing.
				setNextLevelByIndex(levelIndex);
			break;
		}
	}  // Inner Loop
}  // Outer Loop
As you can see, the main challenge is that the loop contains a bunch of smaller loops. So, for TFE, this loop had to be broken down into states with transitions. Then each state, such as the Agent Menu, can be called from here when it is active. So all of the original code still exists in TFE, but the structure is a bit different in order to handle running only a single frame at a time.
Game Loop
The Jedi Engine has a Task system that is used once the in-mission code takes over. Each task acts like a fiber or co-routine, and they support yielding control at arbitrary points. The yield can have a delay, such as TASK_NO_DELAY (meaning it will be called again next frame), TASK_SLEEP (meaning it will never be called again unless it is made active again), or a number of ticks.
In the original code, the task system is recursive, the next task is selected during the yields or when tasks complete and this continues until all of the tasks are complete (i.e. the player exits the game, or aborts or completes the current level). Obviously this won’t work well with a modern OS, so TFE makes the task system iterative rather than recursive and adds a “framebreak” marker to a task - which basically means the frame ends once this task is complete. This allows TFE to exit out of the task loop every frame and resume on the next.
The main Game Loop, only active while actually playing a mission, is one of these tasks - the “Main Task” in the DOS code (that is the actual name, which I found from error messages).
void mission_mainTaskFunc(s32 id)
{
	task_begin;
	while (id != -1)
	{
		// This means it is time to abort, we are done with this level.
		if (s_curTick >= 0 && (s_exitLevel || id < 0))
		{
			break;
		}
		// Handle delta time.
		s_deltaTime = div16(intToFixed16(s_curTick - s_prevTick), FIXED(145));
		s_deltaTime = min(s_deltaTime, FIXED(64));
		s_prevTick = s_curTick;
		s_playerTick = s_curTick;

		setupCamera();

		switch (s_missionMode)
		{
			case MISSION_MODE_LOADING:
			{
				blitLoadingScreen();
			} break;
			case MISSION_MODE_MAIN:
			{
				updateScreensize();
				drawWorld();
			} break;
			case MISSION_MODE_LOAD_START:
			{
				clearPalette();
			} break;
		}

		handleGeneralInput();
		handlePaletteFx();
		if (s_drawAutomap)
		{
			automap_draw();
		}
		hud_drawAndUpdate();
		hud_drawHudText();

		// vgaSwapBuffers() in the DOS code.
		setPalette(s_palette);
		TFE_RenderBackend::updateVirtualDisplay(s_framebuffer, 320 * 200);

		// Pump tasks and look for any with a different ID.
		do
		{
			task_yield(TASK_NO_DELAY);
			if (id != -1 && id != 0)
			{
				mainTask_handleCall(id);
			}
		} while (id != -1 && id != 0);
	}

  // Wake up the mission load task to finish the cleanup.
	s_mainTask = nullptr;
	task_makeActive(s_missionLoadTask);
	task_end;
}
Notice the while loop, which exits using the task_yield() function - and then resumes at that point next frame or when another task calls the main task with a non-zero id.
Plans
Core Game Loop Release
The Core Game Loop release is still the next planned release. While it has taken longer than I originally planned for, as you can see above it is getting close to the finish line. This release will include saving and loading Dark Forces save game data (meaning your current saves will work), creating and deleting agents, proper saved progression through the game, proper visuals using the reverse-engineered classic renderer, pickups, items, all weapons working correctly, accurate player control, physics and collision detection, accurate level interactivity (INF), full enemy AI, palette effects from picking up objects and getting hurt, all items - such as the gasmask - working correctly, Vue animations, basic controller support, key and button rebinding, mouse and controller sensitivity adjustment.
The editors will be temporarily off-line, due to the complete refactor of the code base to properly use the reverse-engineered code. However, they will come back in a future release (see below).
Note, however, with all of this being made available at once there will inevitably be bugs and issues. I consider this to be an Alpha release - since it is not yet feature complete. Missing elements will include: cutscenes, mission briefings, some in-game UI (PDA), iMuse, and there will be some sound inaccuracies.
Bug Fixes
There will be plenty of bugs to fix, so this is a placeholder here. This probably won’t be a big release by itself - instead it will be a bunch of smaller “point” releases. This will likely continue as the next releases are being worked on.
UI & Mission Briefings
The next major system will be the in-game UI, especially useful when looking at mission objectives and key codes using the PDA. Once the UI and mission briefings are in place, the game is technically fully playable.
Sound
This release will implement the correct sound falloff and 3D effects and finally fully implement the iMuse system.
Version 1.0 Release
With this release, TFE will be a complete replacement for DosBox. I am still on track for completing this by the end of the year. If the Core Game Loop release makes it out in September, then I think this will be very likely to be released as scheduled. However, there is still a chance that it can slip - I think we’ll have a very good idea when the Core Game Loop Release is finished.
Voxels!
Quite some time ago now, I implemented an experimental voxel renderer that integrated seamlessly with the Jedi classic renderer. However, there were some loose ends to deal with, such as not supporting the full VOX format and dealing with some palette issues. This release will integrate that code with the main branch and add support for replacing objects with their voxel counterpart.
The focus of this release is to get the tools working again with the reverse-engineered code. This will include basic functionality like importing and exporting assets, viewing them, etc..
Level Editor
The first release of the full level editor. It might still be missing some planned features, but as of this release it should be fully usable for building real levels and mods.
Towards Version 2.0
Finally, hopefully early next year, I plan on beginning the process of adding Outlaws support to TFE. I don’t yet have any real way of making any time estimates beyond this point, but I expect the reverse-engineering process to proceed at a much quicker rate for Outlaws for several reasons:
- I have become a lot faster at the process by going through the process of reverse-engineering Dark Forces.
- Outlaws was built from the Dark Forces code base, and shares the same engine. This means a lot of the structures will be the same or substaintally similar.
- I have a better sense of how to organize the process and reduce re-work and refactoring time.
Perspective and Hardware Renderers
Once the Outlaws enhancements to the Jedi Engine are reverse-engineered, I will be in a much better place to tackle the Perspective and Hardware accelerated renderers for TFE.
14 Jul 2021
The shape of the core game loop is now clear, so this post will go over its structure and also talk about any changes being implemented for TFE. It will also talk about progress towards the next test release and what has been accomplished so far.
Progress
Before talking about the game loop itself, it seems useful to talk about the progress towards the next test release. Missing (skipped) functionality in the Load Mission Task has been reverse-engineered, the Task System has been reverse-engineered and implemented, though there are still some tweaks to be made before release, reverse-engineering has been completed for the following (including support functions): runGame(), Load Mission Task, Mission Task (was the “main” task), the Player Weapon Task (though some individual weapon fire functions need work), the Projectile task, Hit Effects, the Pickup task, the Sprite Animation task, the Texture Animation task, Object Update task, the INF system, and more. The structure of the AI logics tasks though more work is required here for individual AI types.
Work currently is progressing on the Player Controller task, though it is mostly complete. I expect it to be finished this week.
Work is still needed on the Vue, Generator and Sound Emitter tasks, though they are fairly simple compared to the Player Controller, weapon tasks, and Task System and shouldn’t take very long.
Overall there is a couple of weeks worth of work still to go before the Core Game Loop test release is ready. The work has been steady and consistent but ultimately guessing how long reverse-engineering will take can be a bit dicey. To put this release in perspective, the Player Controller, by itself, is a few thousand lines of C code and that isn’t even the largest chunk of code.
It has been a long road, but this release will be a major milestone for the project and certainly the top of the mountain. There will be more work before version 1.0 is ready, but this release will get us most of the way there.
TFE Game Loop
The main game loop consists of the game specific code, contained in TFE_DarkForces, and engine code that is consistent between games (TFE_TaskSystem, Game Loop below).
Each game will have a “main” module, which will consist of three functions: runGame(), exitGame(), and loopGame(). The entry and exit points (runGame() and exitGame()) are required but loopGame() is optional if all of the per-frame game logic is handled by tasks. Dark Forces handles the game loop this way, setting up the required tasks during runGame() and thus loopGame() is omitted.
TFE_Game
The core game interface. There will be an implementation for Dark Forces (next test release) and Outlaws (once Dark Forces is complete).
IGameMain
The game main interface consisting of just three functions:
- runGame(): Required. Game entry point.
- exitGame(): Required. Game exit point.
- loopGame(): Optional. Called every frame to update and render the game.
TFE_DarkForces
DarkForcesMain
The Dark Forces implementation of IGameMain, the main entry point to the game. Note that loopGame() is not implemented since the game is updated using only the task system.
- runGame(): Entry point, sets up tasks. This function is run when preparing to load a mission. This sets up the Load Mission Task, reads agent data, fills in the PlayerInfo struct, and allocates memory for state if needed.
- exitGame(): Called when aborting a mission or exiting the game. This unwinds the tasks, cleans everything up and saves any data.
Mission
The main mission entry point, this handles loading the mission from a high level and kicks off the Mission Task, which will handle the rendering, time keeping, and serve as the main task after loading.
- Load Mission Task
- Mission Task
Load Mission Task
Handles loading the mission - calling functions to load the level geometry, objects, setup the palette, setup object logics, and setup the Mission Task. Once the mission task is finished loading and the Mission Task is ready, it is put to sleep. When it resumes it will then unload the mission data.
Mission Task
The main mission task function. This function is designated as the “frame break” - which means that a new frame begins before the start of this function. The Mission Task handles the camera, rendering, effects, and time keeping. Once it completes, which occurs when the player decides to go to the next level, abort the current mission or quit, the Load Mission Task is made active in order to properly unload.
Note: In the original game there were no frame breaks, but on modern systems, such as Windows, this break allows TFE to interact properly with the rest of the OS and simplifies systems such as input and interaction with the GPU.
Player
The player consists of two main elements - player data, such as inventory, health, and other state, and the Player Controller Task. The player controller handles player input, physics, collision detection, weapon animation, level interactivity using messages to the INF system.
- Player Controller Task
- PlayerInfo
- Player objects - the physical object and the “eye.”
Player Weapon
The Player Weapon Task handles switching weapons, primary and secondary fire, and animating the weapon on or off the screen. When fired, each weapon has its own function that is called. This is handled by a table of function pointers indexed by the current weapon.
Projectile
The projectile task handles the movement of projectiles over time, projectile collision, damage messages on hit.
Hit Effect
The hit effect task handles creating hit effects, handling their lifespan, playing sound effects, waking up enemies within range of a hit, and explosions.
Pickup
The pickup task is mostly idle but is directly called from the Player Controller Task when the player collides with a pickup. Pickups include everything in the levels that the player can collect such as ammo, powerups, health and shields, keys, inventory items, and goal items.
Sprite Animation
This task handles the animation of all sprites (WAXs) with “ANIM” Logic. This is also used to animate hit effects, explosions, and other cases where simple one time or looping sprite animation is required.
Texture Animation
The Texture Animation Task handles all texture animation. It loops through all of the animated textures in the level and updates the current texture stored in the level data based on the animation and time elapsed.
Object Update
The Object Update Task handles all objects with the “UPDATE” logic. This is also used to handle simple objects with possible movement, and gravity; such as objects that should be affected by elevators or that should drop and bounce around.
Vue
The Vue Task handles updating Vue animations and handles chaining them, “sleeping” and waking animations.
Generator
The Generator Task handles “AI” generators, which are objects that can spawn new enemies of a certain type based on various parameters, such as player distance, number already active, and total spawned versus a maximum.
Sound Emitter
The Sound Emitter Task handles sound emitting objects that can be placed throughout levels to provide effects such as continuous river and waterfall sounds.
AI
All of the tasks mentioned above create a single task that loops through a list of objects. AI agents are handled differently with at least one task created for each agent. There are quite a number of AI tasks, so I won’t enumerate them here. As the AI tasks are finished, the tasks will probably be split into multiple files based on code sharing.
Using one or more tasks per entity allows agents to be put to sleep when not needed and be updated at different rates based on the current situation in order to control how much CPU time is needed.
TFE_InfSystem
The INF System was also reverse-engineered and implemented as part of this release. It too uses the task system to update each frame and to allow the game code to interact with it.
INF Elevator Task
The Inf Elevator Task handles elevator updates, movement and other changes, and stops.
INF Trigger Task
The Inf Trigger Task handles sending the appropriate messages from triggered elevators, switch textures, and other trigger based INF messages.
INF Teleporter Task
This loops through the teleport sectors and teleports the player if they meet the required conditions.
TFE_iMuse
The iMuse system will be left incomplete for this test release, but the structural code has been reverse-engineered in order to make going back to it after this release easier.
iMuse Task
This is where the iMuse system adjusts the midi tracks being played, handles volume control, etc.. Note that this task will remain only partially complete until after the next test release.
TFE_TaskSystem
The task system is directly derived from the Jedi system with some changes to work better with modern systems and to make it more portable.
- Task functions manually handle creating and using persistent state. This process is simplified using helper macros and doesn’t significantly add to the complexity.
- Task functions have “decorated” beginning and ending clauses - these are simply macros but they are required for every task function.
- Child functions that use yield() need to be launched as child tasks.
- The system has a notion of a “frame break” - a point where the task processing ends for a frame instead of using an infinite loop. This means that the task system can run on the main or rendering thread.
The task system has a simple scheduler that allows tasks to yield for a specific period of time before being resumed. Tasks can also delay indefinitely, meaning they never continue unless made active again, or have zero delay - meaning they will run the next frame regardless of the elapsed time (TASK_SLEEP and TASK_NO_DELAY delay values).
Tasks can yield control at any point, as mentioned above. Tasks can also create or push new tasks, which are then inserted into the lists. Tasks can run other tasks with a parameter used to define the requested action. When this occurs, the current task becomes the “return task” - and is resumed once the other task is executed. Finally, if a task function is exited the task is removed from the system and automatically destroyed.
In this way, only a single task needs to be created and then the tasks can create and remove tasks during runtime as needed.
Game Loop
With the main systems in place, including others that were previously implemented such as TFE_InfSystem, TFE_JediRenderer, etc., I can talk about the game loop.
The Agent Dialog is still using the stand-in, non-reverse-engineered code - it is functional enough for this stage of development and will be finished along with the remainder of the in-game UI in a future release.
From the Agent Dialog, when the player starts a level - the core game loop begins:
- runGame() is called from DarkForcesMain.
- runGame() reads the agent data, fills in the PlayerInfo struct, and creates and launches the Load Mission Task. Afterward runGame() will return and the task system will take over.
- When the Load Mission Task is run, which will happen the next time runTasks() is called from the Task System, the level will be loaded, Logics are set up, and the tasks will be created - including the main Mission and Player Controller tasks. Once this is done, the Load Mission Task is put to sleep.
- Once the user or system requests the program to exit, the current mission to be aborted, or the System UI is used to return to the main menu exitGame() is called to stop and clean up all of the tasks and game state.
Main Loop
Most of these systems were already in place before this next release. The main new entry is the Task System which is used by the game core loop.
- Handle OS Messages
- Window resizing requests.
- Input which is stored by the Input System to make it accessible by the game code and UI code.
- Mouse polling for input (how far has the mouse moved since last frame, etc.).
- Other windows messages (close, minimize, etc.).
- Tasks are run (runTasks() called from the task system), assuming the game is not paused.
- Rendering is done through the Mission Task while the core game loop is running.
- Reacting to input is handled through tasks, such as the Player Controller.
- Sounds and music is also controlled through the various tasks, but actual mixing and playback occurs in the Audio and Music threads.
- Blit the virtual frame buffer to the back buffer. If a valid GPU target is available, most of the work will occur using a shader on the GPU.
- Conversion from 8-bit to 32-bit color.
- Upscale.
- Post processing (bloom, optional).
- Color Correction (optional).
- System UI
- The System UI is The Force Engine UI designed to be used regardless of the game being played. Right now only Dark Forces is supported but the same UI will be used with Outlaws as well.
- The System UI handles (or will handle in some cases) game data setup, control setup, sound volumes, easier mod loading, and graphics and window options.
- Present
- Vsync (optional).
- Blit back buffer to screen or window.
12 Apr 2021
The previous blog post talked about refactoring the code so that the reverse-engineered INF system, collision system, and renderer can all use the original, fixed-point level data. Another goal was to enable caching for systems, like the floating-point high resolution renderer, that need to transform the data in some way. It illustrated the connected nature of the core game and engine code, making it more difficult to split it apart into smaller releases. As I have continued, I find myself reverse-engineering the “Logics” and “Game Object” code - dealing with pickups, AI agents, weapons and more.
The Goal
The long-term goal of 2021 is to release version 1.0 of The Force Engine with full Dark Forces support. This means that the game is complete and is a full DosBox replacement. Progress towards that goal has been going really well and is on target and even ahead of schedule. But the short term goal of releasing another Test Build has been slipping and so I have decided to change plans somewhat.
The Game Loop
I have decided to stop “fighting it” and set a new short-term goal: finish the core game loop for the next build. In less than a month, I expect to be finished reverse-engineering the entire core game loop of Dark Forces - including AI, pickups, weapons, player control and physics, rendering, and sound. Unfortunately, even after that is finished, there are a few weeks of additional work to integrate all of the code into TFE, finish the refactoring, and get the tools fully working again.
Rather than attempting another in-between test release, the new plan is to finish this reverse-engineering and integration process. This means that the new test release is at least two months away, probably three. But once it releases, the game will be fully playable including mods. It will not be complete, it will be missing dynamic music (iMuse) - though the basic midi tracks will still play, cutscenes, some of the in-game UI, and saves. And that is it, which should be easily finished before the end of the year.
Summary
The test release is being delayed again, for two to three months. However, as a result, when it releases Dark Forces will be full playable through TFE, including existing Mods.
19 Mar 2021
The Jedi Renderer and INF System have been completely reverse-engineered and the collision detection system is almost complete. But a new problem looms on the horizon.
The Problem
Reverse-engineering the Jedi Renderer was completed sometime back and was integrated into The Force Engine along side the existing temporary renderer. In order to support higher resolutions while preserving the original renderer as-is, a Fixed-Point sub-renderer was implemented and then a Floating-Point sub-renderer was derived from that. This works great and allows for arbitrary output resolutions and cleans up sub-texel precision issues nicely.
The issue is that the INF system, recently reverse-engineered but not yet fully integrated and the collision system, now partially reverse-engineered, are written against the original fixed point implementation. Converting those to floating point might be beneficial but might also have unforseen consequences that can subtly modify existing functionality, especially in mods. Ideally any such change should be tested and implemented carefully. This suggests that the original fixed point implementation should be preserved for now and not rely on the state of the renderer.
The Solution
For the initial release, I think it is clear that the fixed point data should be in memory and kept up to date. The idea is to factor out the fixed point sector data so that it is accessible by the INF, collision and render systems and to maintain and keep it up to date as the level changes. Then, if needed, this floating point data is mirrored and cached so that it can be used by the floating point renderer. This suggests possible issues:
- More memory consumed by level data - given modern systems, even doubling the amount of memory used to store sector data seems trivial. For performance reasons, all elements required for rendering should be duplicated but even with tens of thousands of sectors the memory increase will be modest and the amount of memory being fetched at runtime unchanged except when sectors change - which is generally a small percentage of the total number of sectors.
- Decreased performance due to updating both fixed point and floating point data - this is true and unavoidable for this approach. However, sector data is updated only when needed. This means that a small amount of data needs to be updated and cached at any time.
- Forcing vanilla level spatial size limits due to fixed point limitations - this is again unavoidable but necessary in the short-term.
The Plan
The plan is to split out the level fixed-point level geometry into its own system, which is then accessible by the INF system, Collision detection system and Renderer. Specialized sub-renderers, such as the Floating-point and GPU sub-renderers will then cache any required data internally since it is not needed by the rest of the game. To communicate that floating point or GPU data needs to be updated for a sector a dirty flag will be set and the data will be updated in a “lazy” manner (as-needed). This should be both consistent with the original DOS code and allow for specialized and improved sub-renderers.
- TFE_LevelGeometry - this will store all of the level geometry in the original fixed point format.
- TFE_InfSystem - references and updates level geometry as needed and will flag sectors as “dirty” so that the floating point data can be cached when needed.
- TFE_Collision - the collision detection system can be called directly from the game systems or INF system. This system can also directly reference level geometry and can change it, but since it only changes collision related information does not need to trigger updates to the floating point cached data.
- TFE_JediRenderer - the Jedi renderer can reference the fixed point level geometry. If using the floating point or GPU sub-renderer, cached data is stored internally since it is not needed by any game system.
The core idea is to avoid costly runtime conversions whenever possible and to intelligently cache the floating point data only when needed. This should minimize the performance impact while enabling the renderer to fully support high resolutions and high quality texturing, like it does now, while allowing the reverse-engineered gameplay code to be fully integrated and tested against the original game.
The Future
Clearly using floating point for the source level data is desired as that will unlock the ability to have larger levels and improve performance in many cases. However, I do not think that straying from the reverse-engineered code when dealing with gameplay elements is a good idea without being able to do proper A/B comparisons and ensuring that any changes don’t break existing functionality in obscure ways.
Finally, my goal is still to finish an initial release this year - which seems tantilizingly close to reality given the recent progress in reverse-engineering INF, collision detection code, and player contoller code. Achieving this goal means being able to integrate the reverse-engineered code as-is as much as possible and avoid worrying about Fixed-Point vs Floating-Point issues until after the first release.
Current Progress Towards the Test Release
Percentages are approximate.
- Reverse-engineering the original Renderer: 100%
- Reverse-engineering the INF system: 100%
- Reverse-engineering the collision system: 80%
- Reverse-engineering the player controller / player physics: 50%
- Integrating Jedi Renderer: 100%
- Integrating INF System into TFE: 90%
- Integrating player controller / player physics: not started.
- Refactoring: 10%
Test Release Target
Due to new findings, the target needs to be moved once more due to the increase in scope. It is still close, the reverse-engineering has been going well and the above refactor should only add a few weeks. So, given the current rate of progress, my new target is end of April. This will be a huge release, with the following features - most of which are already complete:
- Accurate renderer that supports the original 320x200 fixed-point sub-renderer and higher resolutions using the floating-point sub-renderer.
- Large performance improvements at higher resolutions thanks to GPU color conversion, asynchronous frame buffer uploads and general improved rendering performance.
- Accurate game timing up to 145 fps, which should produce a much smoother experience when running on lower end systems or running without vsync.
- Improved System UI with the ability to alter graphics settings while in-game, so you can see the changes as you make them in real-time.
- Optional color correction.
- The ability to adjust the Scale and Positioning of the HUD elements in-game using the System UI.
- The ability to drag & drop mod zip files or load them from the System UI to more easily test mods.
- Accurate player control, physics and collision detection. This means that the “feel” of the game will finally match the DOS experience.
- Accurate player weapons instead of the current placeholder system.
- Accurate INF system, this means that not only will the core levels function correctly but so will mods (except in cases where they rely on AI logic).
And obviously this list barely touches the behind the scenes updates since the last Test Release. As you can see this huge release sets the foundation - with the rest Logic/AI following relatively soon afterward (but definitely a future release).
02 Mar 2021
In the last post - TFE Update and 2021 Plans - I talked about the INF & Classic Renderer release which was to be followed by a “Player Control & Physics” release later in the year. Due to the way the renderer, INF and player controller are connected there has been a change of near-term plans. This post will go over those changes, talk about how the INF system works internally and provide a general update regarding the progress towards this year’s goal of reaching the 1.0 release.
Connections
What do I mean about connections?
In order to render the world correctly, the sector geometry must be correct (such as floor and ceiling heights) and texture offsets for the various elements must be set (such as floor and ceiling offsets). However, some of these values are not correct until the INF data is loaded and the initial stops are setup. So here, we can see that the visuals are incorrect until the INF system is working.
Similarly, the INF system affects the player - elements like scrolling textures do not directly update the player position, rather the player controller queries the sector “links” (see INF System Overview below) and then handles any needed updates. Conversely, the interaction between the player and INF system, such as hitting switches, landing on the floor, and crossing lines are also handled by the player controller and collision detection systems. In other words the INF system is incomplete without the player controller and collision detection systems.
What does this mean for the “Classic Renderer” release?
Essentially this means that the Classic Renderer release will take longer than planned, the new target being the end of March. However, it also means that the Classic Renderer release will not only have correct rendering, correct INF functionality - greatly improving the usability of mods, but also that the “Player Control & Physics” milestone is being moved up and completed as part of this build. This means the next build will feel like Dark Forces - with accurate physics, jumps, control and collision.
Progress Update and Timelines
Progress
Reverse-engineering for the INF System is nearly complete, the last elevator update function will be finished in the next few days and the code integration is not too far behind and should be done this week. The entry points for the player controller, physics, and collision detection have been reverse-engineered, though work in that area is just beginning. As mentioned above the new target is the end of March for the next build.
The Build
I consider the next build the turning point for the project, essentially meaning it will be at “top of the peak.” There will be a lot of work to do afterwards, of course, but the most challenging and time consuming elements will be behind us. In other words, for me at least, it will be the most exciting build yet and will lay the foundation for the future of TFE. Unfortunately for most players, there won’t be much new to experience - though mods/user-levels will work much better and the game will feel like Dark Forces. That said, the build will require a lot of testing to make sure the visuals, INF, and player control are accurate and to make sure bugs have not been introduced.
Overall Timeline
Because the player controller and physics are included in this release rather than being a seperate milestone for later, this delay should not impact the overall timeline for the project - its more of a re-ordering of tasks. It does mean that the cross platform build is getting delayed a bit (by about a month or so) - but there will be more there when it does happen.
A Note on Timelines
All timelines presented here are targets and are subject to change as “real life” and future discoveries dictate. I like having targets to strive toward which also serve to way to communicate with others the scope of the work and to keep a feeling of forward momentum, however they are not promises and further delays may happen.
INF System Overview
What is INF?
The INF acronym, like COG, doesn’t actually mean anything according to an interview with the original team. However it handles all interactivity with the level - the system controls switches, doors, elevators, lighting changes, moving and rotating sectors, scrolling textures, when mission goals are completed, text and audio that play or is displayed as you complete objectives, determining when you have successfully completed the mission, and more.
The level INF is a text based data file consisting of various “items,” where each item consists of one or more elements which control and interact with sectors, walls, or the system. In general these elements consist of Elevators - sectors that change in some way, such as changing height, rotating, or changing light level, Triggers - these generally trigger other INF items, such as switches, and Teleporters - which consist of only “chutes,” sectors meant to seamlessly teleport the player vertically between sectors to allow for vertical connections between areas.
Example Elevator:
item: sector            name: complete
  seq
    class: elevator move_floor
    stop: 55 hold
    stop: 56 hold
      page: 1 m01kyl01.voc
      message: 1 rickenbacker master_on
    stop: 56 4
    stop: 56.5 2
      message: 3 parking_space wakeup
    stop: 57 0
      message: 4 text_boy m_trigger
    stop: 57 complete
    speed: 0
  seqend
Example Trigger:
item: line      name: blocker_panel     num: 2
  seq
    class: trigger switch1
    client: blocker1
    client: blocker2
  seqend
Of course I’m leaving out details, a single “item” can actually have multiple INF elements. A sector can have multiple elevators and triggers, for example. There are older INF resources that are mostly accurate and later I will add full INF up-to-date documentation to this site for furture reference, along with any extra functionality that gets added for TFE mods. But for this post, I think a basic summary will suffice. From a glance, it is easy to see that the INF system is very flexible and essentially acts like a very limited scripting language. The rest of this post will cover the internal workings of the system rather than exhaustively covering how to use the system.
A Note on Timing
Dark Forces quantizes time to 145 ticks per second. So any time “ticks” are mentioned, it means 1/145th of a second. These are always whole numbers. Also note that delays, which are stored as floating point in the data, are actually multiplied by 145.5 and then truncated when converting to ticks. This means that converting from seconds to ticks slightly overestimates the delay length. This is done to essentially “round up” - since rounding down could make it impossible to make certain jumps, get through an area in time, etc. in low framerate situations if the timing is too tight.
Level Geometry INF Setup
Message Addresses
During level load, every named sector is added to a list of “message addresses” - this is basically just a way of mapping from sector name to level sector. This way the INF system does not have to search through the level data during load. This also means that the name to sector mapping is static beyond this point and cannot be changed. It also means that multiple sectors with the same name may not be handled intuitively.
Automatic INF Items
INF items are also automatically created for sectors with the “door” and “exploding wall” flags during level geometry loading. Those particular “special” INF types automatically create the necessary stops and maps to one of the 11 core elevator types. Explainations of what those terms mean can be found in sections that follow.
Loading and Parsing INF
As mentioned above, the INF data for a level is loaded from a separate text file. This file is parsed during load which creates links, elevators and triggers as internal structures. Unlike an actual script language, there is no interpreter or VM, though there is an equivalent in the form of an update function.
Links
Sectors and walls have pointer to an optional list of “InfLinks.” These are exactly what they sound like - they link a sector or wall to an INF element, such as a elevator or a trigger. These link to the source (the sector or wall), to the target (the INF element), and they also hold information about when the link can be used. This comes in the form of an entity mask and event mask. I will talk about these more later, but briefly the event mask tells us what action or event triggers the link and the entity mask tells us what type of thing can trigger the event. This might be an enemy crossing a sector wall from the front - these masks decide if this event by the enemy entity can trigger the link. Triggering the link then causes that event to be passed on to the target elevator, trigger, or sector as appropriate.
Triggers
The main purpose of Triggers is to trigger other INF items. Which seems redundant but makes sense. When a player interacts with a switch, the player controller code doesn’t know what to do next. It just decides if the associated link (the one attached to the wall with the trigger) can to triggered. From there the Trigger itself will recieve the “nudged” event from the player entity. The trigger also has a list of links, built from the clients specified in the INF data, that connect it with the trigger targets. The trigger has an event that it sends, which is usually different than the one it received. By default this event is 0 - basically meaning it should be ignored. The trigger also has a “message” that it passes along which tells the elements being triggered what to do. You can specify what message to send, though the default is “m_trigger.”
However, in addition to sending messages to clients, a trigger can also change the texture frame of its source wall (like a switch), display a text message to the screen and play a sound.
Elevators
Elevators are the workhorse elements of the INF system. There are 11 core elevator types:
- move ceiling - moves the sector ceiling height.
- move floor - moves the sector floor height.
- move offset - moves the sector second height.
- move wall - translates sector walls horizontally in the direction derived by the angle variable.
- rotate wall - rotates sector walls around the center variables by the angle variable.
- scroll wall - scrolls the sector wall textures in the direction specified by the angle variable. Note each wall section has separate flags to determine what parts are affected.
- scroll floor - scrolls the sector floor texture, again in the direction defined by the angle variable.
- scroll ceiling - scrolls the sector ceiling texture by the direction defined by the angle variable.
- change light - change the sector light level.
- move fc (move floor ceiling) - moves both the floor and ceiling heights of a sector together by the same amount.
- change wall light - changes the light offset of any walls in the sector with the correct flag set.
Of course there are many more types presented to the mapper, such as door, door inverse, inverse, basic_auto, and more. These all map to one of the 11 core types, but some of these change flags and settings or automatically generate stops for common types. This also allows doors and exploding walls to be specified as sector flags when creating levels, greatly simplifying the work flow.
An elevator consists of stops, these are similar to key frames - these determine how an elevator changes. Each stop defines a value, which may be relative, and this value determines how much the sector moves, changes light level or other value. What it does is determined by the type of elevator. In addition stops can have a delay - this tells the system how long the elevator should pause before going to the next stop. Some delay values, such as Terminate, tell the elevator to shut down for good.
At each stop an elevator can also play a special sound (“page”) or send out messages to other INF elements, sectors, or itself. These messages range from enabling or disabling other elements, changing to the floor or ceiling texture of a sector based on another sector, changing the adjoins of one or more pairs of walls, sending another elevator to the next, previous or specific stop, and more.
In-between stops, the elevator changes its value, moving it towards its next stop and updates the sector based on the type of elevator. This is where the heartbeat of the system comes in.
Elevator Update
The core task of the INF system is an update function that runs as often as necessary - or that was the plan anyway. Basically the code takes a fair amount of effort to determine when the next update time should be and only update as often as possible. Unfortunately, since some elevator is almost always active somewhere in a level it really runs almost every frame (for TFE it will run every frame to simplify the code slightly without changing the functionality).
Whenever the update runs, it loops through all of the elevators, determines if it should be updated - its “next tick” being less than the current tick - and then updates its value based on the associate elevator update function. How quickly this value gets updated is based on its speed, another variable you can set in the INF data. If you don’t set it, every elevator has its own default. A speed of zero (0) causes the elevator to update to the next stop instantly.
When the elevator reaches the next stop, the page is played and any messages are sent. Then the “next tick” is updated, it is “current tick” + delay. A special value is written if the elevator is to stop until triggered. If the elevator is complete (delay is complete or teriminate), then it is deleted, as are any links pointing to it.
Final Words
This was a fairly brief overview and skimped on details, but that will be rectified in the future with complete INF documentation. It is a complex system with a lot of moving parts, but ultimately it isn’t hard to use or understand when you get used to it.
The TFE level editor will simplify the creation of INF with a tool dedicated to the task (already partially complete) and in the future INF elements will be able to call script functions to add greater flexibility the TFE-based mods. But for now, the INF system nears completion finally unlocking the rich set Dark Forces level mods.
18 Jan 2021
As the first blog post of 2021, this will cover several topics. First, an update regarding the progress of The Force Engine. That will be followed by TFE plans for 2021 - the year of the first fully playable release (hopefully), and finally the first “experimental” build and what that is all about.
Progress
The main focus has been reverse-engineering and integrating the original INF-system to replace the code currently available in TFE, which - despite being mostly functional for the original levels - was basically placeholder until now.
The reverse-engineering progress is still ongoing and will, most likely, be for a few more weeks. My goal is to finish the INF reverse-engineering and integration by the end of Feburary, at which point proper testing of the Classic Renderer and INF can begin across the original levels and Mods. This will form the foundation for the rest of the year as we speed towards Dark Forces completion (though TFE will still have a ways to go after the first full release, with Outlaws, mod tools, and various improvements and enhancements).
Inf Debugger
In order to visualize and test the INF system at work I have also started the implementation of the INF debugger.
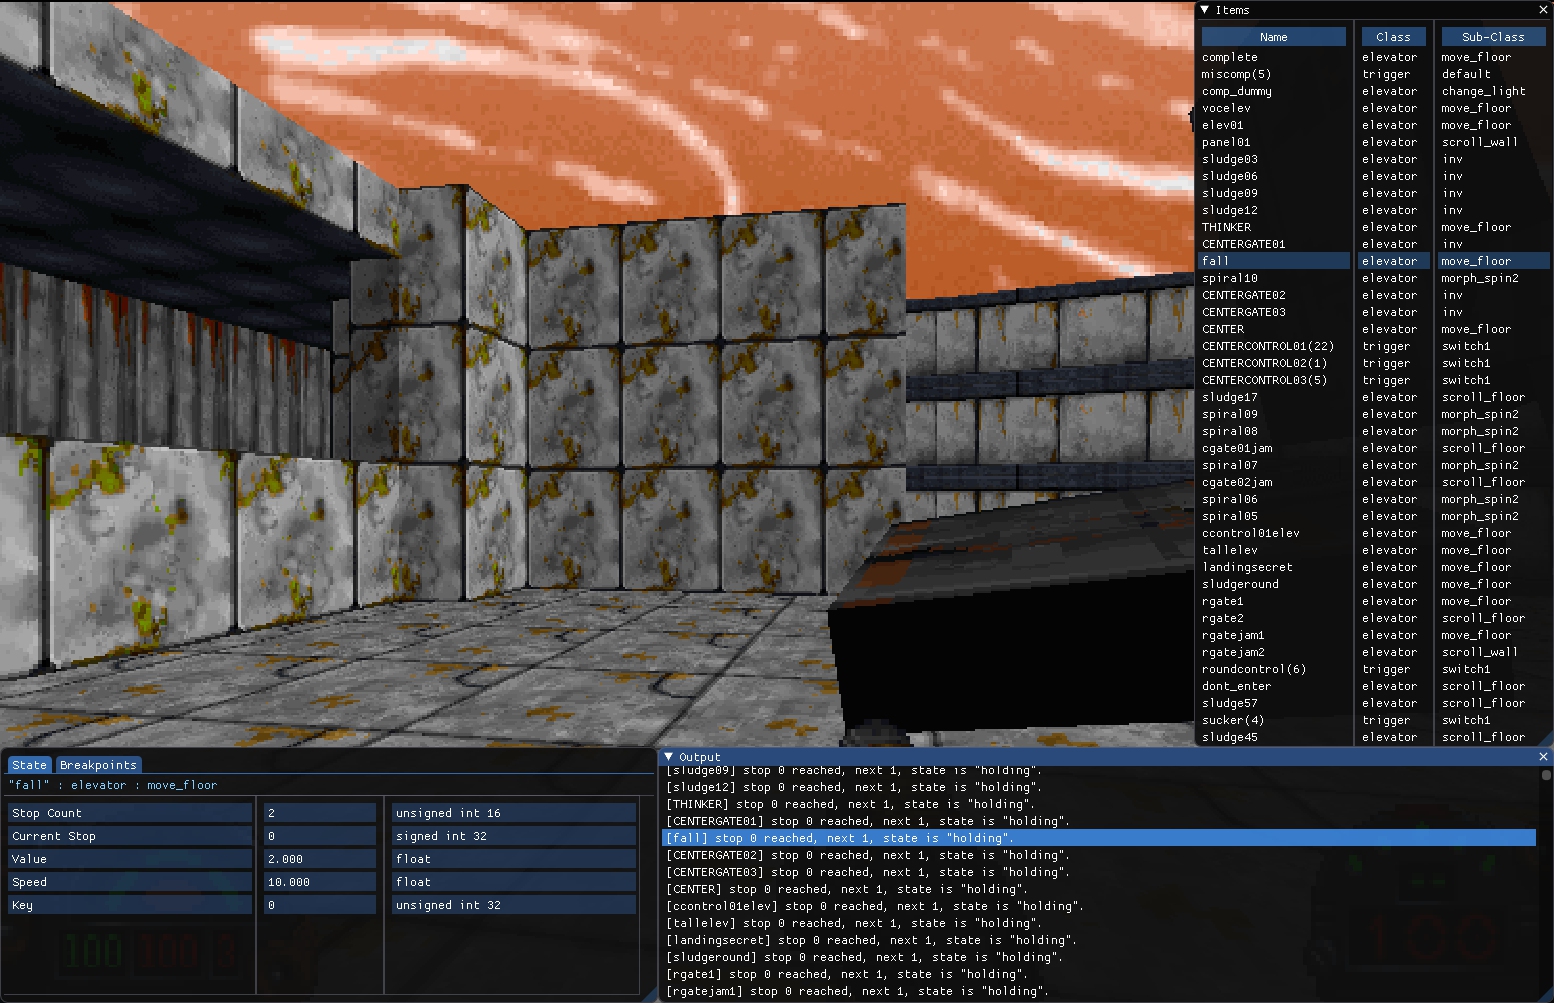
At any point while running a level you will be able to hit Alt+F10 to bring up the INF debugger. The right window contains a list of all the INF items in the level. You will be able to select whether to show all items, active items and other options. In addition you will be able to click on the Name, Class, or Sub-Class buttons to sort by those categories. Clicking on any of the items will select it, and it will be visible in the Inspector window.
The Inspector window, on the bottom left, allows you to see the current state - such as the current stop, speed, key, flags and more. The values of most of these items are editable in real-time, in order to facilitate testing. Not all values will be shown (there are many values) - so you will be able to add and remove variables from the view, though some will likely always be visible. In the breakpoints tab, breakpoints can be set on various events such as reaching a stop, a variable changing, the item being activated, etc..
This is not shown yet but you will be able to pause the game, needed when breakpoints are hit, and single-step through INF commands. Finally, as the INF system operates, messages are sent to the Output window, on the bottom right, so you can see what is happening. There will be some sort of filtering available, though this has not been implemented yet. If you click on a message in the Output window, it will select the INF item so you can inspect it.
This is still a work in progress and will get fleshed out as I work on the INF system. This is great for me to debug the system but should also be useful to level authors and modders trying to figure out why their INF is not working as intended, or just to check correctness.
2021 Plans
The goal for The Force Engine project is to release version 1.0 of TFE this year, which means that TFE will be a full replacement for DosBox when playing Dark Forces. At that point the tools will still be mostly in a preview state, though the level editor should be usable, if not feature-complete.
INF & Classic Renderer
The next main test release will be the finish INF & Classic Renderer release - where levels should look correct compared to DOS, including Mods, and the level functionality - except where it relies on Logics or AI, will be fully accurate. The goal is to have that release done around the end of Feburary.
The next main test release will be focused on setting up a CMake build system and making sure TFE builds and runs on Linux and OS X platforms. The GitHub projects list marks “Metal” support as required, though I may put this off until after the first release.
Player Control & Physics
The next test release will see Player Control, Physics, Collision detection reverse-engineered and integrated. Some of this work has already been completed. The goal of this release is to make sure Dark Forces plays and feels authentic.
Logics & AI
Finally, this release will get some real gameplay finished. Logics, such as pickups, and AI should be fully functional after this release, including bosses. The Logics will be scriptable and most likely written as scripts (as the placeholders are now).
Weapons
In this build, weapons will be finished and fully working. This means using ammo, updating the HUD, proper effects in the levels, proper damage and damage falloff. This test release will also cover auto-aim and System UI options to control how much auto-aim you want while playing (from “Dark Forces” to “None”).
Dark Forces UI
In this test release the Dark Forces UI will be finished, including the PDA and cutscenes.
Beta 1.0 Release
Finally the TFE 1.0 Beta release.
Post-Release
Once the initial release is complete and the important bugs worked out, the focus will shift to tools - including the initial support for Outlaws levels in the level editor. During this phase features that were added to the Jedi Engine for Outlaws will be ported over - such as slopes and dual adjoins - and made available for Dark Forces mods. Then the focus will shift again to Outlaws. This is about as far ahead as I want to plan, so there will be more updates on Outlaws and tools as we progress through the year and beyond.
Experimental Builds
The last topic will be experimental builds. I have a variety of possible features and enhancements in mind for The Force Engine, many of which are rendering related. The idea behind experimental builds (and the associated experimental branch) is to be able to take a break from the current work, such as INF reverse-engineering, to implement one of these experimental features and then release an Experimental build for people to play with.
Experimental Features may not make it into master, depending on the results, performance and reactions - though I suspect most will. Experimental Features won’t be “production ready” - meaning they may have bugs, low performance or missing features. It is meant as proof of concept, fun breaks from the main work. The features that make the cut will eventually be moved into master and finished, when the engine is ready for the feature.
The first experimental feature is . . .
Voxels
I couldn’t resist implementing voxel support as the first experimental feature. As mentioned above, it isn’t ready for production - and won’t be for some time, definitely not until after the Classic Renderer / INF test release is out, if not longer - but is a nice proof of concept that you can try out yourself. For this Experimental Build, I embedded Dzierzan’s voxel pack (https://github.com/Dzierzan/Dark-Forces-Voxel-Pack) and a patch to Secbase to show some of the voxels.
How to Get the Build
You can get the current experimental build from Downloads on The Force Engine site. Scroll to the bottom, under experimental builds.
How to Run
The setup is the same as normal, unzip the build into a new directory and then run TheForceEngine.exe. You will need to setup your Dark Forces data, if it is not auto-detected. If you have run TFE before, it should just work. Next startup the first level, Secbase. Make sure to either run in widescreen or at higher than 320x200 - otherwise the voxels won’t render.
Once in Secbase, open the console (~ on US keyboards) and type EnableExperiment. Hit the same key again to raise the console.
What is implemented
- Conversion between VOX and the internal format. Proper conversion and saving of the TFE format will happen once the feature is moved to master.
- Rendering of opaque voxel objects.
- Basic console commands to place voxels and to save and load placements.
- Some debugging console commands.
What is missing (things that need to be finished once I get back to the feature to make it “real”)?
As you can see from the list, this is definitely still in the experimental/not production ready phase.
- Proper conversion into the TFE format.
- Animation support.
- LOD support.
- Translucency support (obviously this needs this feature to be added to the engine first).
- Editor to import frames, set scale values, etc.
- Support for arbitrary pitch and roll, needed to support software voxels in the perspective renderer.
- Better handling of palettes (MagicaVoxel mangles the order - meaning the colors have to be remapped).
- Performance improvements (the techique is not fully optimized and may be slow on some machines).
- Quality improvements, the texturing/edge quality leaves something to be desired at lower resolutions due to incorrect sub-pixel precision.
- A few minor bugs, such as sorting breaking if standing inside or over the top of the object.
There are several console commands available to test things out:
raddVoxel
raddVoxel filename base offset upVector Add a new voxel object. This pulls the object from Mods/voxels.zip. If you want to add or change voxels, edit the zip file. There are several options:
- filename: the path to the voxel, starting from the zip file. For example, decorations/table.vox
- base: ceil or floor, default floor. This determines if the voxel is floor or ceiling aligned. Use ceiling alignment for things like hanging lights and chains.
- offset: offset in units from base, negative values go up.
- upVector: y or z, default y. This is the up vector of the original asset. For some reason a few of the voxel models use Z up instead of Y, such as table.vox. In those cases specify Z to get the correct look.
Examples
- raddVoxel decorations/table.vox z - the voxel is decorations/table.vox, the up vector is Z.
- raddVoxel enemies/intdroid.vox -4 - the Interrogation Droid, moved 4 units from the floor.
- raddVoxel decorations/redlit_a.vox ceil - the redlight voxel aligned to the ceiling.
rsaveVoxels
rsaveVoxels filename Saves a level patch with the voxels you have setup. It will be saved into Mods/filename.
rloadVoxels
rloadVoxels filename Loads a previously saved level patch, assuming you already typed EnableExperiment.
rclearVoxels
There are no arguments, this command simply clears all voxels from the level.
rvoxel_showDrawOrder
rvoxel_showDrawOrder enable - animates the draw order of the voxels if enabled.
- rvoxel_showDrawOrder 1 - enables the debug animation.
- rvoxel_showDrawOrder 0 - disables the debug animation.
rvoxel_step
rvoxel_step - if voxel_showDrawOrder is enabled, this stops the animation and steps forward 1 column. You can specify the number of columns to step.
rvoxel_continue
rvoxel_continue - this resumes the draw order animation.
Screenshots
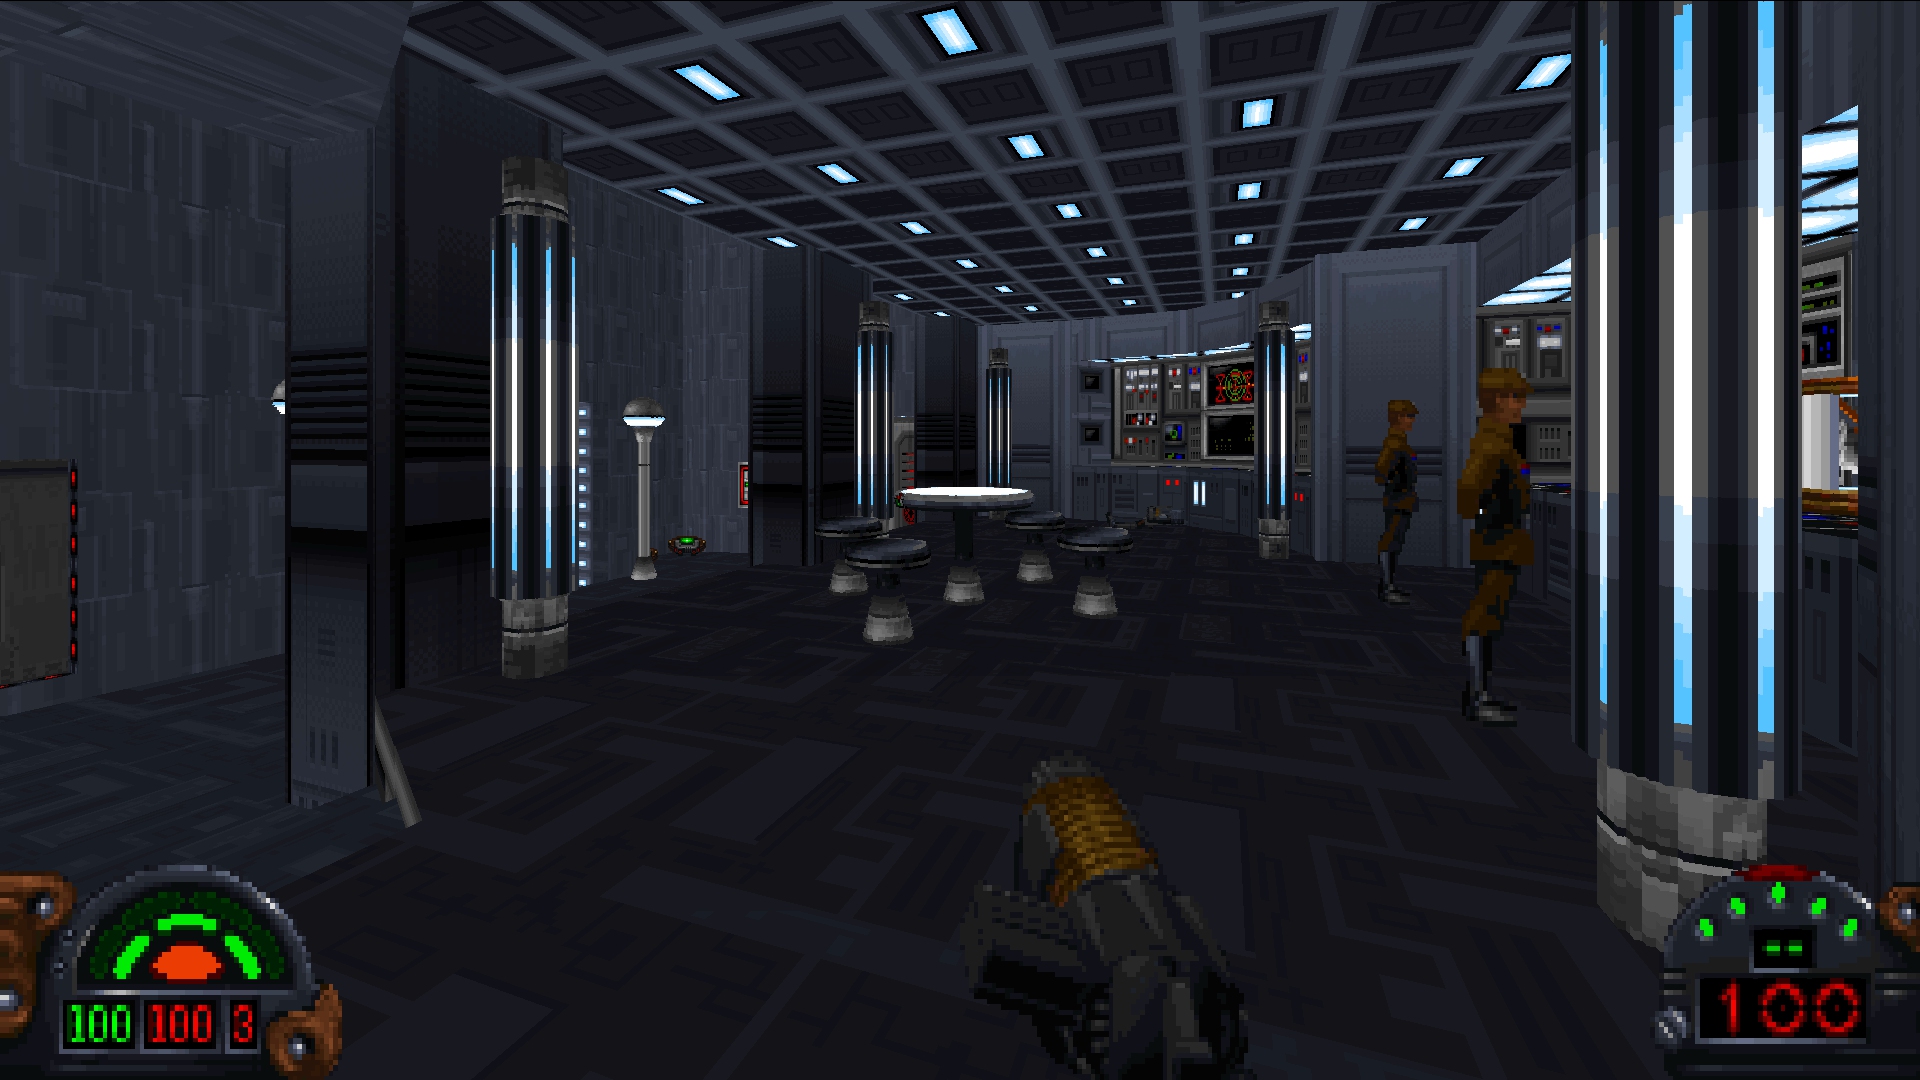
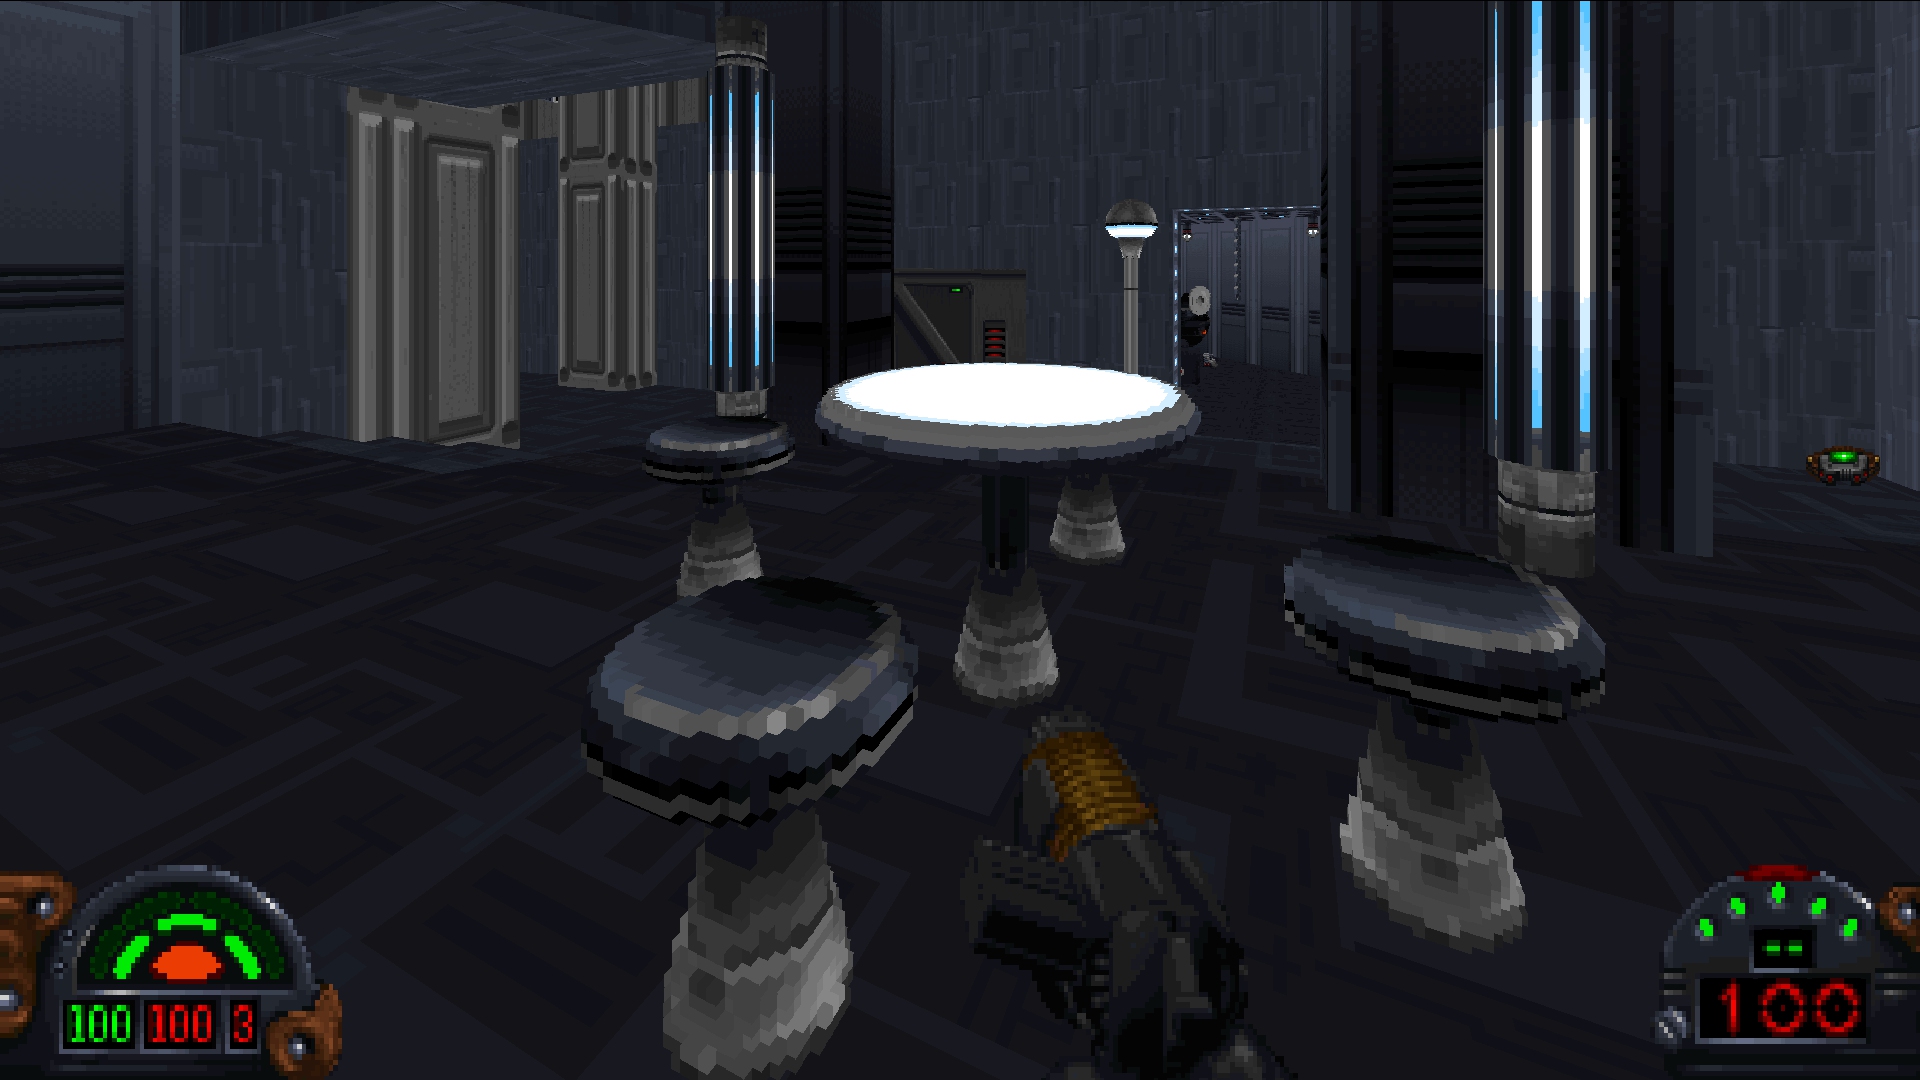
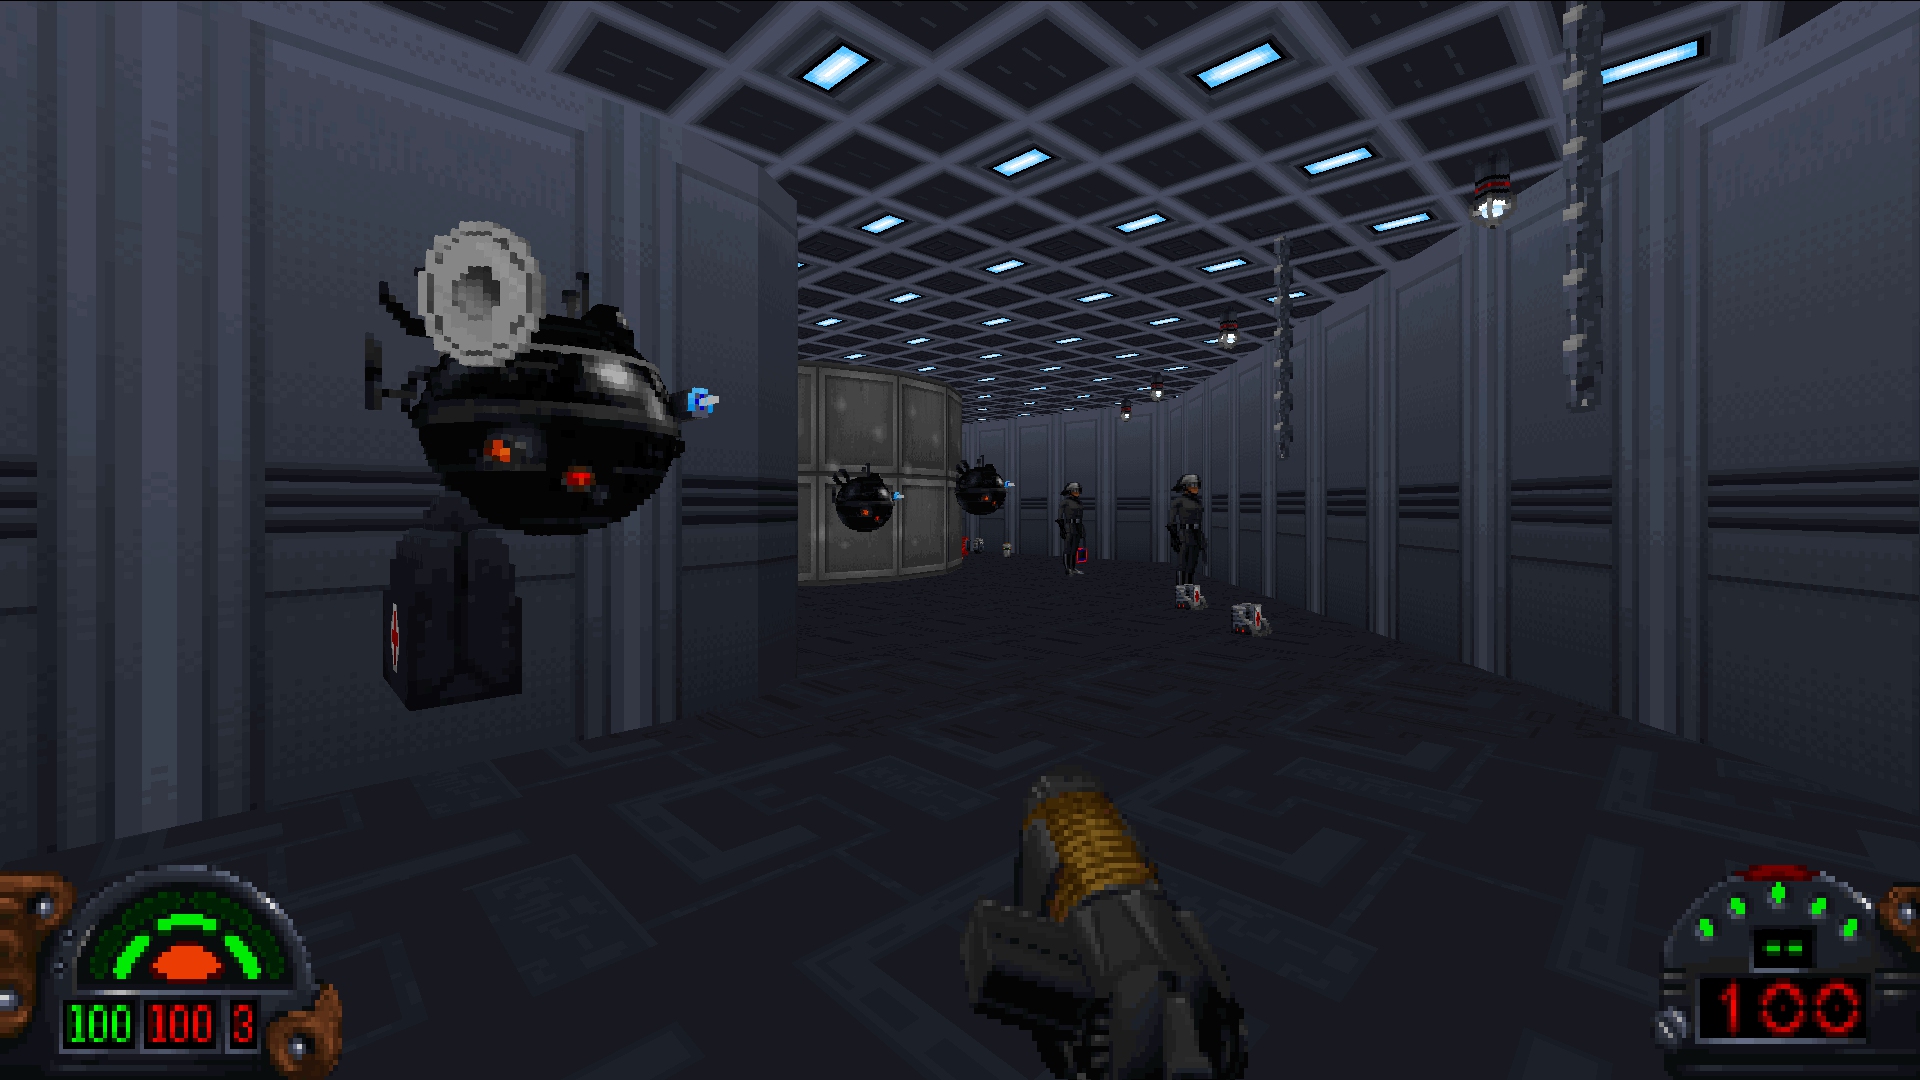
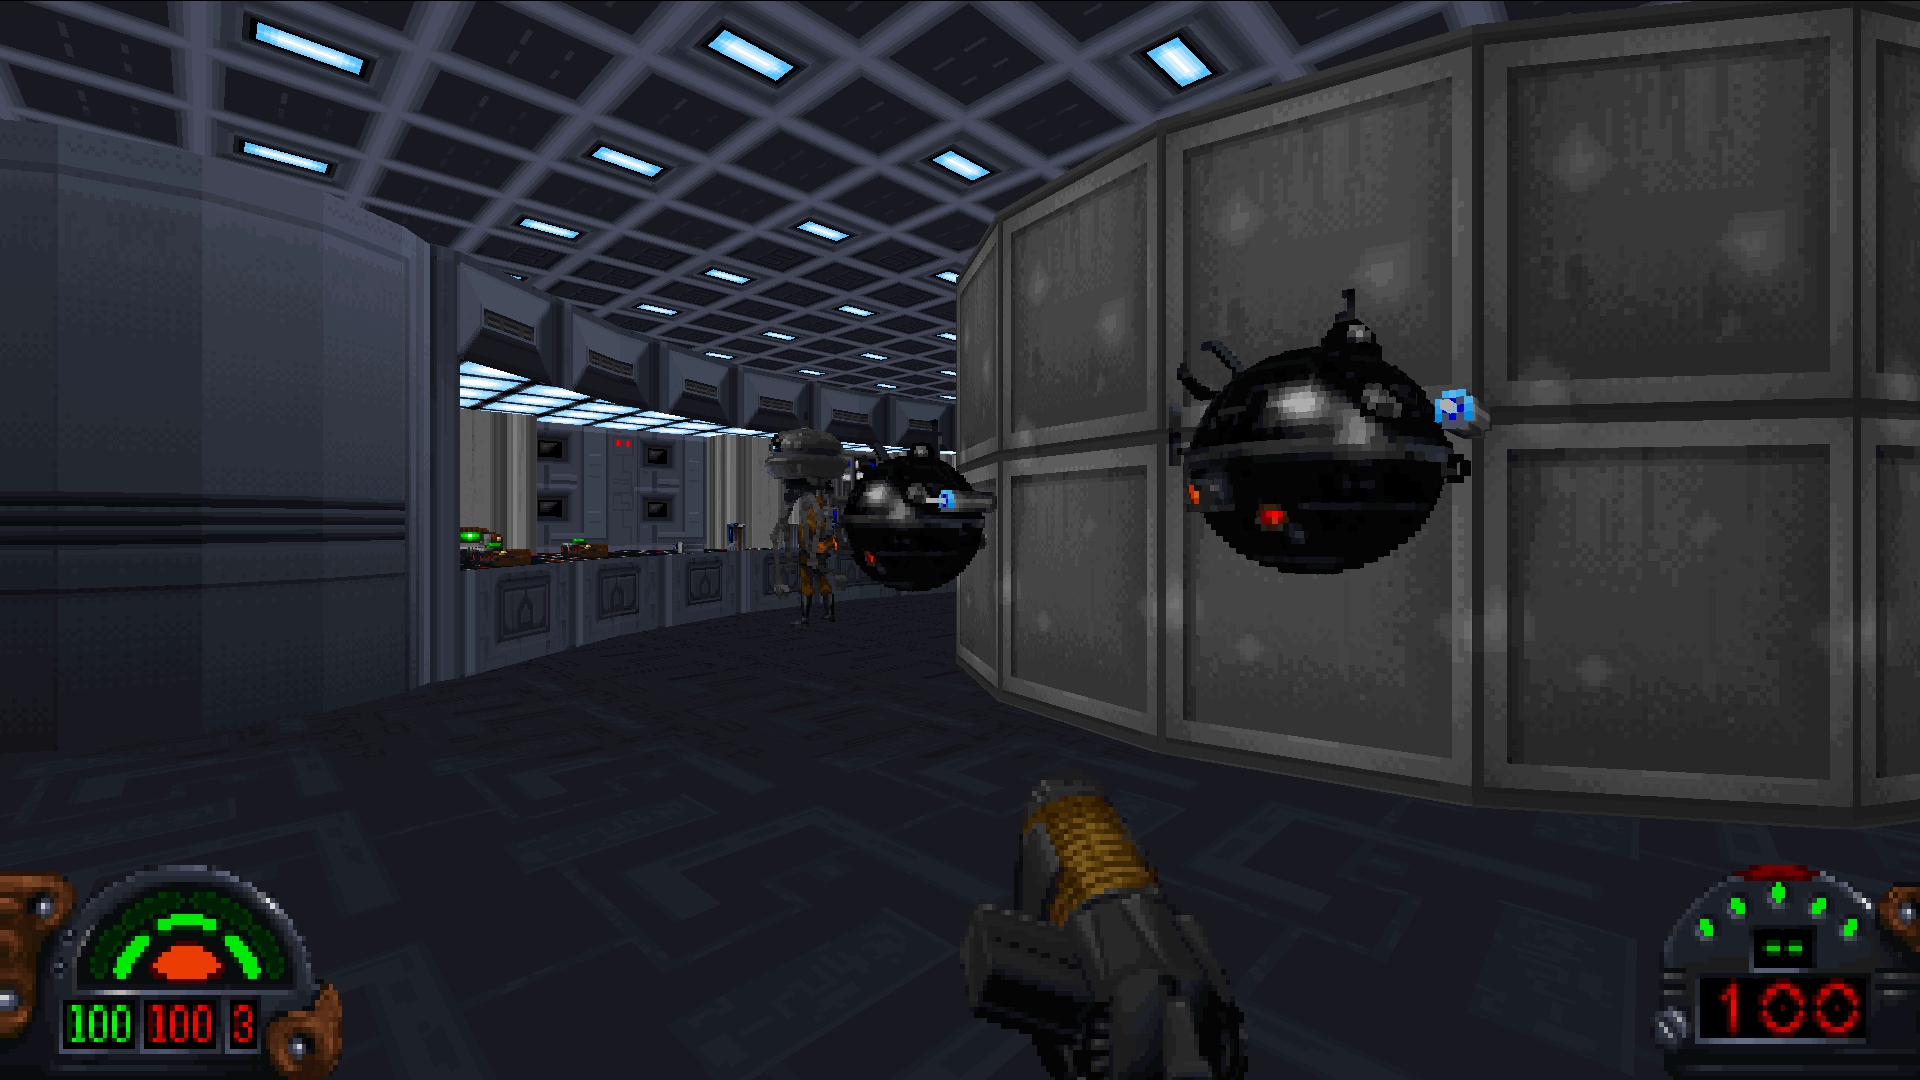
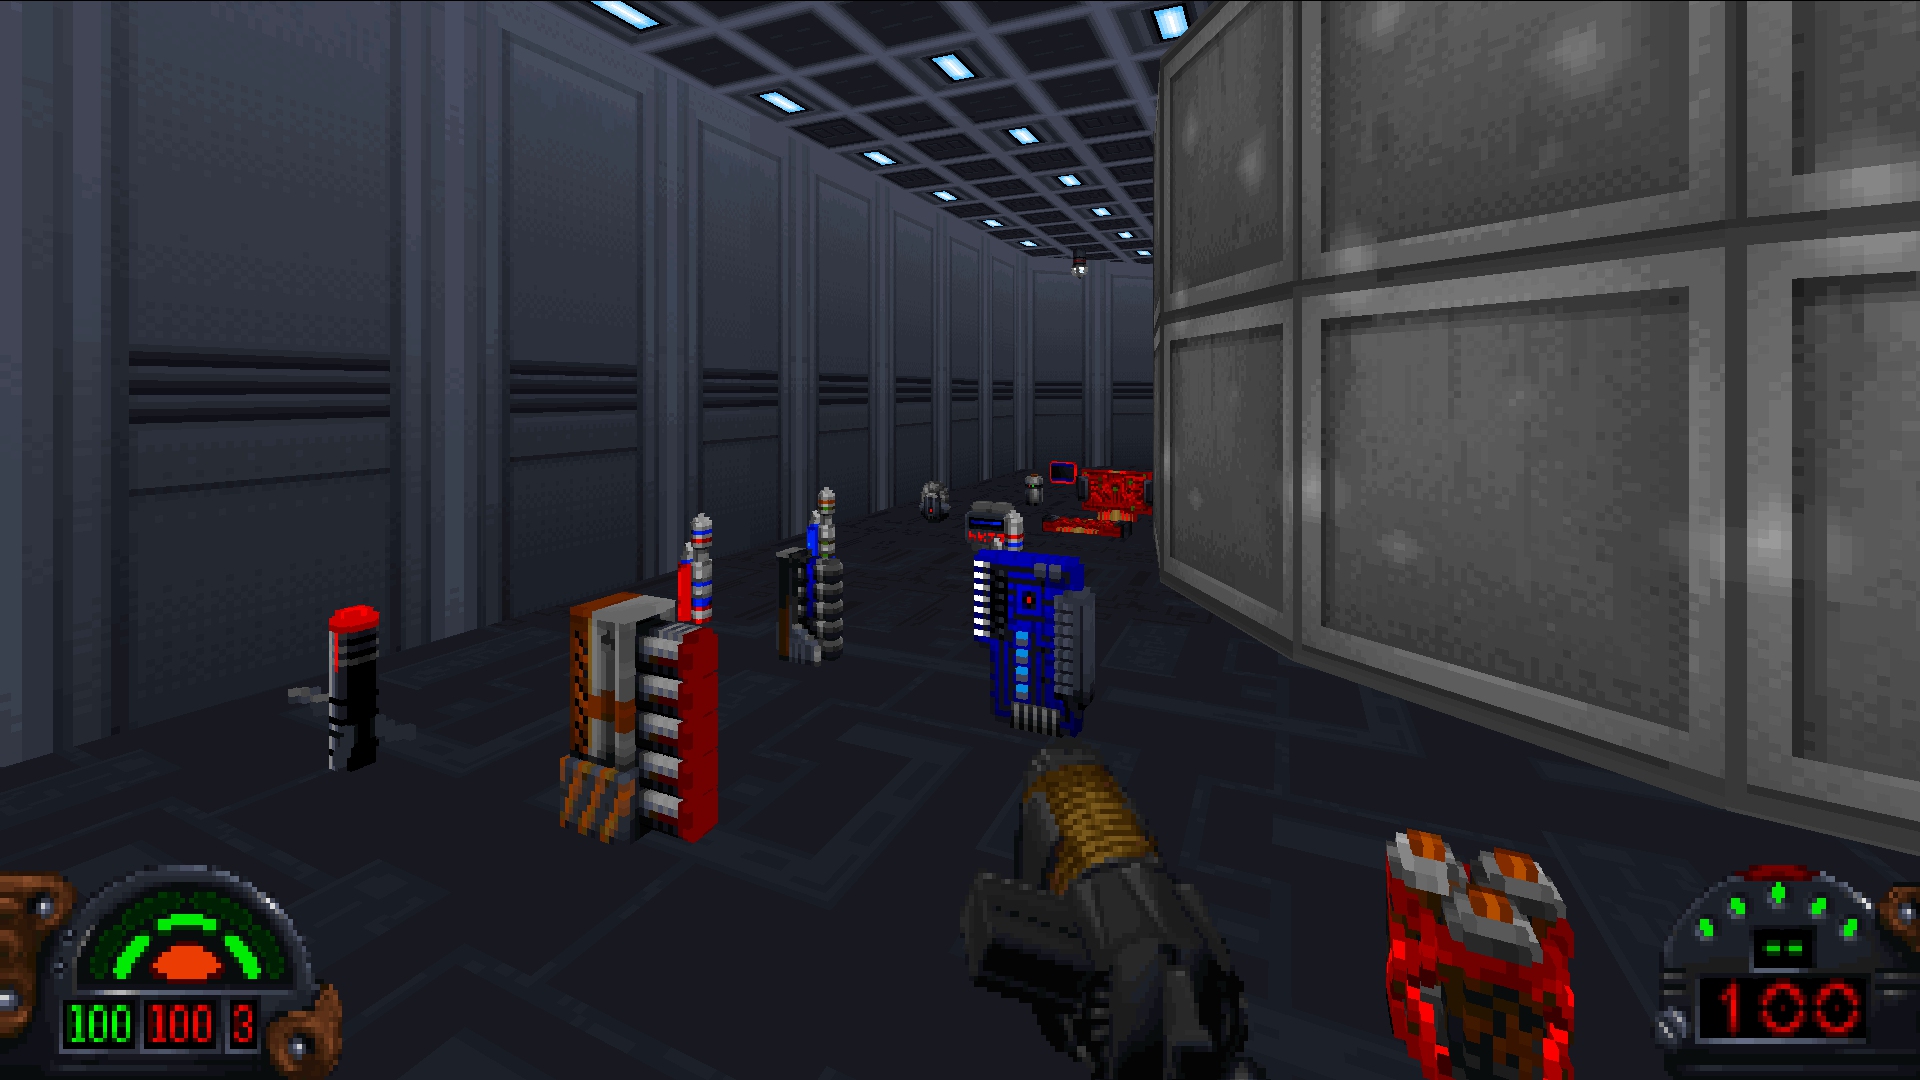
Implementation Details
I implemented the voxel rendering code from scratch in order to fullfill some requirements, which I think all new features and improvements in TFE should share:
- Decent performance in the software renderer - while this feature can certainly be improved in this regard, in general it performs well consuming 1-3 ms per frame on 1080p. This is inline with other features, such as 3D objects.
- Follows engine patterns - the feature should follow engine patterns, such as favoring column rendering and should mesh well with the engine.
- Proper sorting - continuing with the integration, the feature should sort properly with sector geometry and other objects. This voxel renderer uses the 1d zbuffer to sort with walls, fits into the same sorting system as other objects, culls and clips against the view window (needed for adjoins), etc.
- Proper “look” - meaning the results should be consistent with the rest of the game and feel like it belongs.
I will write up more details about the algorithm in the future, but here is the quick overview:
- Data is organized and rendered as voxel columns, compressed using the same RLE algorithm as WAXes, modified to fit the data.
- RLE data basically splits voxel columns into transparent runs which are skipped and opaque runs that form “sub-columns.”
- Voxel-column rendering order is determined algorithmically based on the view vector, meaning no sorting is required for back to front rendering.
- Sub-columns may have vertical caps rendered depending on the camera position, but at most one cap per sub-column will be rendered.
- Each voxel has a 4-bit adjacency mask, which is used to avoid rendering faces shared by multiple voxels.
- Sub-columns are further sub-divided based on the adjacency mask and the final contiguous voxel columns are rendered as textured lines using a column renderer very similar to sector walls. No per-pixel transparency testing is required.
Interior voxels are removed, interior faces are skipped using the column sub-division method mentioned above and voxels are rendered as voxel-columns instead of as individual voxels.
Next Experiment?
I have ideas for future experiments but they will have to wait, the focus has returned to the INF reverse-engineering, integration, and the debugger.
27 Dec 2020
The 3D Object rendering system, derived from the original DOS code, is now working in both 320x200 (fixed-point sub-renderer) and at higher resolutions and in widescreen (floating-point sub-renderer). This completes the Classic Renderer reverse-engineering and integration project, allowing me to move on to reverse-engineering the INF system.
3D Object Renderer
The 3D object renderer in Jedi is basically an entire, mostly self-contained rendering system that integrates fairly well with the sector system. Models can either be drawn as points, though TFE turns these into quads at higher resolutions in order to maintain the same screen coverage, or as polygons. These polygons can either be triangles or quads, though there is little difference between the two forms in practice.
Each polygon can be shaded with one of five (5) variants: Color vertex shaded (“GOURAUD”), Color flat shaded (“FLAT”), Textured and vertex shaded (“GOURTEX”), Textured and flat shaded (“TEXTURE”), and finally textured as a floor or ceiling (“PLANE”). In the original executable, there are four (4) different clipping function variants and five (5) different polygon draw variants resulting in thousands of lines of C-code. In TFE, macros are abused in a method most likely similar to the original code to reduce these down to a master clipping routine, which is then instantiated four times using defines and two polygon rendering routines - one to handle the “PLANE” case and one to handle every other case.
For TFE integration, I have split the original rendering code into several components to make following and maintaining the code easier. I will go through each component below.
3D objects in Jedi have a 3x3 rotation matrix and a 3D position. The main renderer generates a 3x3 camera matrix for use by the 3D object renderer. The object position is transformed into viewspace and the object/camera matrices are concatenated to build a single local to viewspace rotation matrix. The final matrix (“transform matrix”) and viewspace offset (“offset”) are used from here on in all transformations.
Next, all of the modelspace positions are transformed into viewspace. It is at this point the transform and lighting stage end if the “MFLAG_DRAW_VERTICES” flag is set, which causes the object to be rendered as points. Otherwise, the model has a list of polygon normals that were precalculated on load and these are now transformed into viewspace. These normals will be used later for backface culling.
Finally, if vertex shading is required - that is any polygon uses “GOURAUD” or “GOURTEX” for its shading - the vertex normals, also computed on load, are transformed into viewspace. Once that is done, per-vertex lighting is applied.
Lighting
The Jedi Engine supports multiple directional lights, each with its own direction and brightness values. For Dark Forces this is setup as 3 directional lights, each in a cardinal direction (X, Y, Z). The lighting contribution for each light is summed up for the vertex and then the sum is multiplied by the “sector ambient fraction” - which is the fraction of sector ambient compared to the maximum. The maximum ambient light level for any sector is 31 (0x1f), so a sector with an ambient of 22 would have a value of approximately 0.71 for its “sector ambient fraction.”
The next step is to apply lighting from the camera light source, such as the headlamp (by default this is turned off). This uses a special light source ramp that is embedded in the level’s color map. This is a 128 entry table, indexed by the current depth: depthIndex = min( floor(z * 4), 127 ); the table itself is inverted. The final value of the camera light for the current depth is: MAX_LIGHT_LEVEL - (s_lightSourceRamp[depthIndex] + s_worldAmbient). Normally this is done per-column or scanline, but in the case of vertex-lighting, it is done per-vertex.
The final step is to apply a falloff value based on distance, similar to the distance-based darkening in Doom or Duke3D. The current depth (Z) value is scaled and then subtracted from the intensity calculated so far. However to avoid the brightness changing too much, the overall lighting value is clamped to a range of [Sector Ambient, 0.875*Sector Ambient].
Backface Culling
If the “MFLAG_DRAW_VERTICES” flag is set, then the model will draw the vertices at this point and then the object drawing is complete. Otherwise the renderer moves on to the next step - backface culling. This step has two tasks, 1) determine which polygons are facing towards the camera, which are added to a list of potentially visible polygons and 2) determine the average depth (Z) value for each polygon for later sorting and lighting if flat shading is used (“FLAT” or “TEXTURE”).
Once the potentially visible set of polygons has been determined, they are sorted from back to front based on their average depth value.
Polygon Drawing
At this stage, the code loops through the visible polygons, skipping past any with too-few vertices. Drawing each polygon requires several steps:
Setup
The required vertex attributes to draw the polygon are copied into flat arrays which will be used directly for several reasons: to avoid indexing into the larger list, and the arrays are mutable, allowing the clipping routines to change and add values without modifying the larger data set. If the shading mode requires texture coordinates, they are copied from the polygon into the array. If vertex shading is required, the intensity values calculated during the Transform and Lighting step are copied.
Clipping
Next polygons are clipped against five (5) frustum planes: the near plane (at Z = 1.0), left, right, top, and bottom planes. In TFE, float-point sub-renderer, the left and right planes are adjusted based on the (potentially) widescreen aspect ratio. The top and bottom planes are computed, taking into account the sheared perspective. Given a convex polygon as input, the result will be a complex polygon or be discarded - which happens when a polygon is fully behind a plane.
Drawing
If the polygon survives clipping, its vertices are projected into screenspace and then drawing can begin. If flat shading is used, a single color or intensity value is generated for the polygon using the procedure described in the Lighting section above. In this case the polygon normal and average Z value is used.
The first four variants generate columns while the “PLANE” shading mode generates scanlines. For the column drawers, the screenspace bounding box is computed for the polygon and then edges are scanned starting starting from the minimum X value. Matching edges are scanned backwards and forwards and as the code steps along the edges, columns are computed.
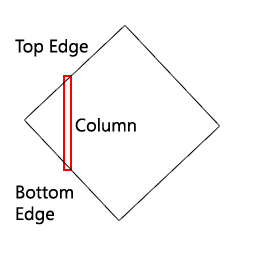 You can see in the image the “top edge” (forward) and “bottom edge” (backward). Given two edges, the code steps forward in X and vertex values are computed at each point by linearly interpolating along these edges. Once we move past an edge, the next one is found and this continues until we run out of edges.
At each X value, we setup a column. The Z (depth) value is the minimum of the Z along each edge. This Z value is compared to the 1D depth buffer previously generated by the sector walls in order to sort the columns with the walls. Columns are also clipped to the current vertical window and columns are discarded if they are outside of the horizontal window. Finally the vertex values are interpolated along the column using one of the specialized column drawing routines. If vertex shading is used for lighting, a screenspace dither value is used to breakup the edges between light levels.
The scanline case is very similar but rotated on its side (minimum Y instead of X, stepping along Y, etc.). The difference with the “PLANE” mode is that it doesn’t use existing texture coordinates. Rather, once the scanlines are generated, they are clipped and rendered in the same way as the flats (floors and ceilings).
Conclusion
This is obviously a very brief description of the rendering process, but as you can see it was pretty advanced for the time. Unfortunately the lighting rig was underutilized, they simply stuck with 3 axis aligned directional lights at full brightness. It might be interesting to make this functionality accessible by modders in order to enhance the mood of their levels. However, this lighting rig only affects 3D objects.
Screenshots
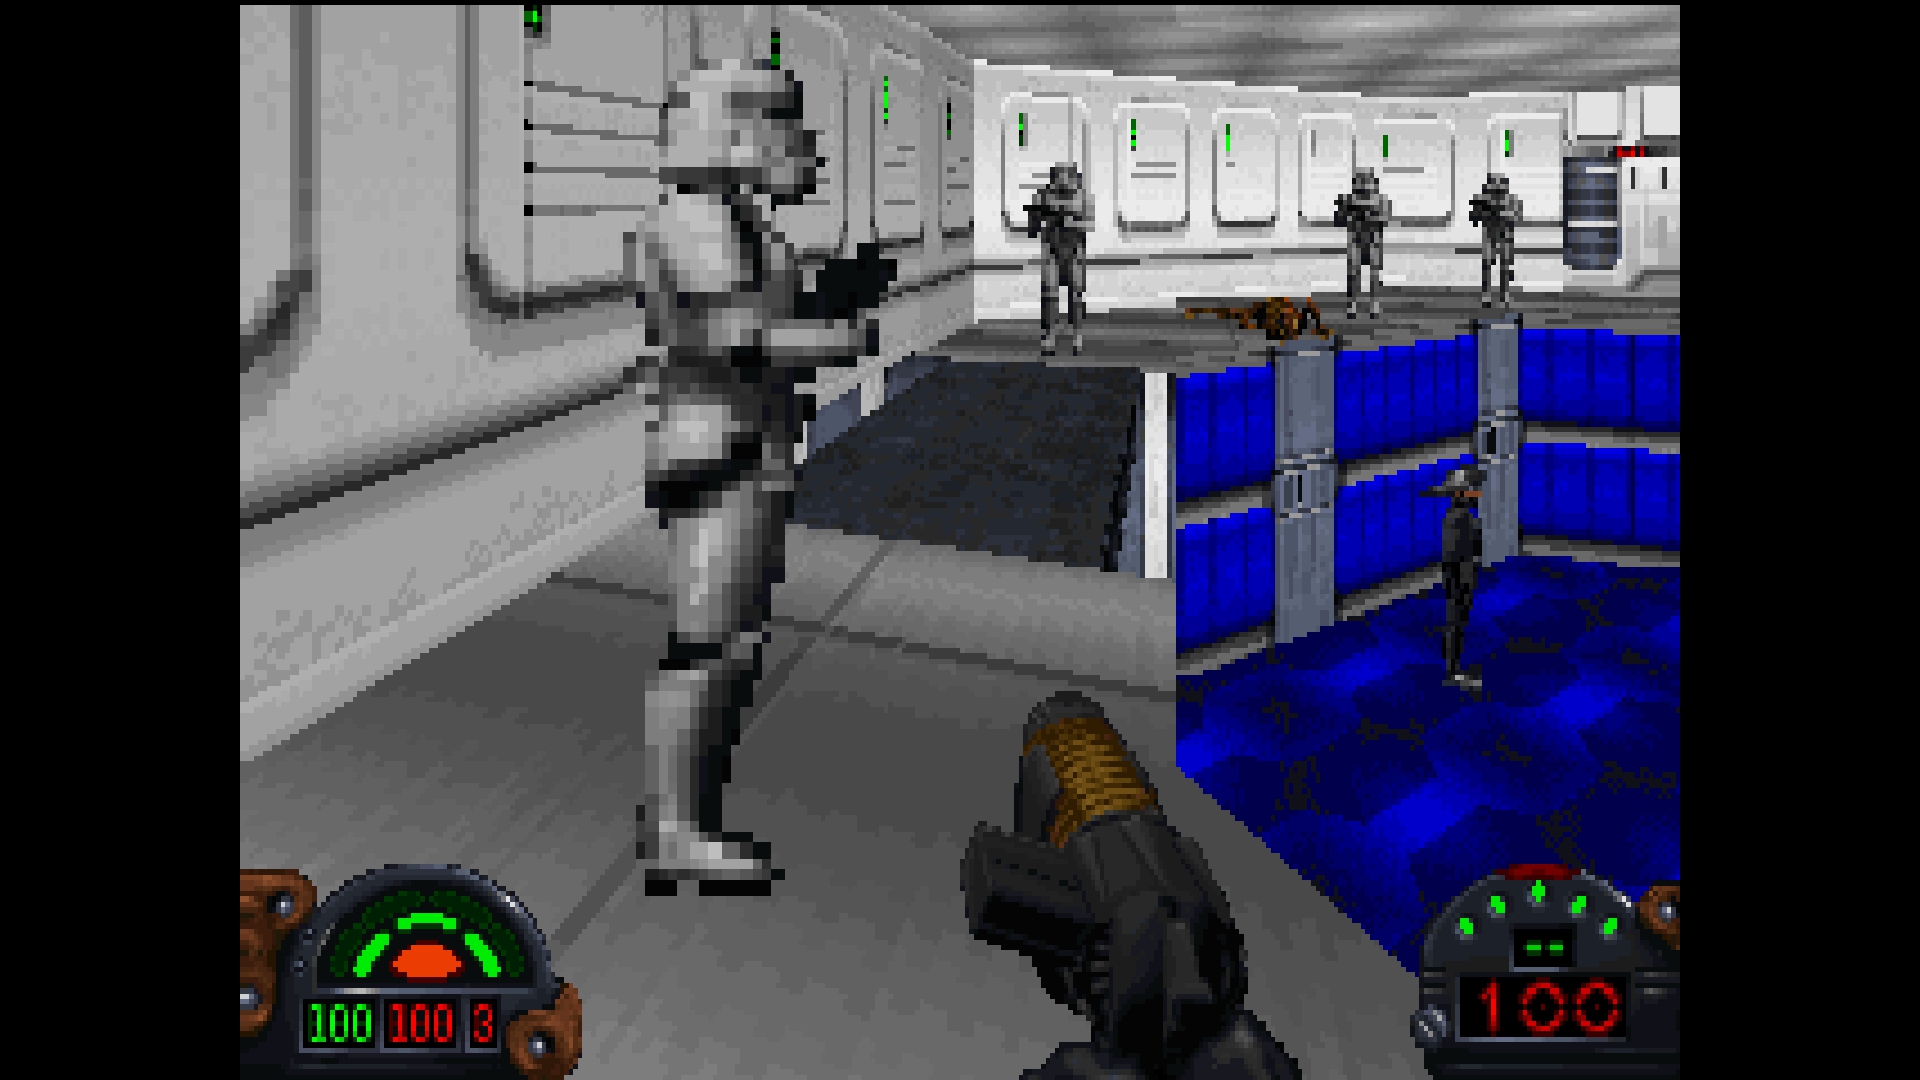
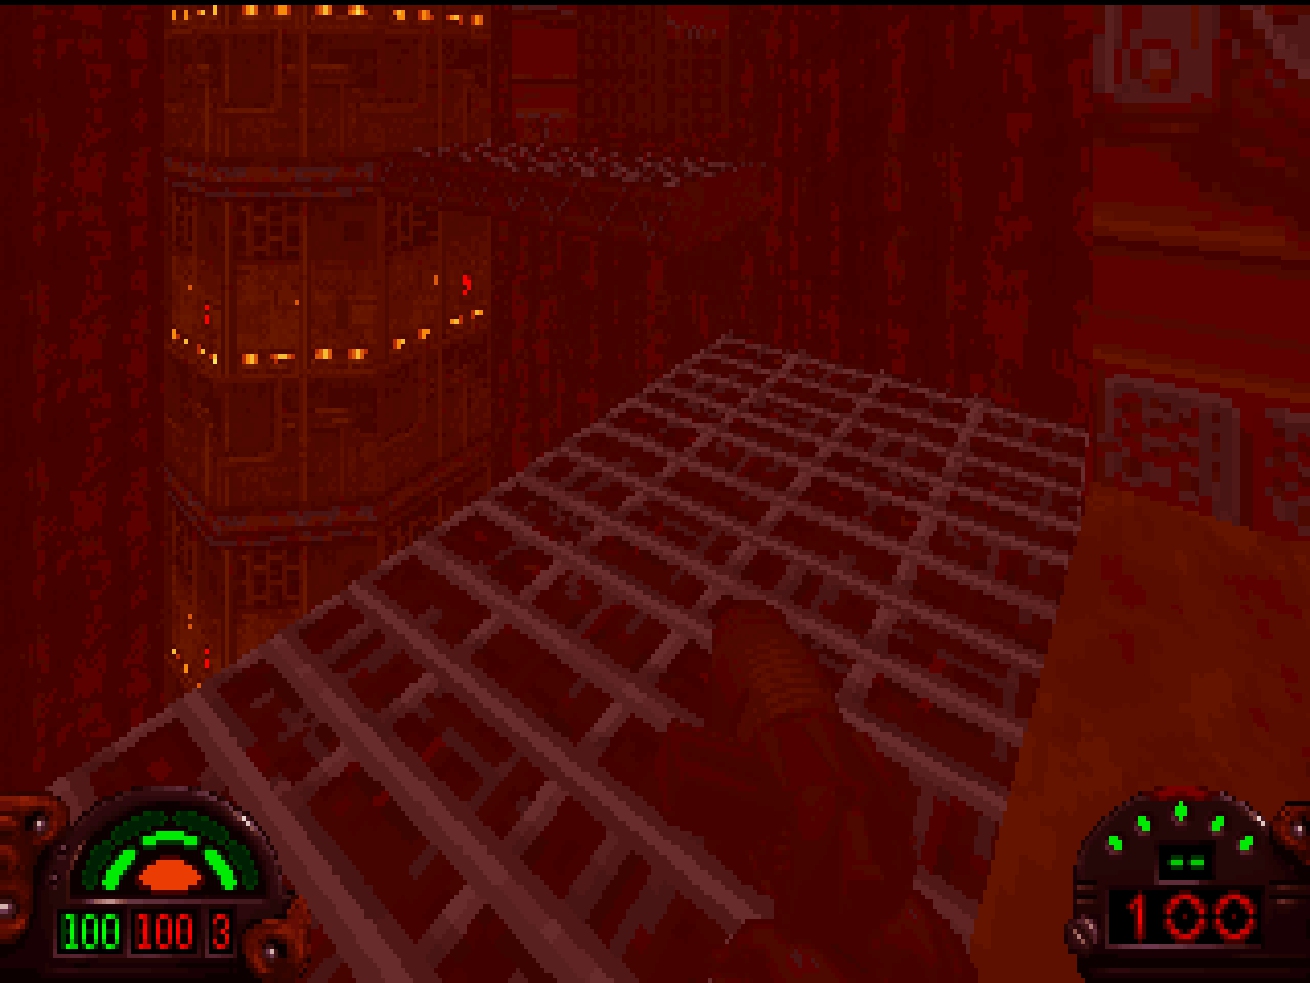
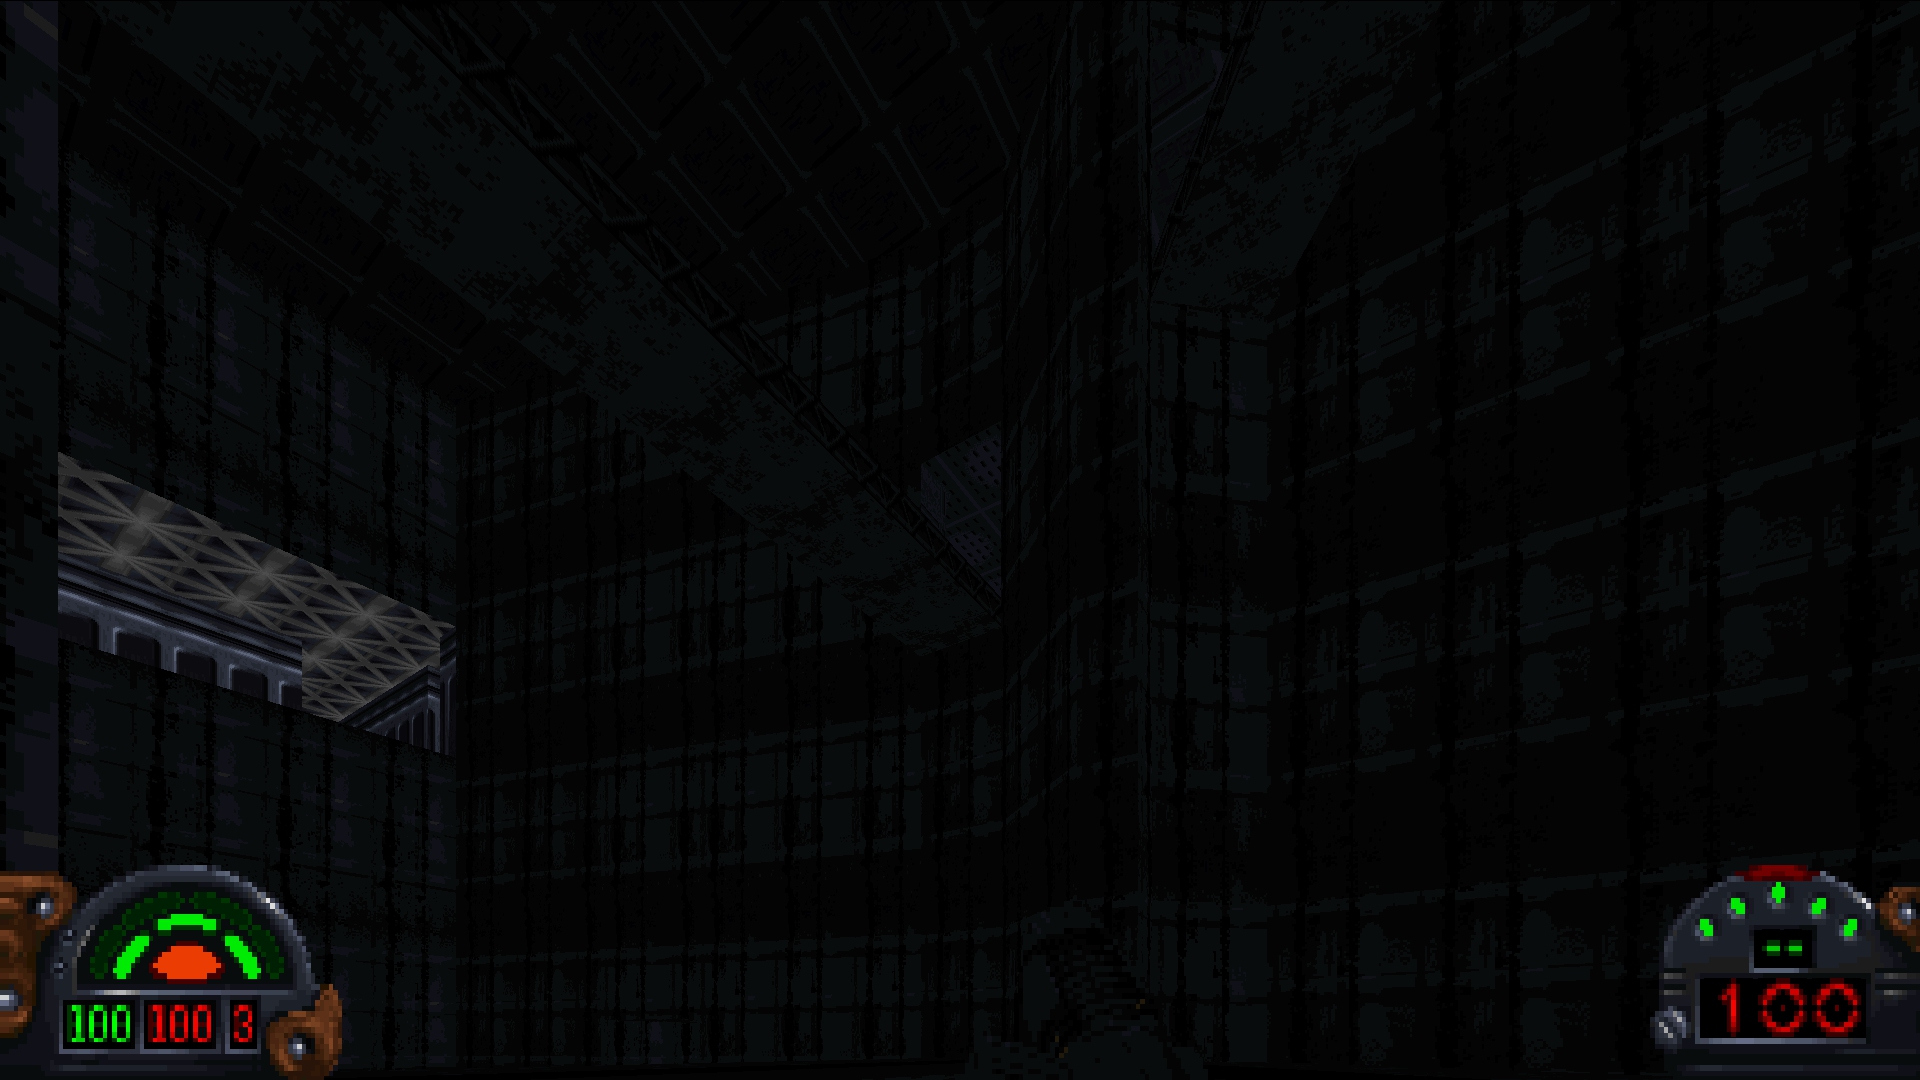
Issues and Bugs
The Classic Renderer will have bugs, the 3D object rendering code itself is about 3k lines of code and is less than half the size of the sector and sprite rendering code. However, some issues are due to the way objects are assigned and offsets are calculated as part of the INF setup. So, in other words, the Classic Renderer will not look 100% correct until the INF system is reverse-engineered.
Next Steps
The existing INF system in the test release was written based on my understanding of the INF system in the original game which obviously still has gaps. The next step is to replace that system with directly reverse-engineered code, which will be tested heavily with mods as well as the original levels. Once this is complete, almost all mods should be playable with TFE - with the caveat, of course, that the AI will still be placeholder (i.e. just stand around waiting to be killed) - but the correct events will fire.
21 Dec 2020
The Force Engine started out life as DarkXL 2 on December 21, 2019. Two months later, the project was renamed to The Force Engine, in order to encapsulate the intent of the engine, and put up on GitHub. After another month of work, about 3 months from the beginning, The Force Engine was announced on DoomWorld.
After reflecting on what went well and what could have gone better with DarkXL, the project was started from scratch. In order to build a framework and get things working, basic tools were written, including a level viewer (which is becoming the full level editor) and viewers for most asset types. I wrote a software sector renderer based on my understanding of the Jedi Engine, a sound system and midi engine, and an INF system, and finally released a test build.
While it has been nice to have a working build and to be able to “play” through the levels, these initial systems are not accurate enough to meet the project goals. Thus, once the test build was released and after getting some initial feedback, fixing and improving a few things along the way, the real meat of the project began.
Most of the remaining year has been spent reverse-engineering the original DOS renderer, integrating it into the TFE framework, and extending it to support higher resolutions and widescreen. The DOS fixed-point renderer is still there and that is what you will see when running at the original resolution of 320x200. Because TFE is currently the only source of reverse-engineered Dark Forces/Jedi Engine code, the DOS-derived renderer will never go away. The renderer has the same features, techniques and bugs as the DOS renderer. At higher resolutions, the floating-point variant of the renderer is used in order to handle much higher resolutions and in some cases fix bugs (though most of these fixes will be optional). The “Classic Renderer” is finally days away from completion.
Once the Classic Renderer is finished, the next task is to properly reverse-engineer the original INF system which, once integrated, will complete the visuals since things like texture offsets and other features will be handled correctly. Once complete, the long overdue “Classic Renderer” release will finally be done.
Death Star (Classic Renderer)
Color Correction

Foundation
The Classic Renderer and fully accurate INF system will lay a strong foundation upon which to rebuild the rest of the game and engine. And, of course, working through the rendering and INF code has and will continue to reveal more about the inner workings of the original systems, the layout of the code and over all program flow. As a result, I expect that the difficulty and complexity of the remaining reverse-engineering work to decrease, meaning we are nearly at the top of the hill.
The Future
Once the Classic Renderer release finally comes out there will be a period of testing to verify that The Force Engine renders everything correctly in the base levels and in mods and that the INF functionality is fully accurate (which handles things like level progress, doors, switches, elevators, 3D model animations, changing light levels, scrolling textures, and more).
The following test release will focus on realizing the cross platform support promised since the beginning. This means setting up a CMake-based build system and adding support for Linux and OS X (including new ARM based Macs).
After that the focus will shift to gameplay, starting with reverse-engineering the original collision, movement and physics code. And then moving on to Logics and weapons. This will finally lead to a fully playable version of Dark Forces through TFE. Once gameplay is complete, the next steps will be cutscenes, mission briefings, finishing the in-game UI, and finishing the iMuse system.
And finally, this will leave the project in a good place to start diving into the Outlaws code to figure out the engine differences and finally getting that game up and running using The Force Engine.
11 Dec 2020
Last post I talked about the remaining work for the Classic Renderer and the next steps. In the meantime, based on feedback regarding widescreen, it came to light that just moving the status HUD elements to the edges of the screen in widescreen may not be ideal - especially for ultrawide resolutions. So I decided to implement some basic HUD options, including the ability to move the HUD elements away from the edges. This, of course, appears unnatural since the grapics were designed to sit at the edges of the screen. “Dzierzan” - a member of the discord server - quickly made some art to fix these cutoff edges so I spent a little bit of time to implement an adjustable HUD.
Note that the original assets from Dark Forces are still used, “add ons” are rendered as needed which were cut from Dzierzan’s art. This is done to avoid palette issues, make it easier to integrate and avoid directly modifying the existing art.
Adjustable HUD
I added a new tab to the System UI Settings dialog in order to adjust the HUD. Like the Graphics tab, as you adjust the HUD settings, you will see the in-game HUD respond immediately, allowing you to easily tweak to taste.
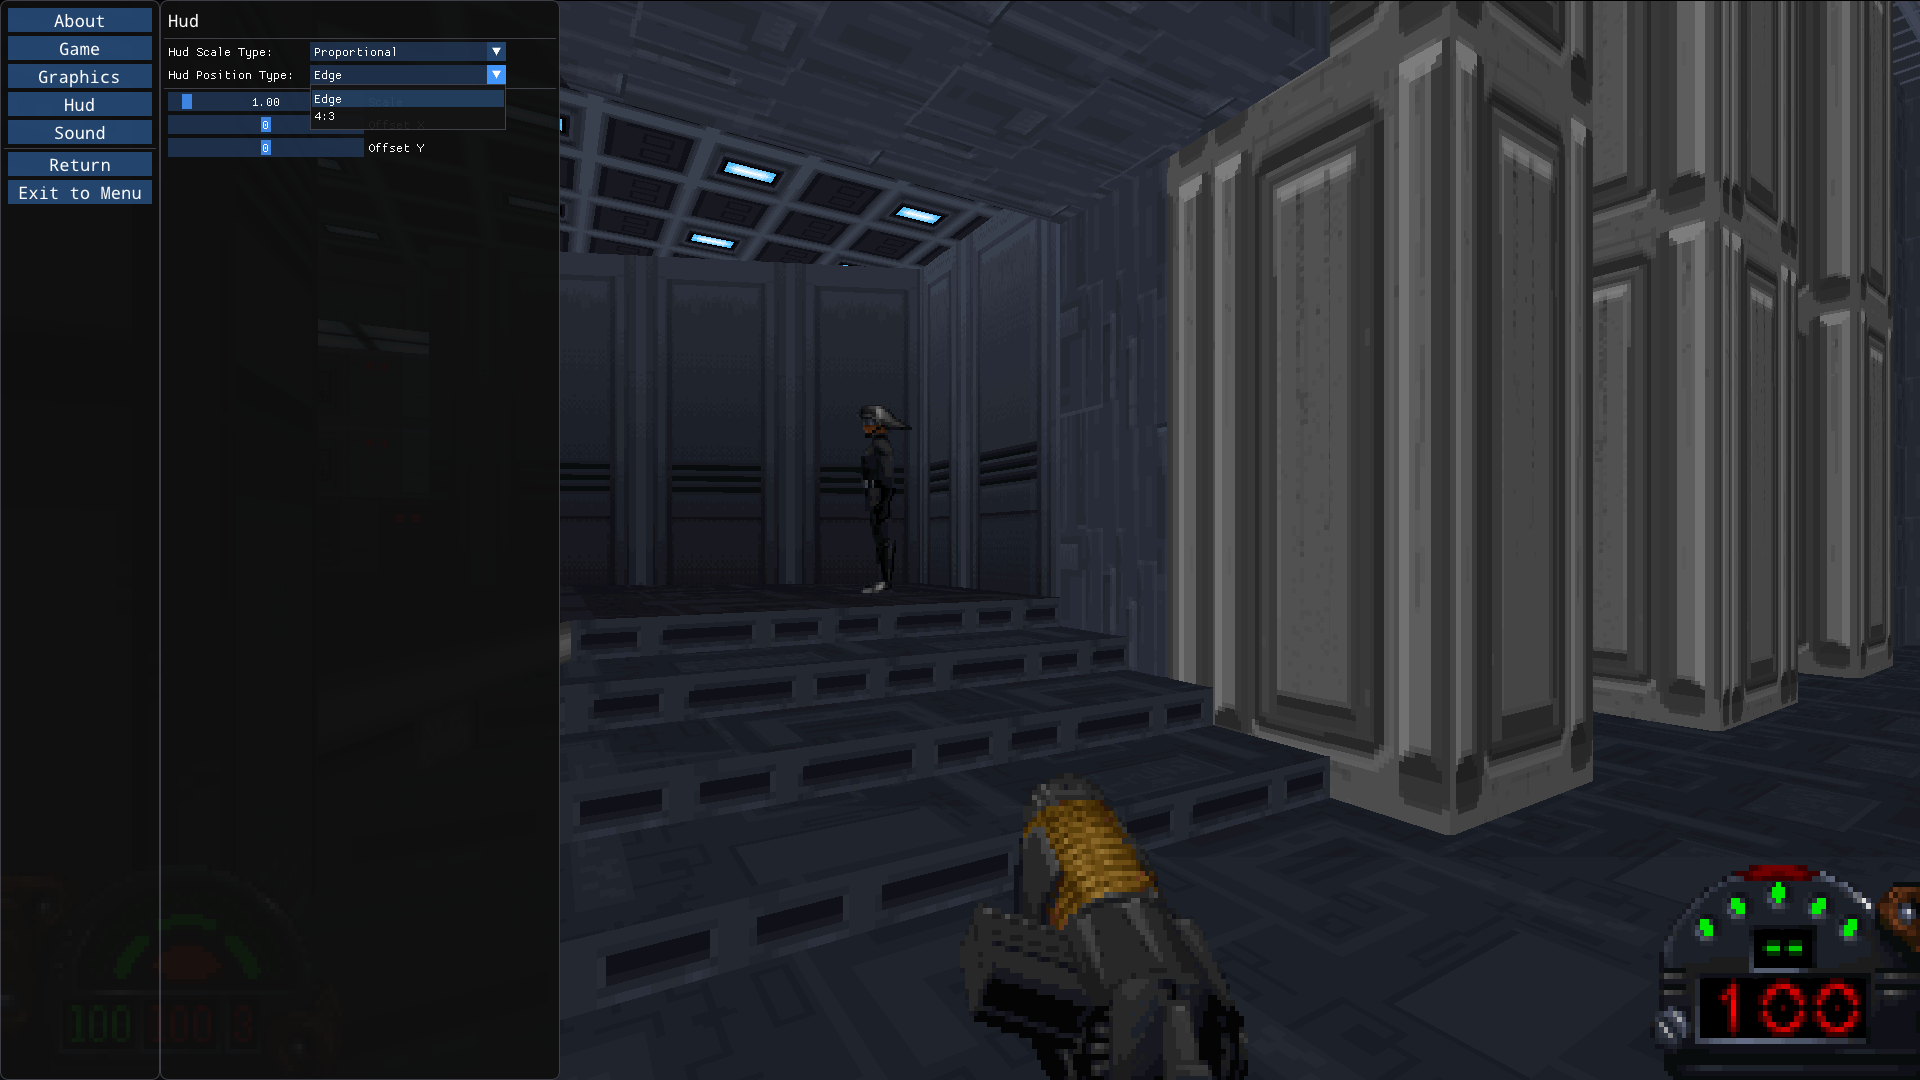
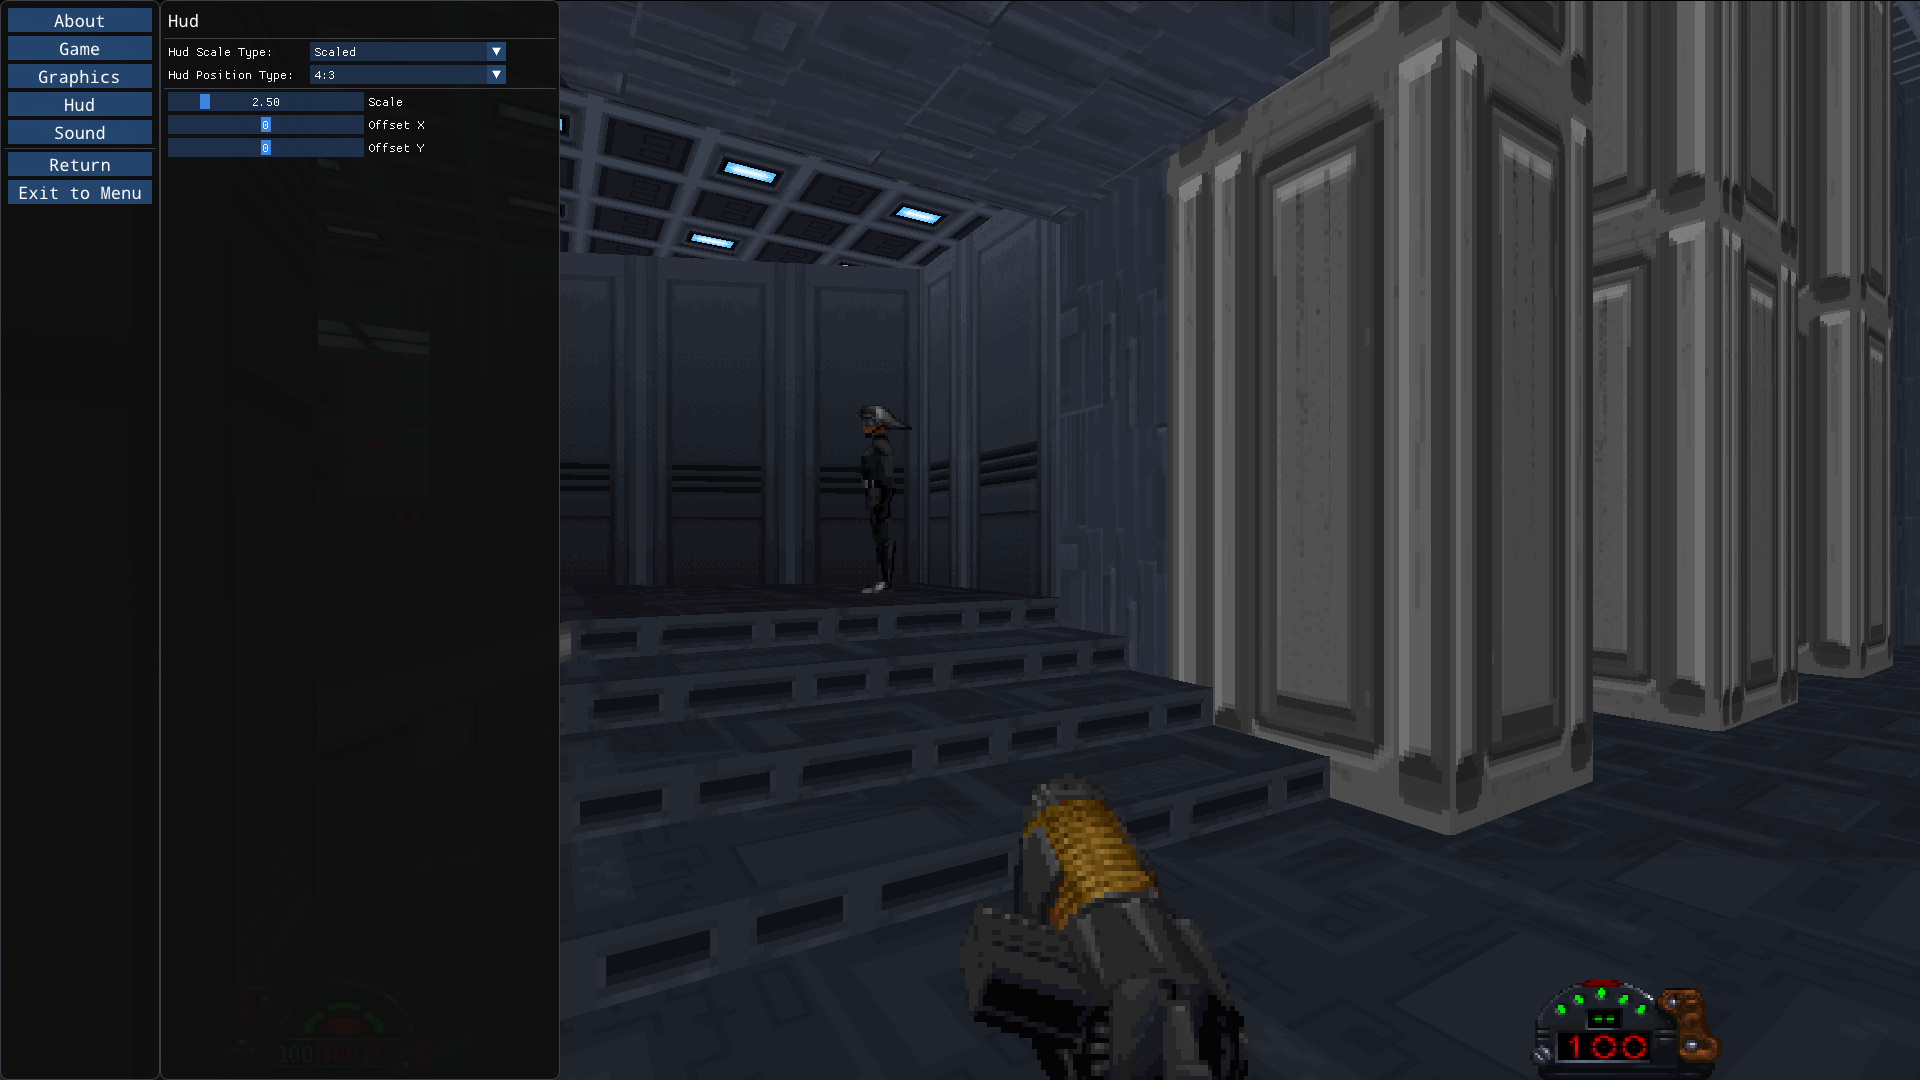
Hud Scale Type
The HUD scale type determines how the HUD scales with resolution.
Proportional
The HUD is scaled to stay the same size as the original game in screenspace regardless of the resolution. This is the default option and will look the most like the original game.
Scaled
With the scaled option, the HUD gets smaller with higher resolutions. Using this option, you can then use the Scale slider to adjust the size of the HUD. Note that changing resolution will change the apparent size on screen.
Hud Position Type
This determines how the HUD is position by default. In either case further adjustments are possible by modifying the OffsetX and OffsetY sliders.
Edge
The Status elements of the HUD are always aligned to the edges of the screen. This is the way the original art was designed.
4:3
In this mode, the HUD will stay in its original 4:3 positions even if in widescreen. With this mode it is easier to see the full HUD at once.
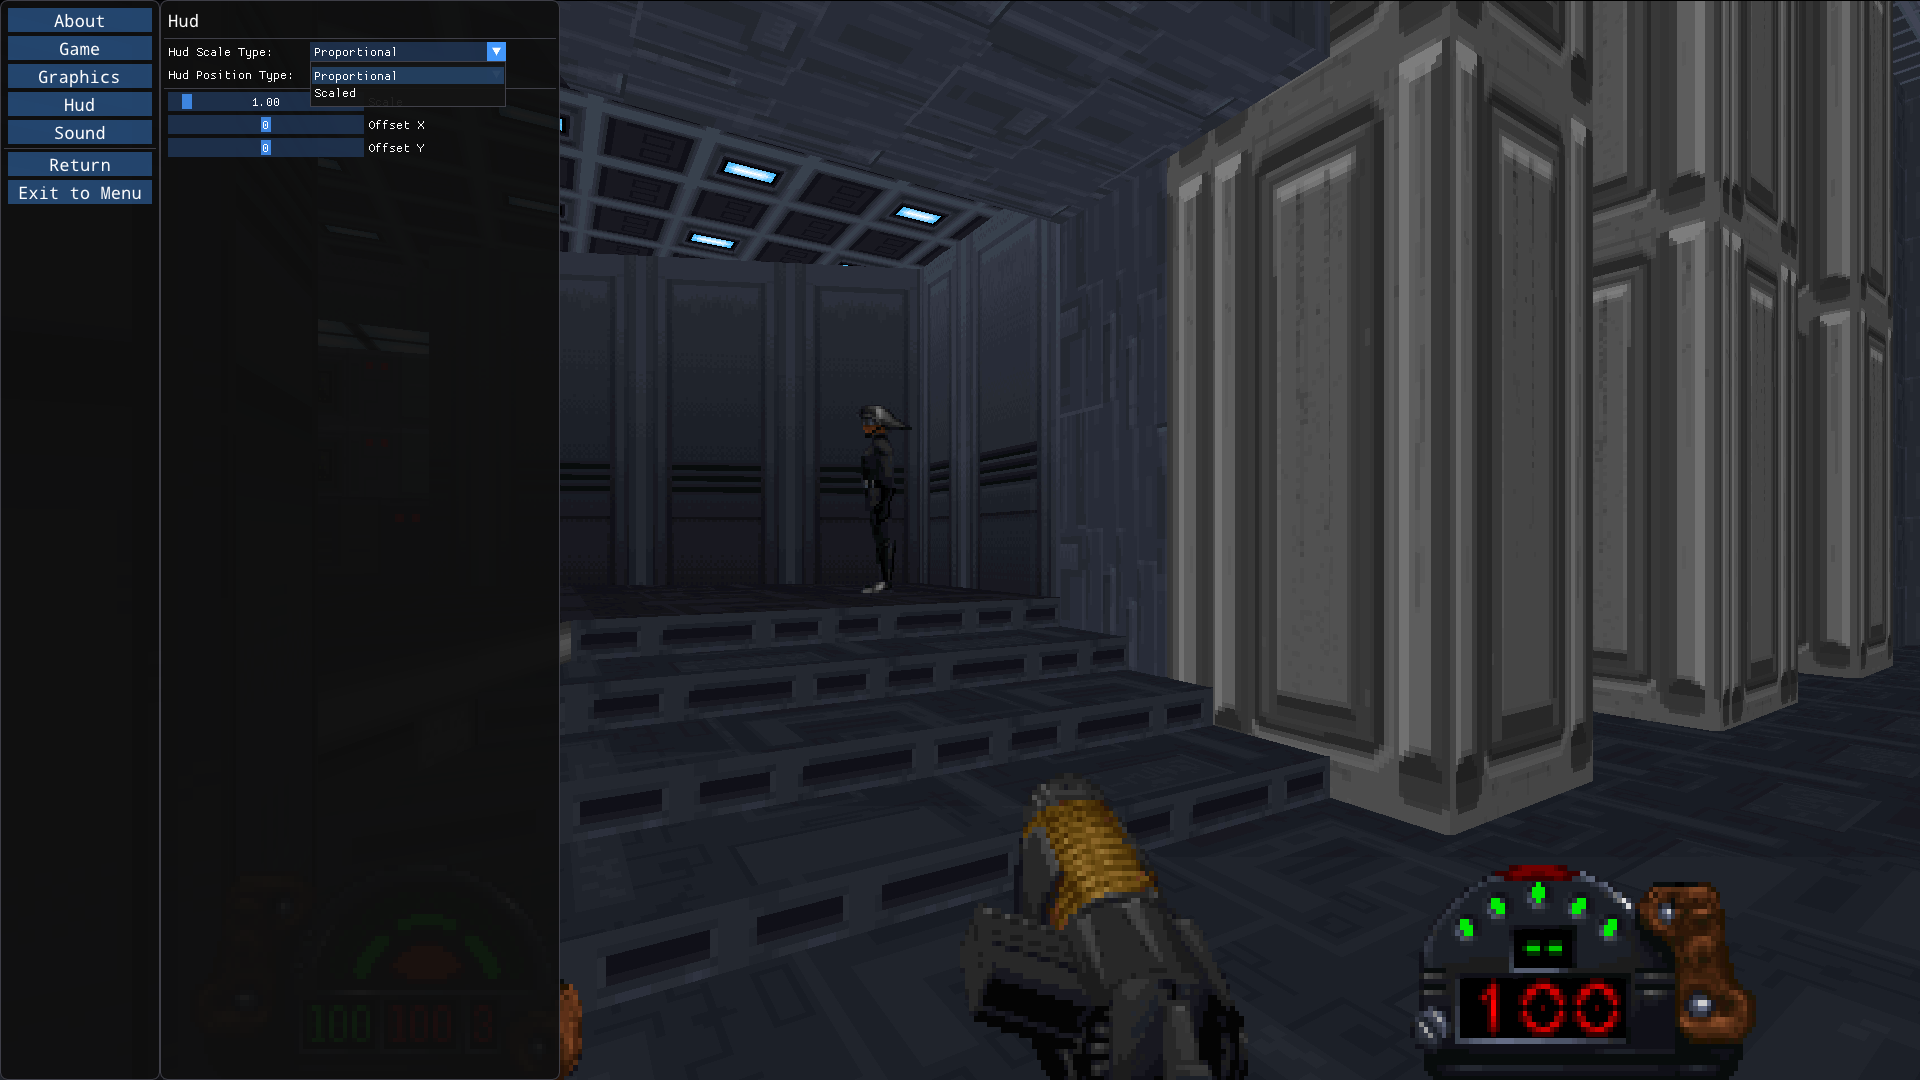

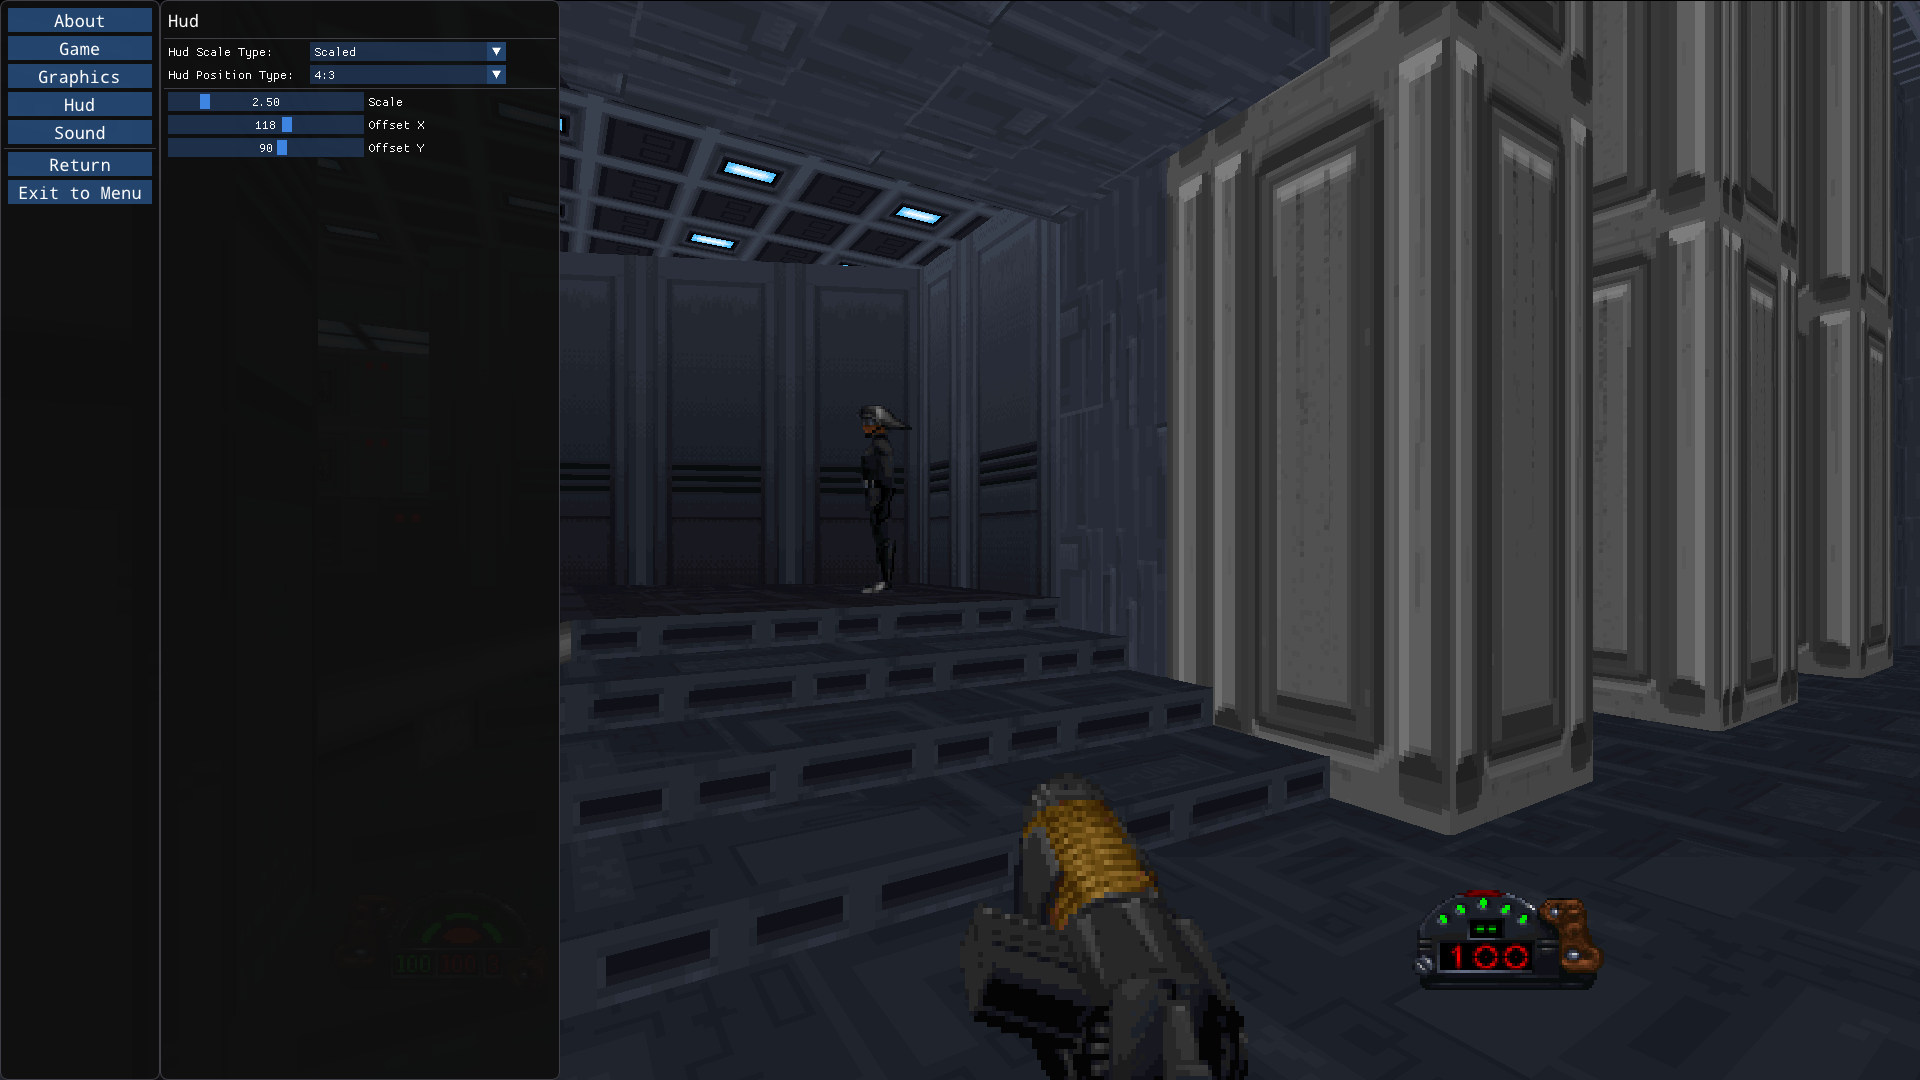
The Final Results
In this screenshot you can see the 4:3 HUD in action in widescreen.
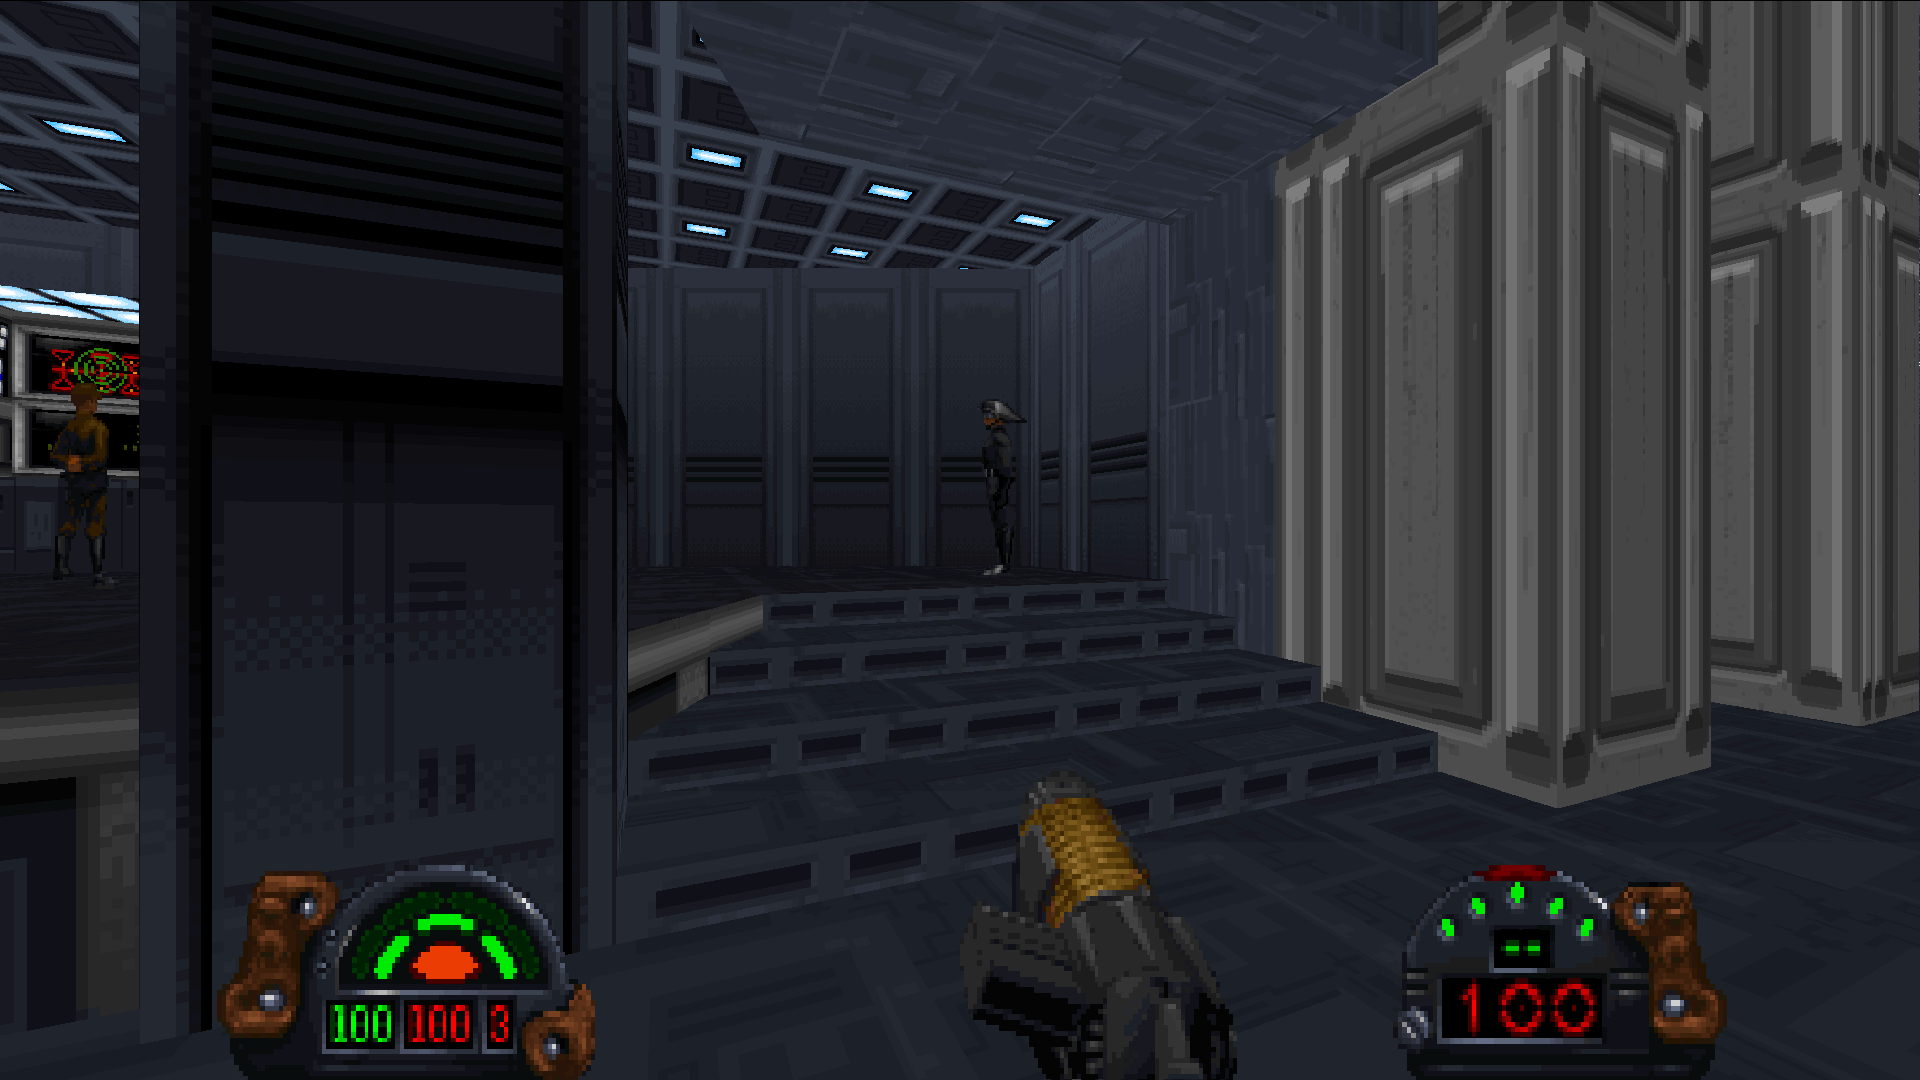
Next Steps
The next steps haven’t changed from the last post, though some progress has been made integrating the 3D object rendering code into The Force Engine.
04 Dec 2020
It is time for another, long overdue, project update. The project went through a “slow period” of about a month after a flurry of work on the Classic Renderer but progress resumed about a week ago in earnest. This post will go over some of the work done so far, the current state of the project, and the next steps.
Progress
The majority of the work since the last build has been on the “Classic Renderer” - consistenting of three main phases, though of course work bounces between them.
Reverse-Engineering
The first stage is reverse-engineering the original DOS code in order to figure out how the original renderer works. This stage consists of decompiling the code, stepping through the code in a debugger to test values and see the results of calculations, and then figuring out what the code is trying to accomplish. This requires figuring out structures, global variables, decompiling functions and going through the program flow. The raw code goes into an internal project called “Dark Forces DOS” which, for a variety of reasons, is kept private.
As blocks of code is figured out, it gets turned into nice “C” code, which leads to phase 2.
Porting into TFE
The code gets “ported” into the main project (The Force Engine). By this I mean building systems to contain the code in a way that can interact with the other low level systems, such as the file system, OS layer and graphics backend. During this process I attempt to clean up the code and test it in the working build to verify its accuracy to the original. Sometimes there are issues requiring me to bounce between phases 1 and 2.
Extending the Code
The Force Engine supports higher resolutions, up to 4k at the moment in addition to improved controls and mouse look. The original Dark Forces code does not work well at higher resolutions due to the limits of its internal 16.16 fixed point math. In addition the quality of the texture mapping does not hold up very well beyond 320x200, due to its low sub-texel precision. After evaluating and attempting a few different solutions, I landed on this renderer design. So far the Fixed Point and Floating Point Classic sub-renderers have been implemented. The Floating Point sub-renderer handles very high resolutions gracefully, with plenty of sub-texel precision.
In addition to supporting higher resolutions, the renderer now supports widescreen. This is made trickier by the requirement to support widescreen for 200p and 400p with rectangular pixels as well as normal resolutions. The biggest changes and caveats:
- 200p widescreen automatically switches to the floating point sub-renderer, the original fixed point renderer has not been altered to support widescreen.
- The algorithm to compute the wall/frustum intersection when clipping is different when using widescreen and is slightly more complex. This is unavoidable, however. With widescreen disabled the original algorithm is used.
- There is no direct FOV control, though that may be added in the future.
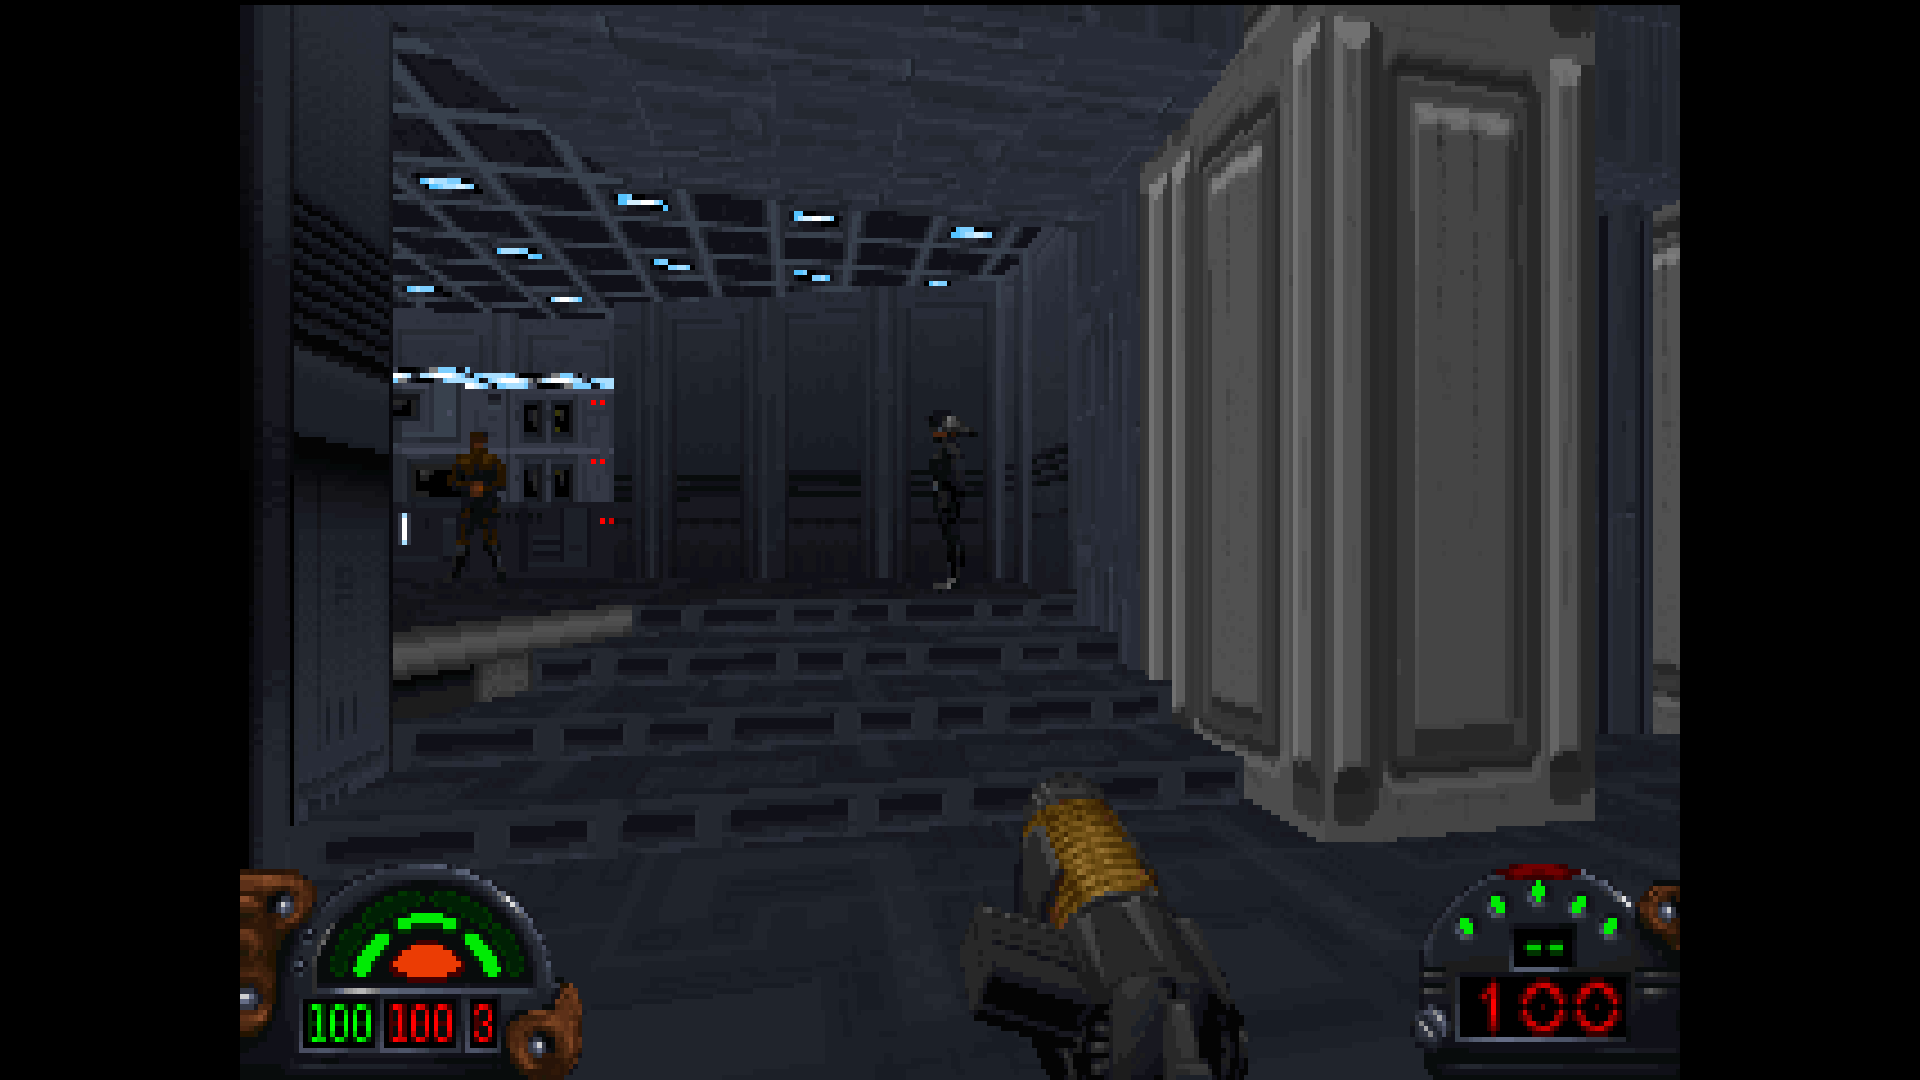
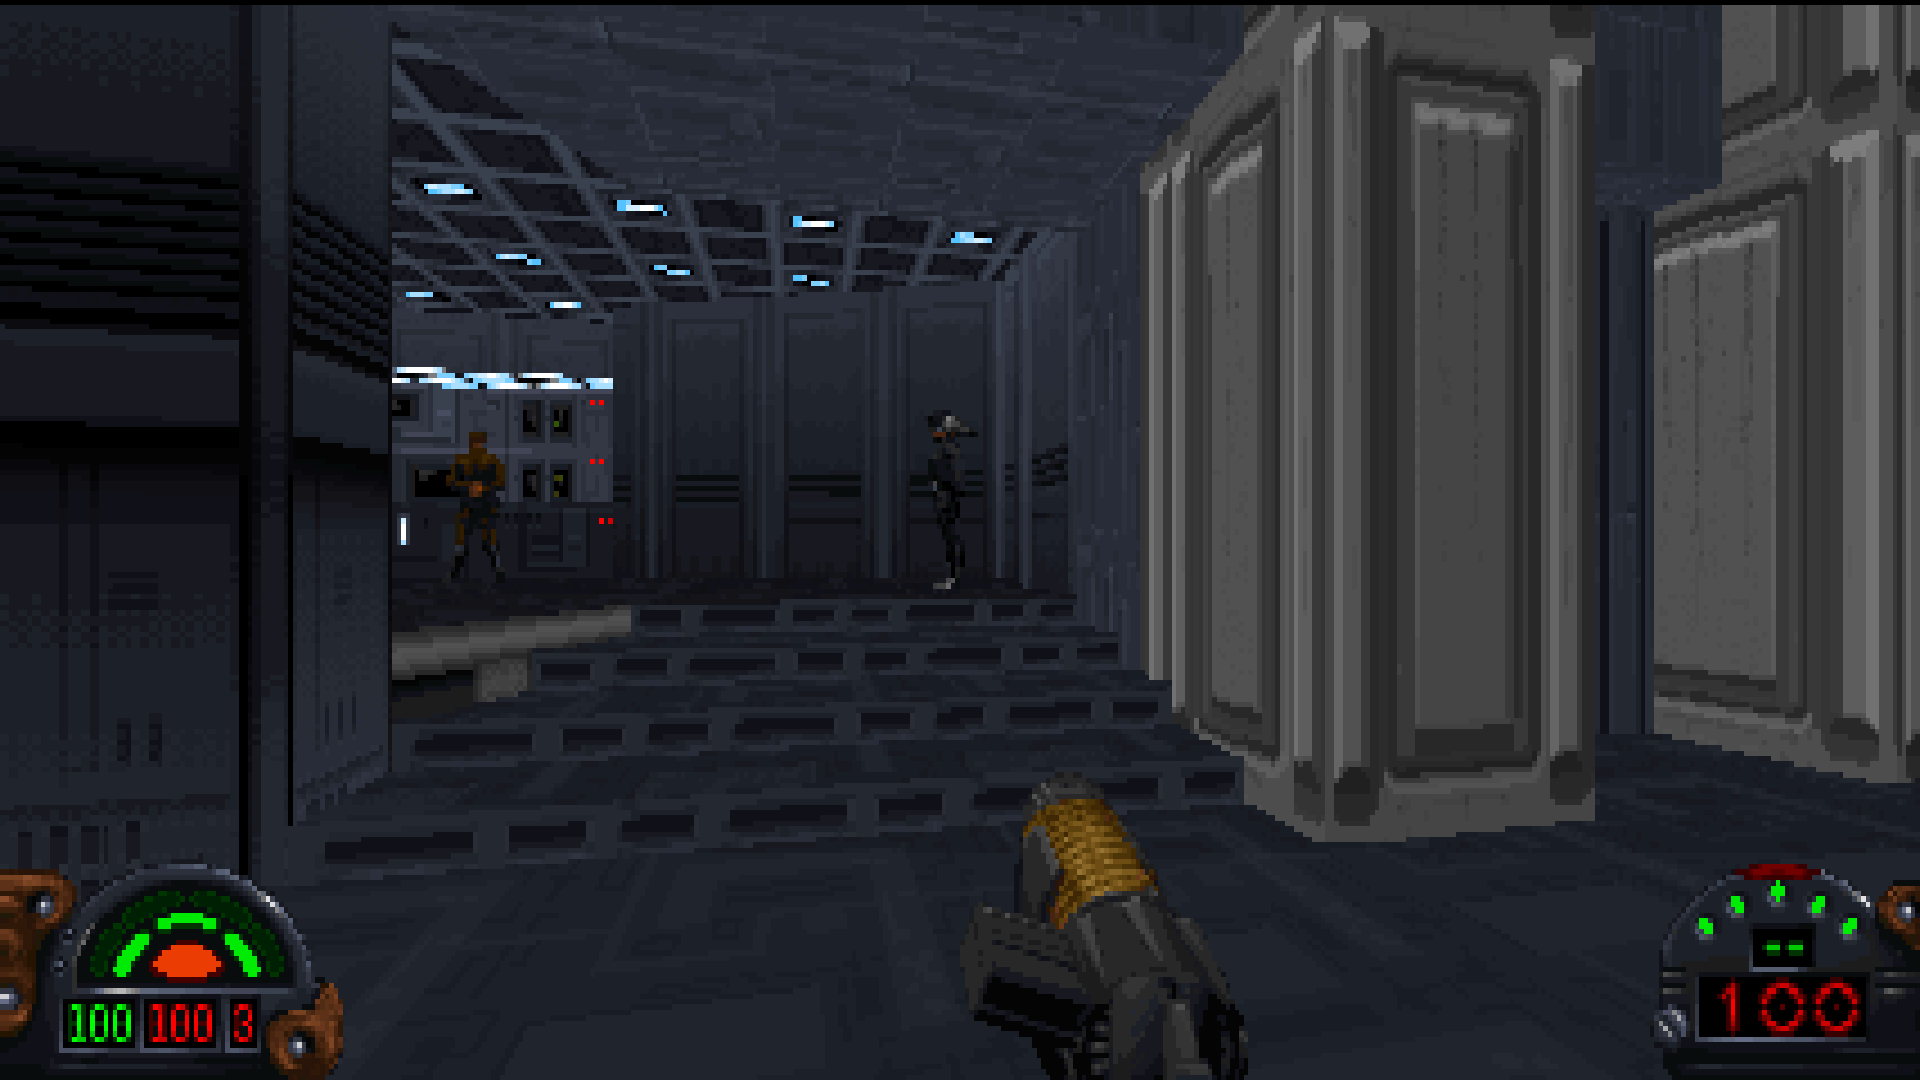
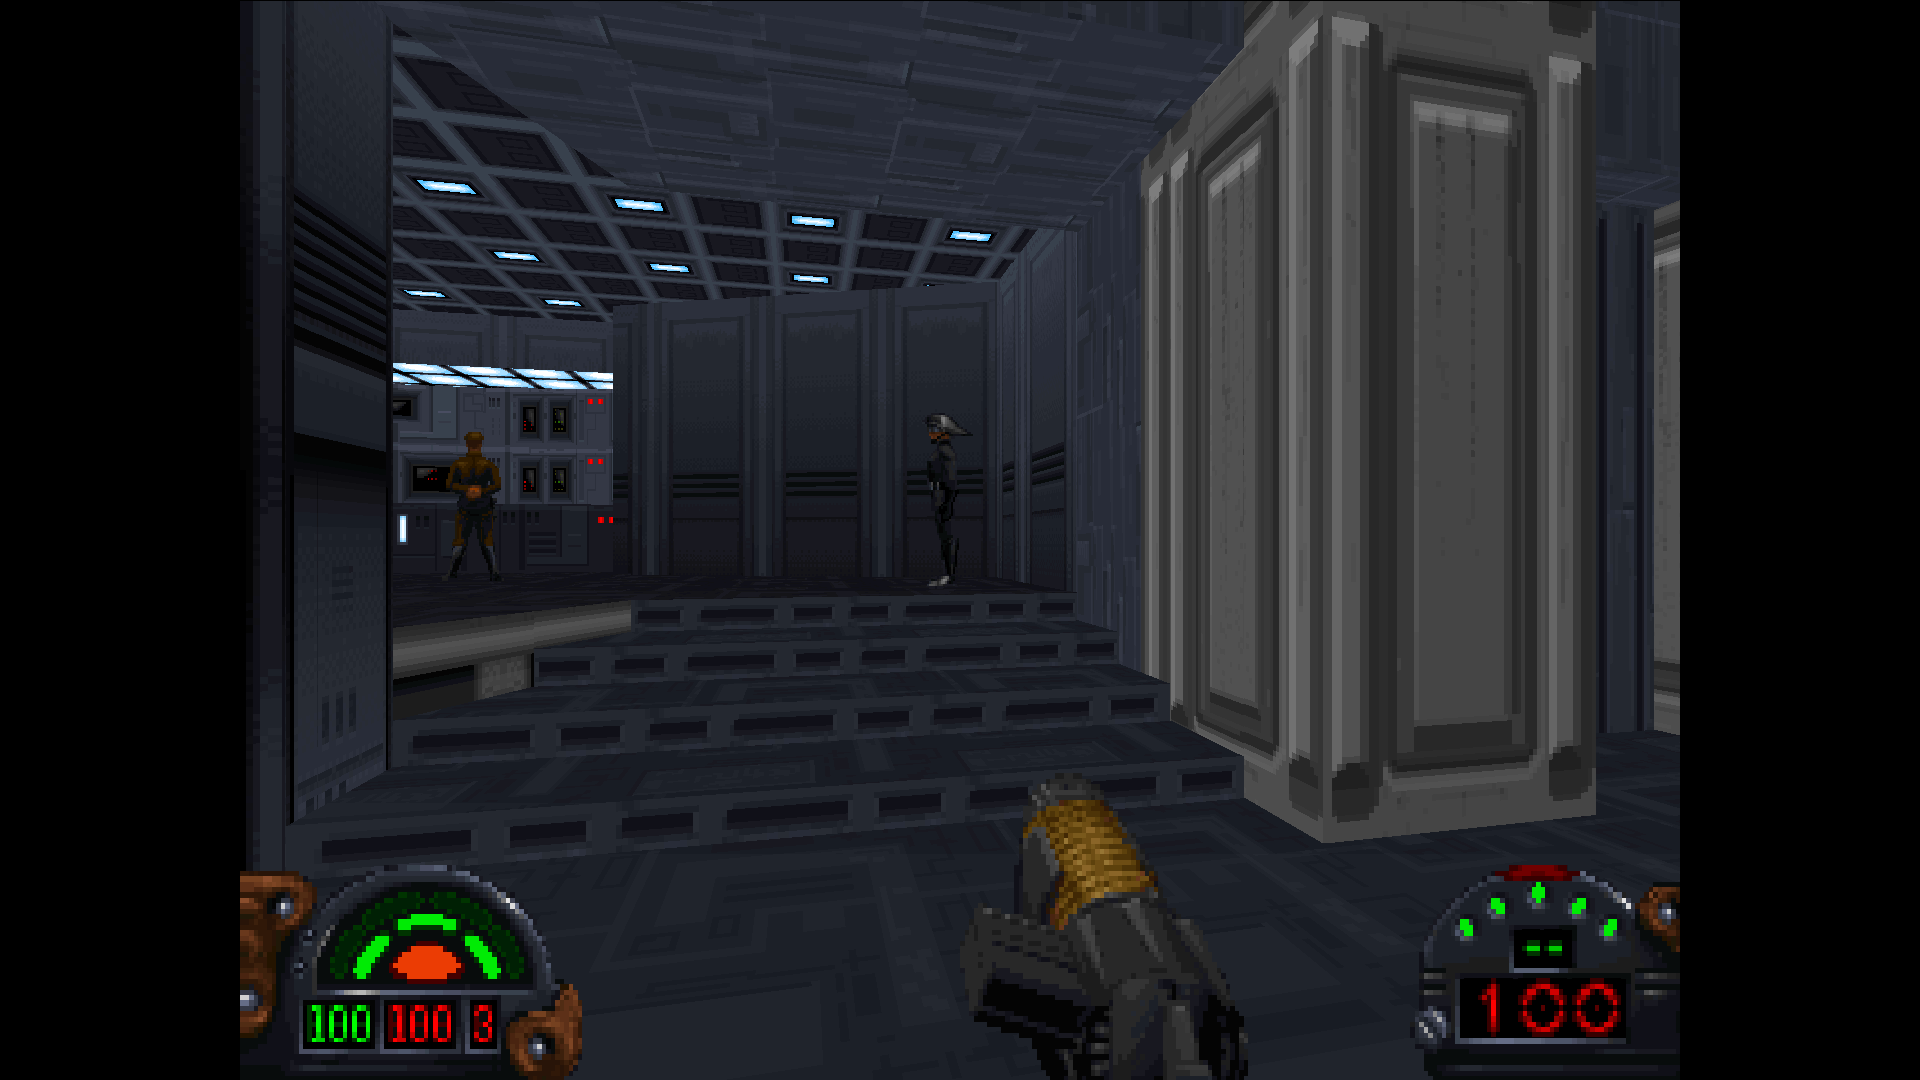

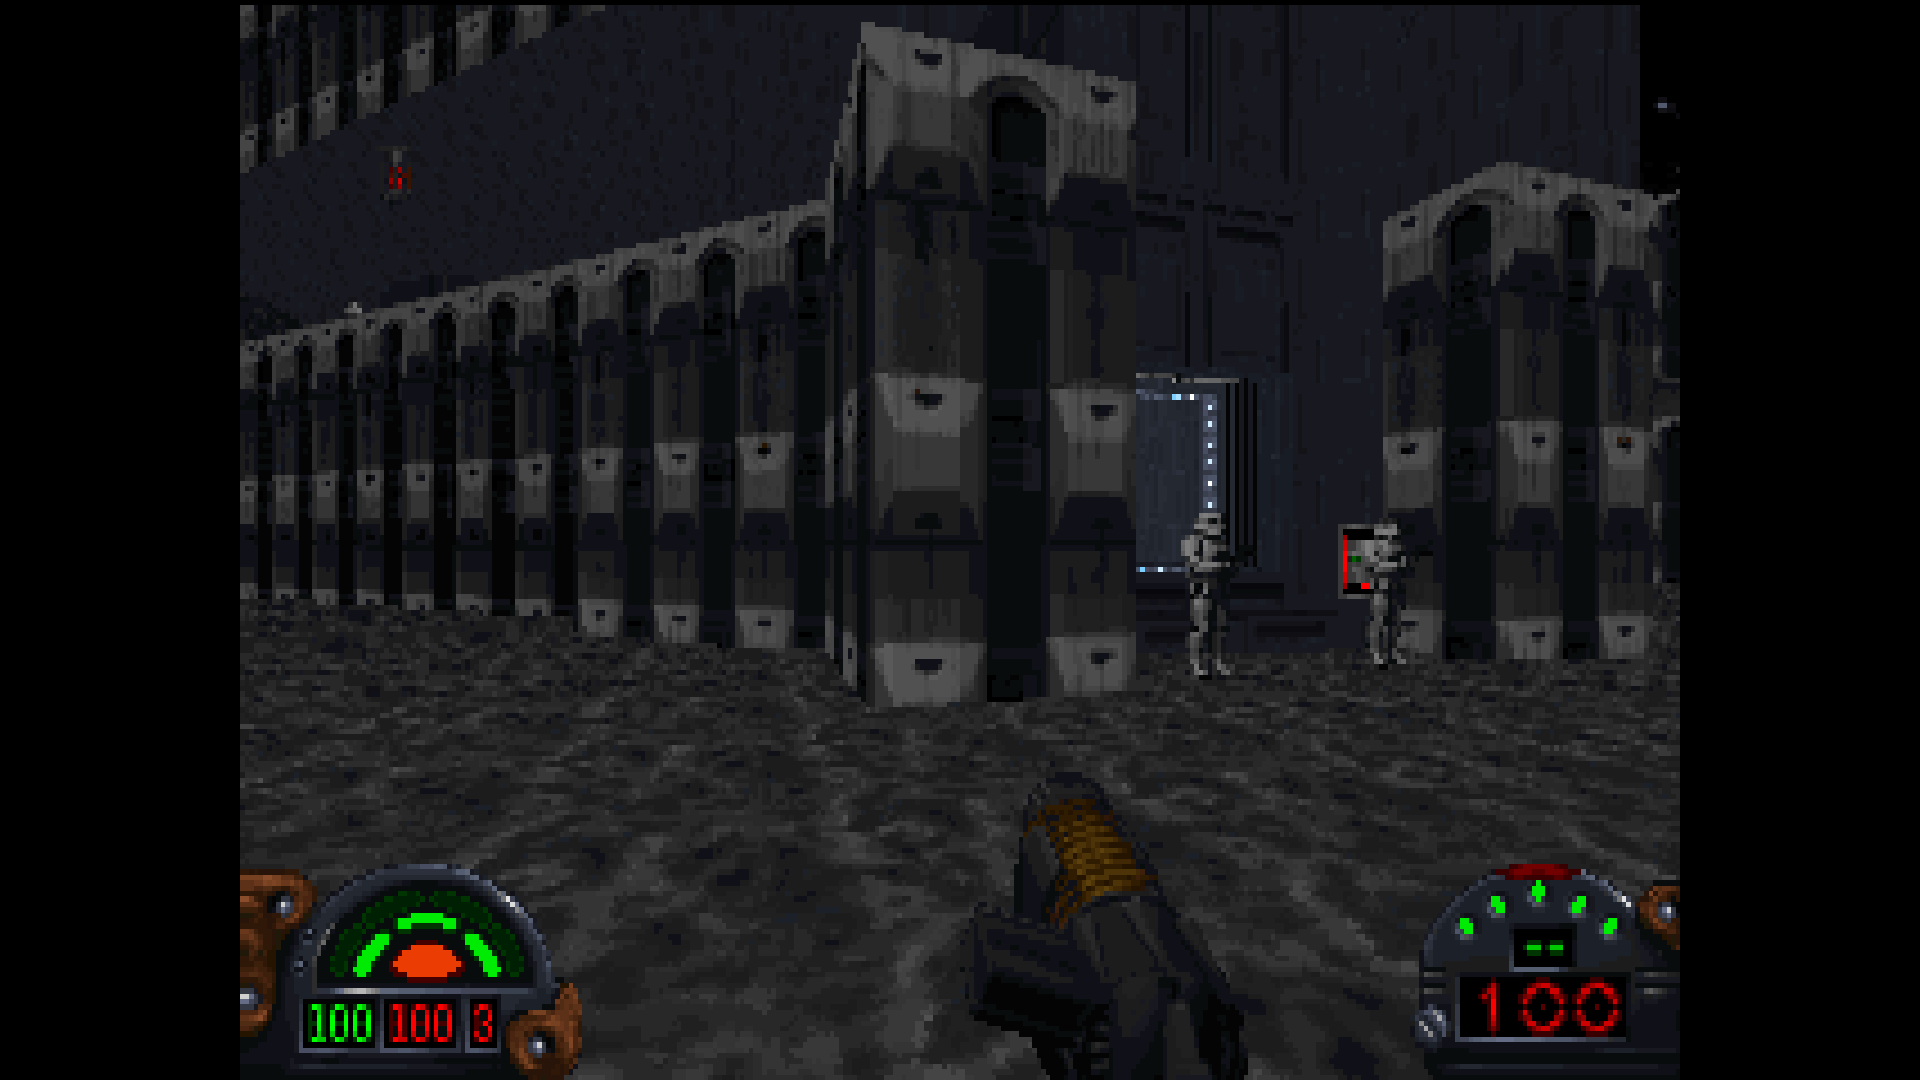

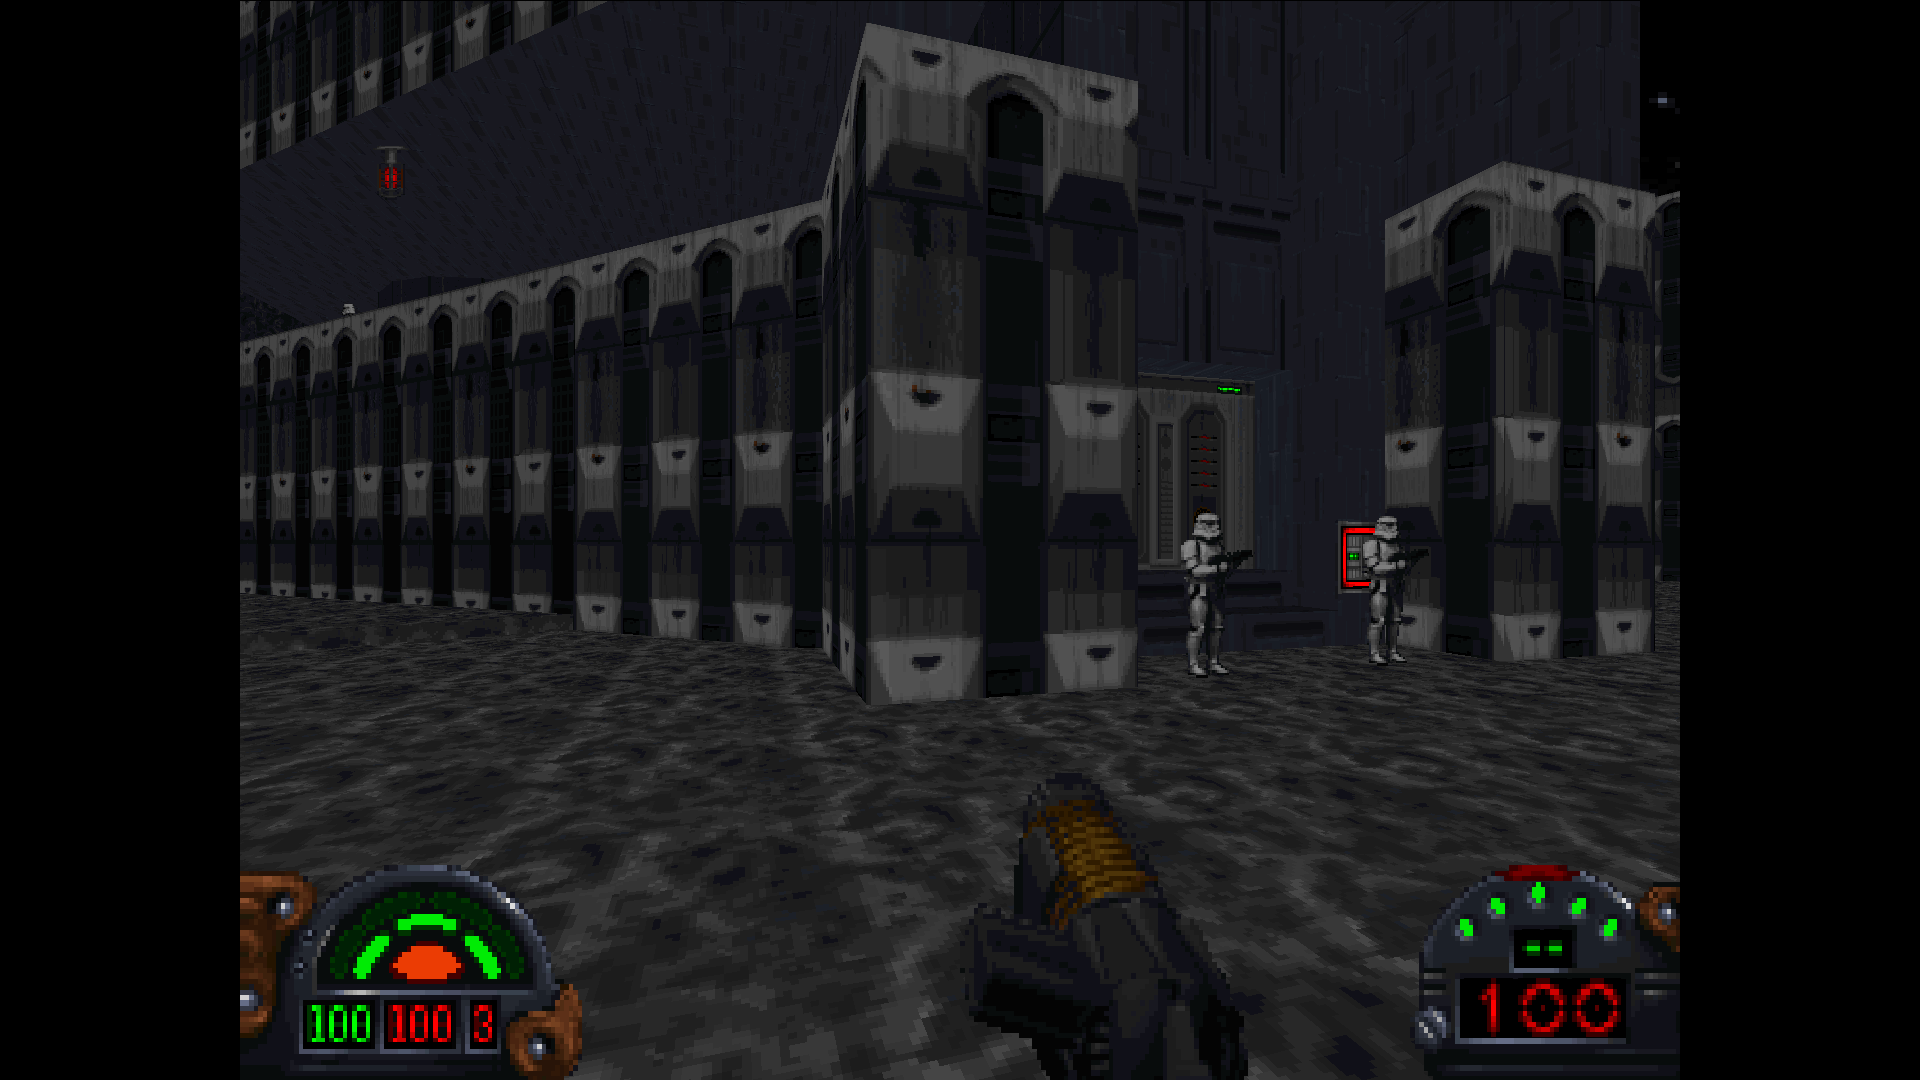
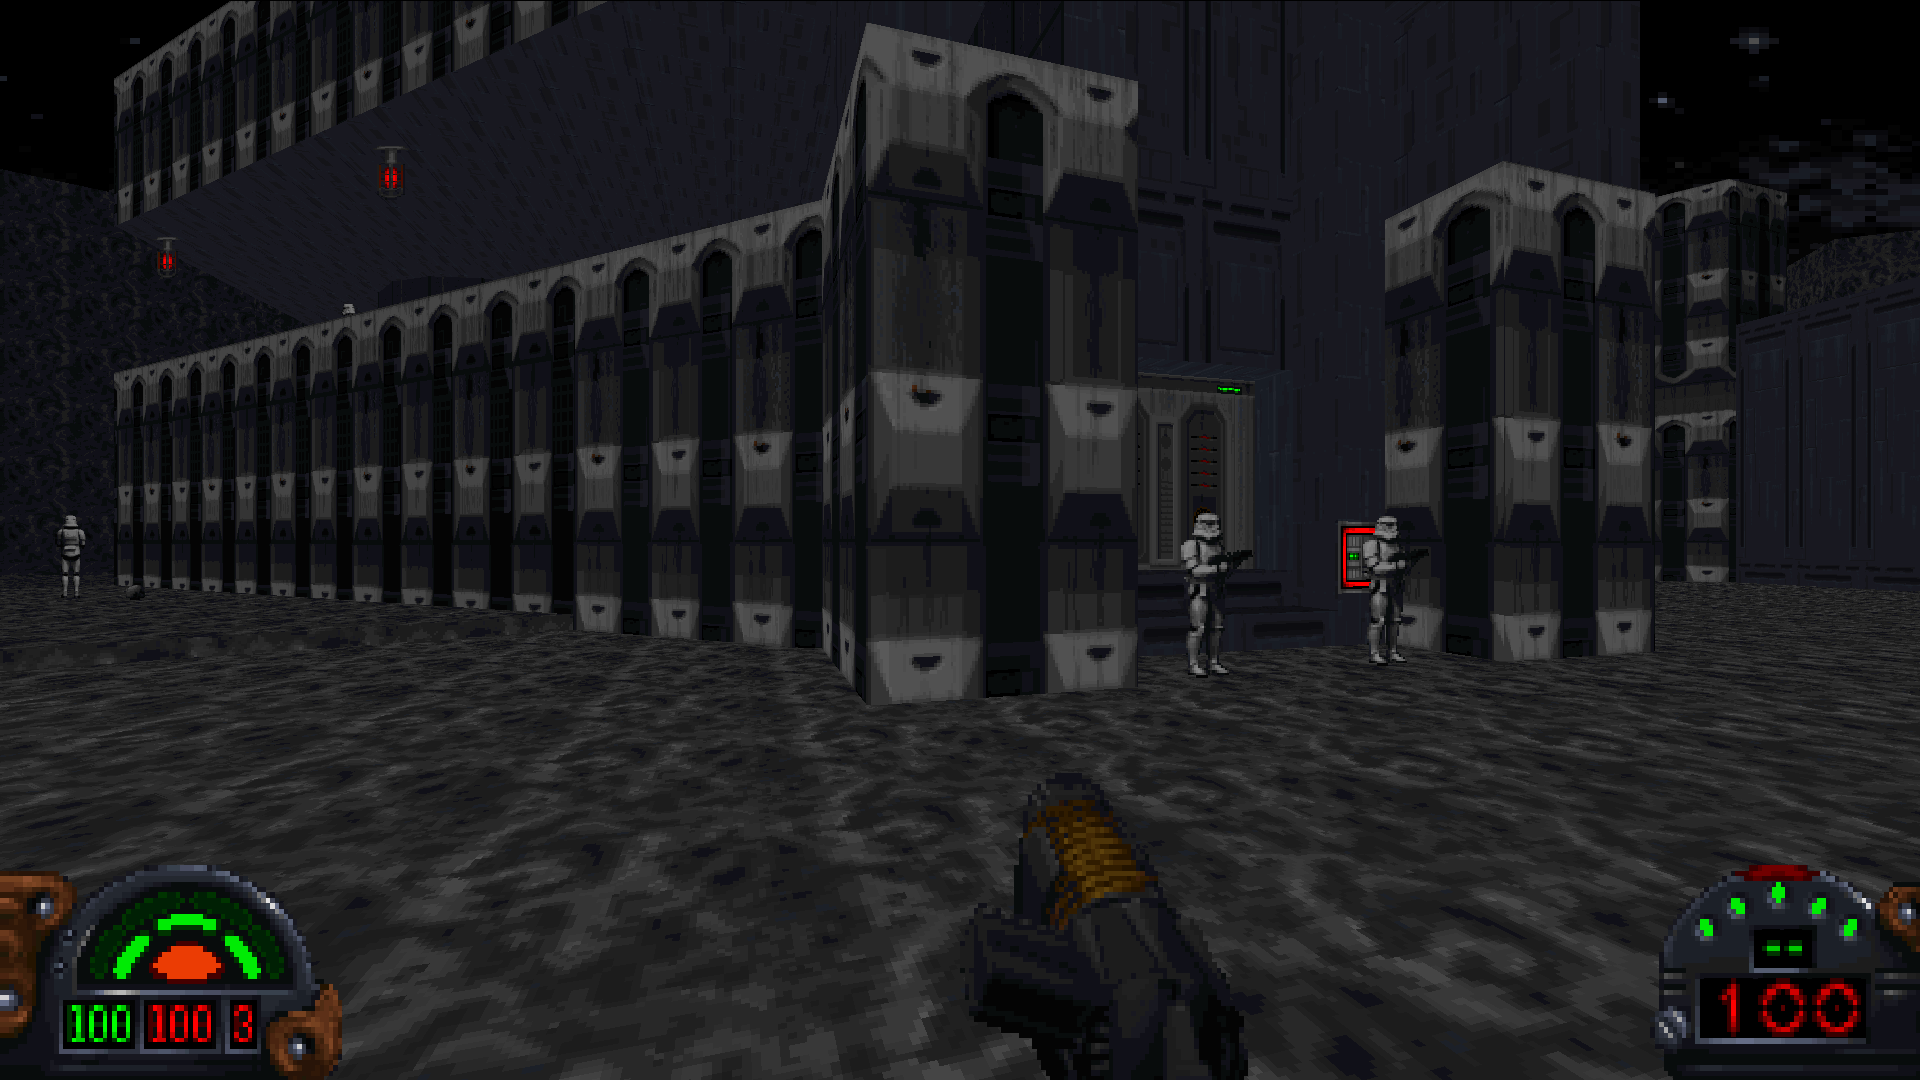
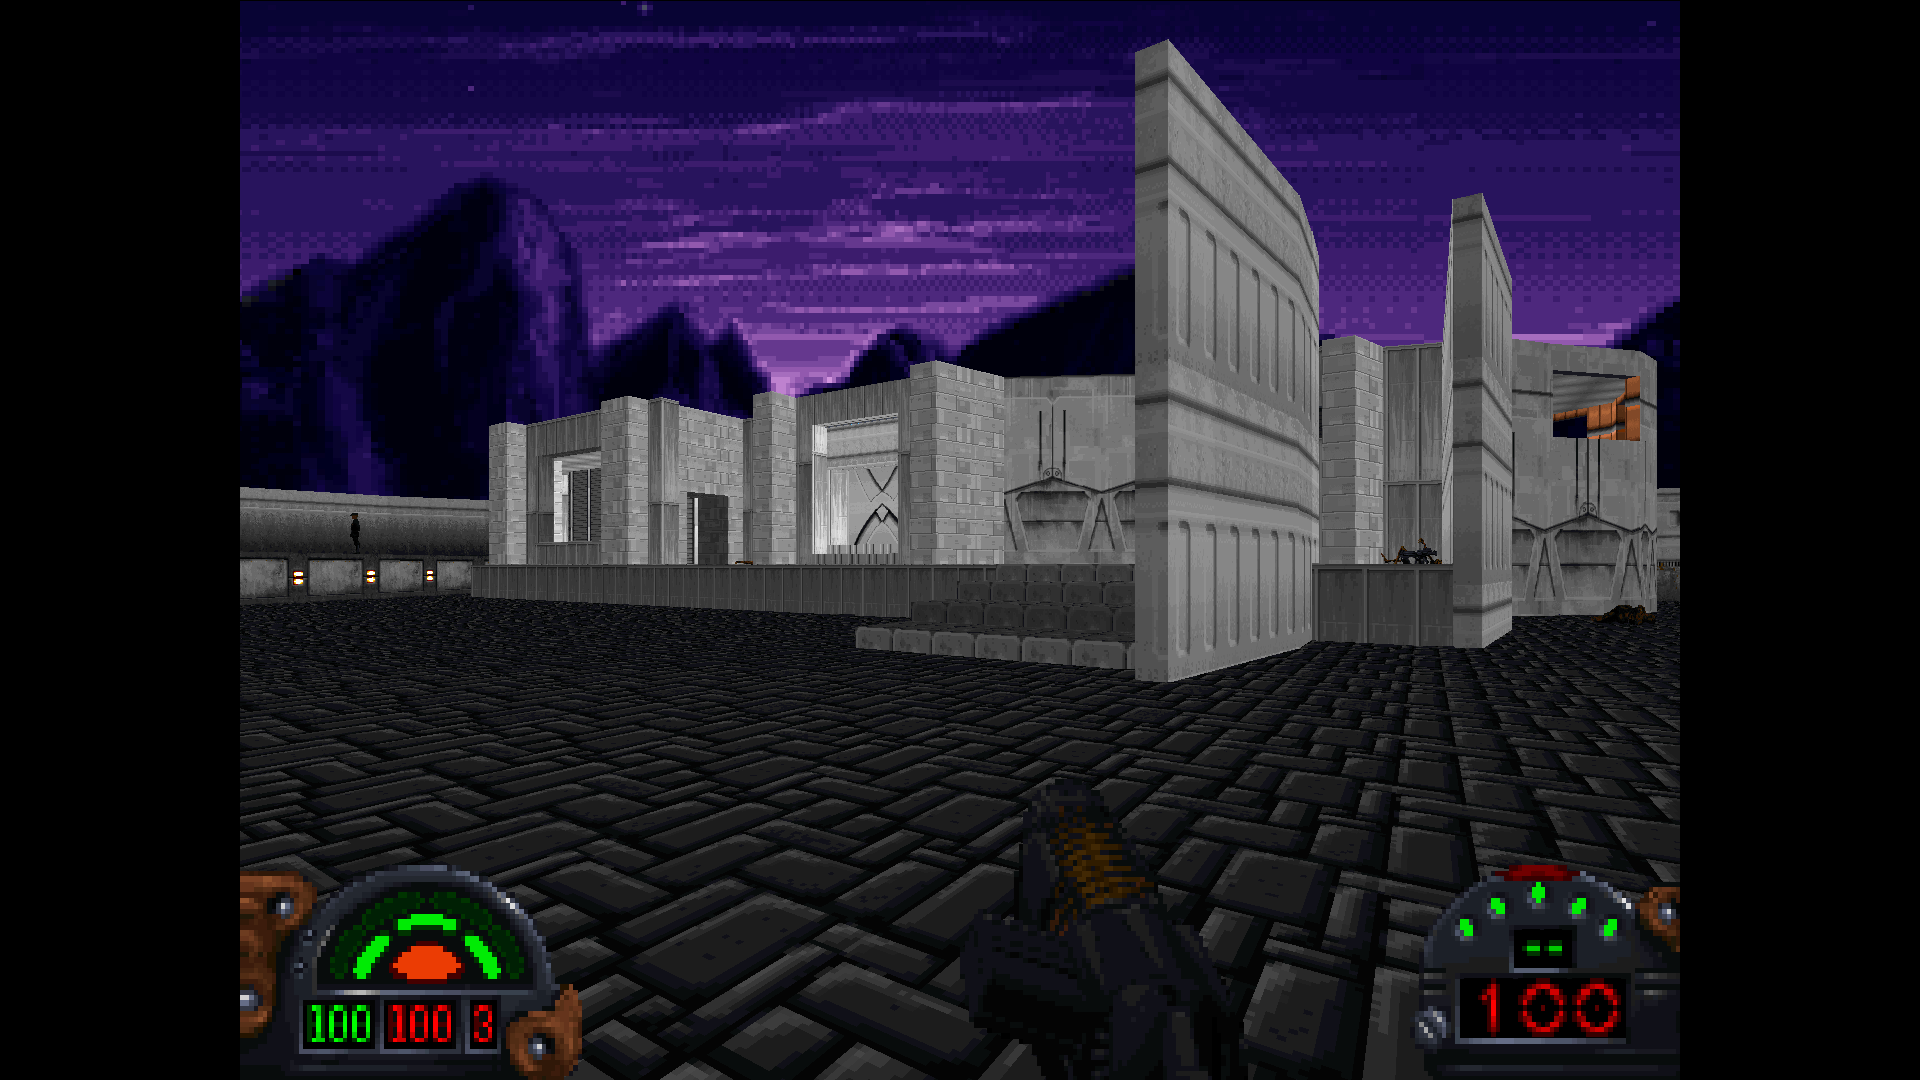
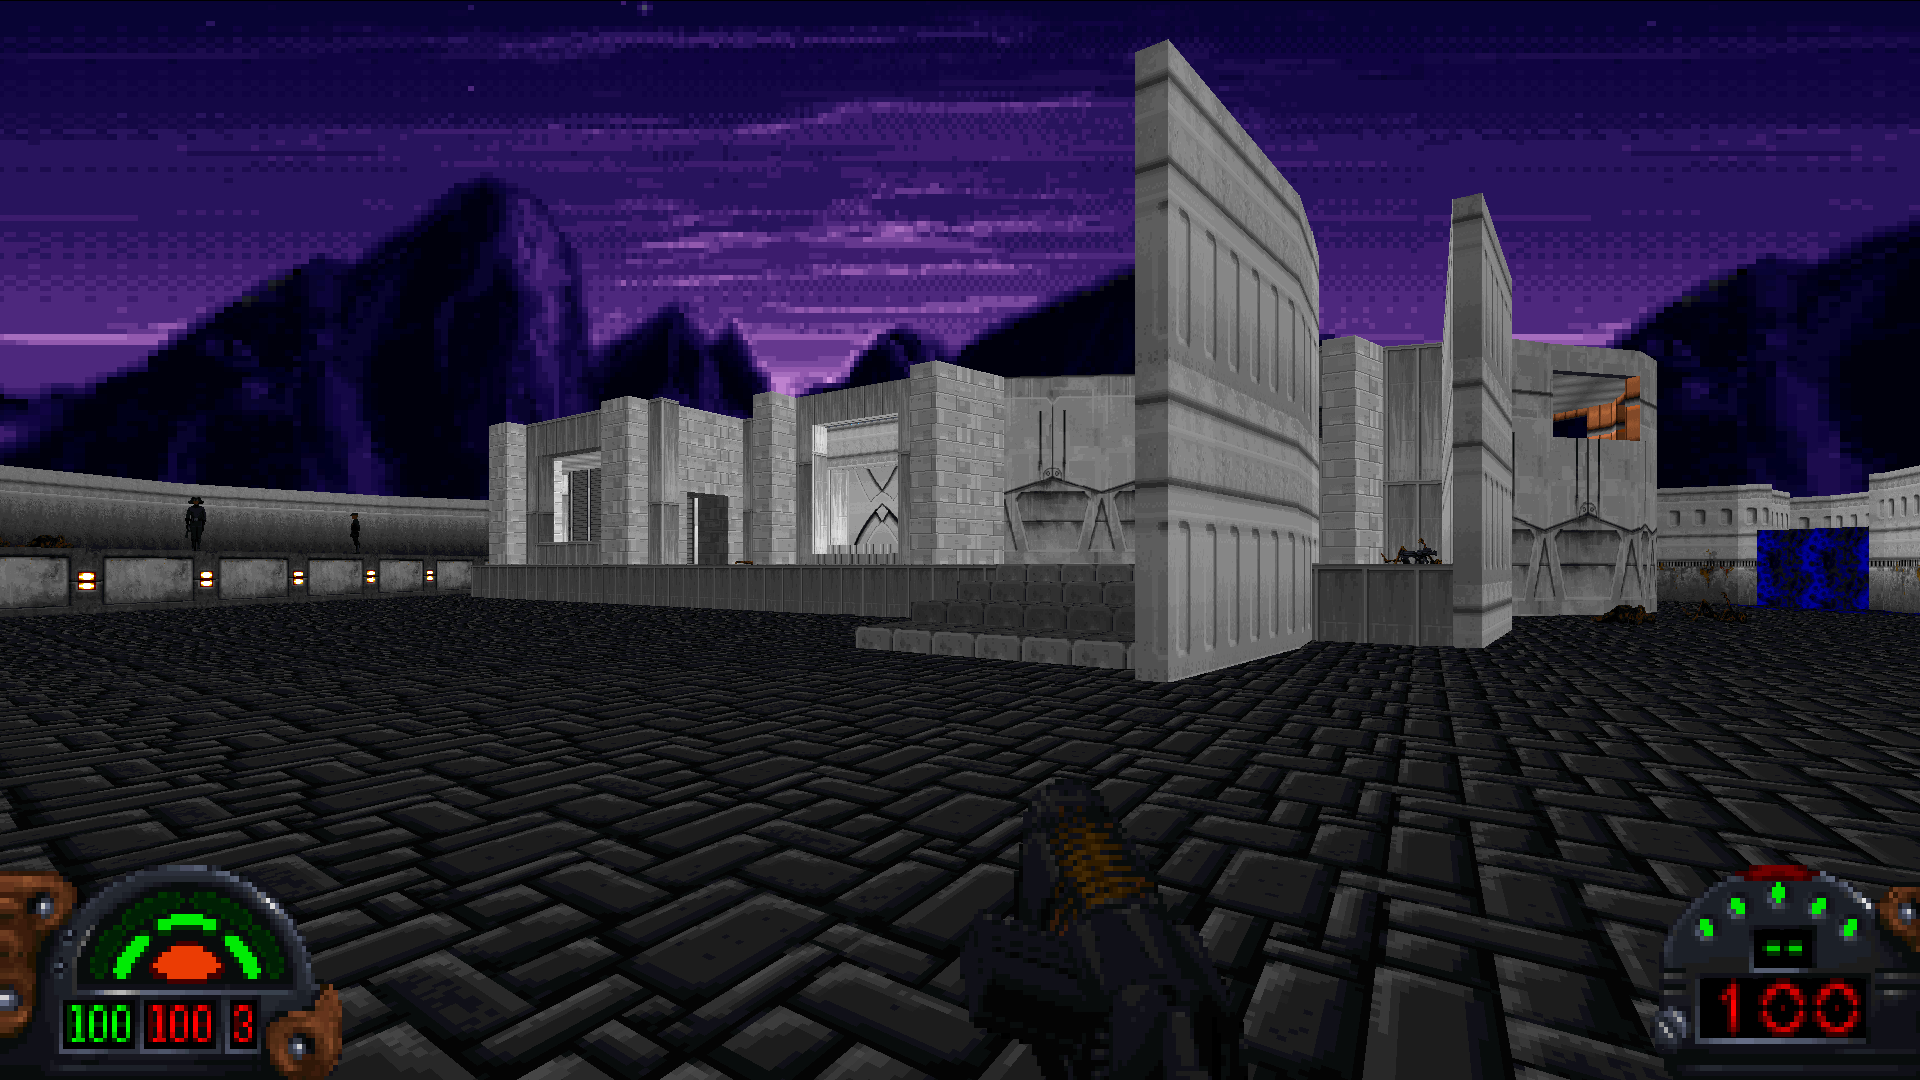
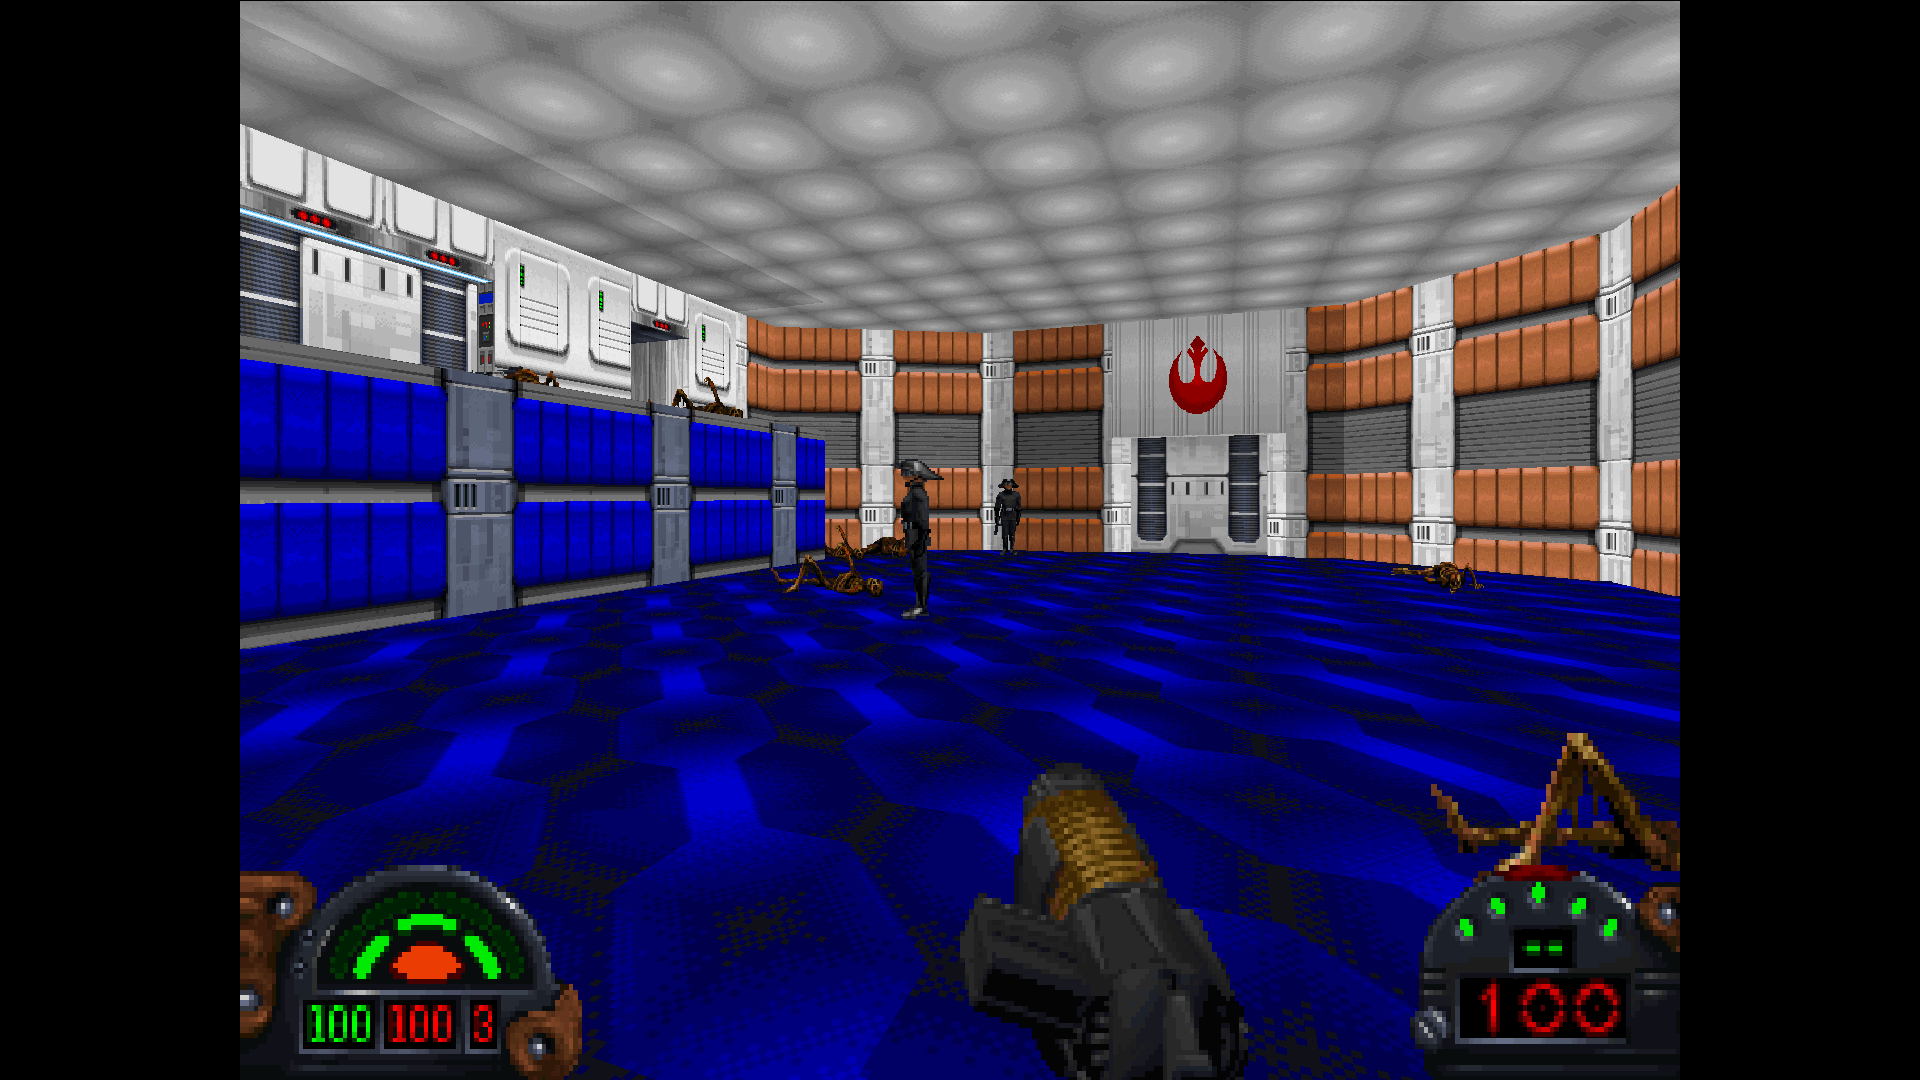
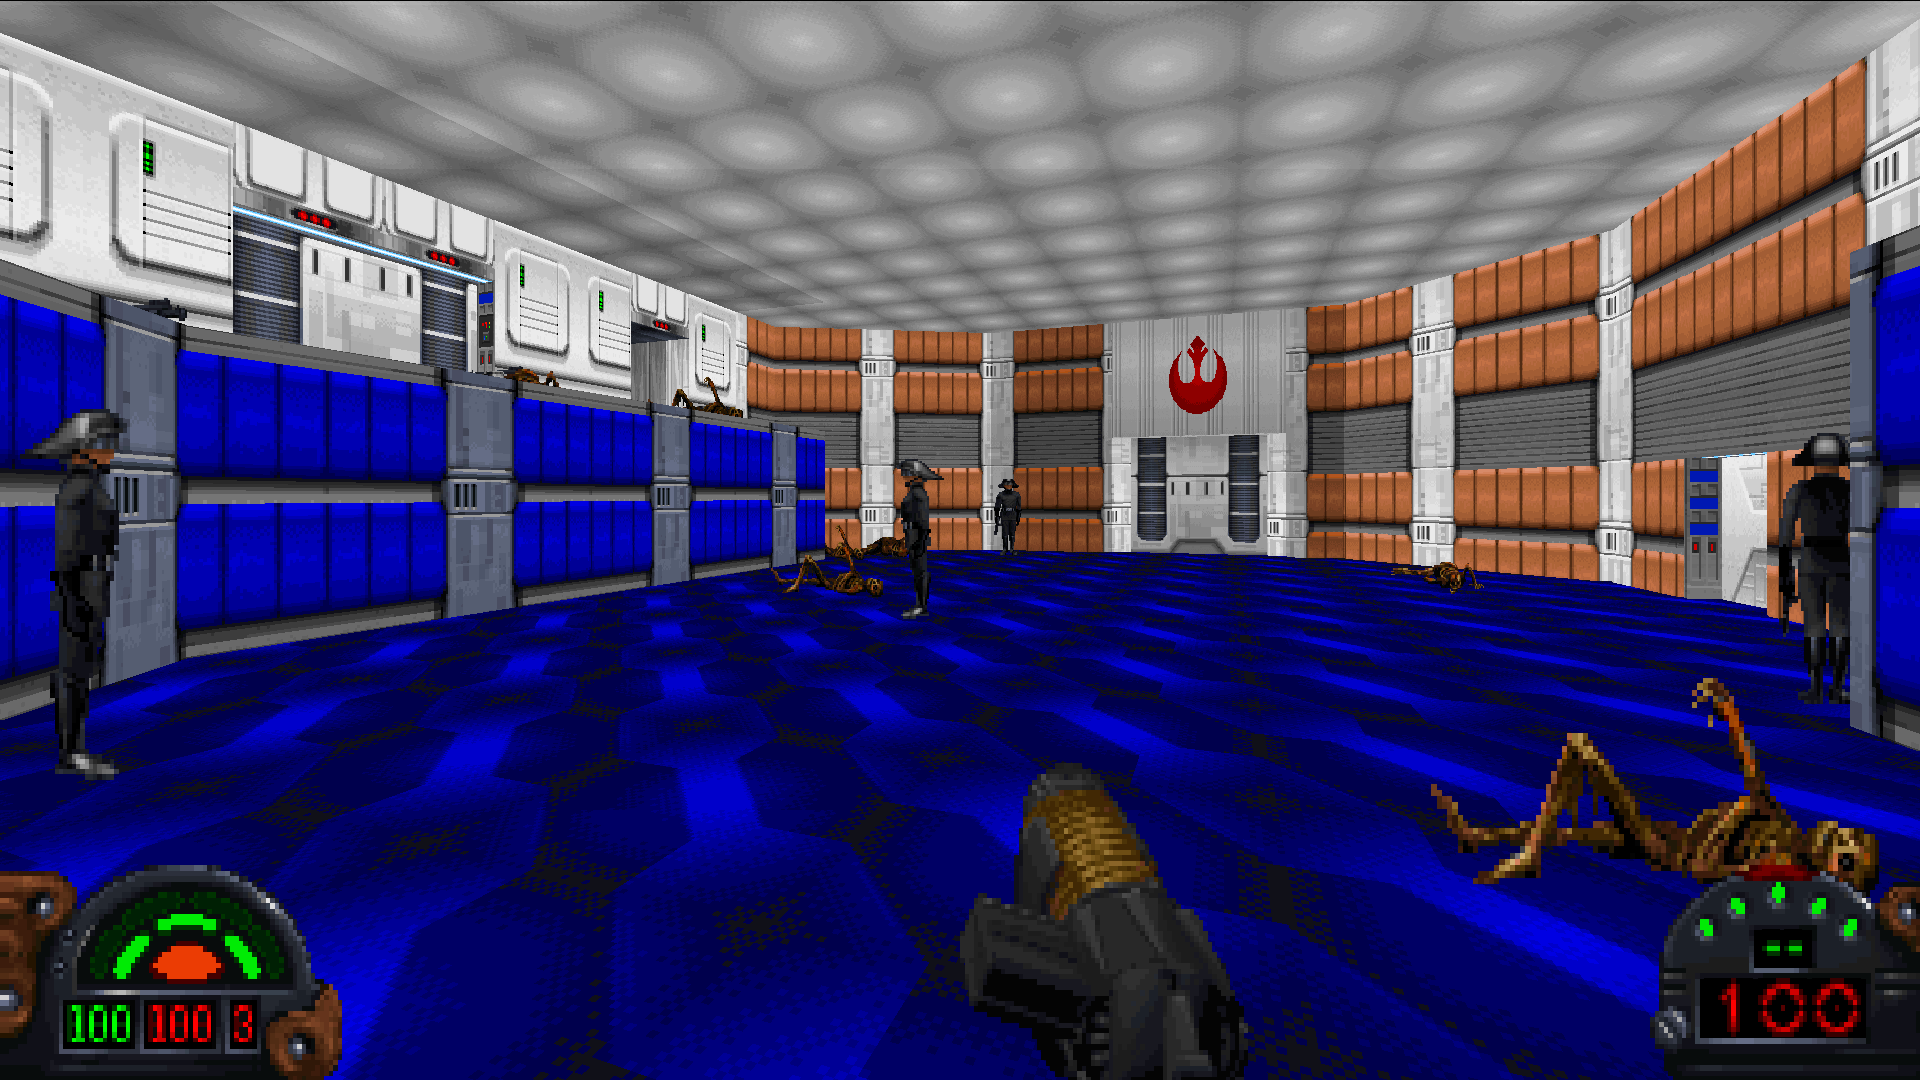
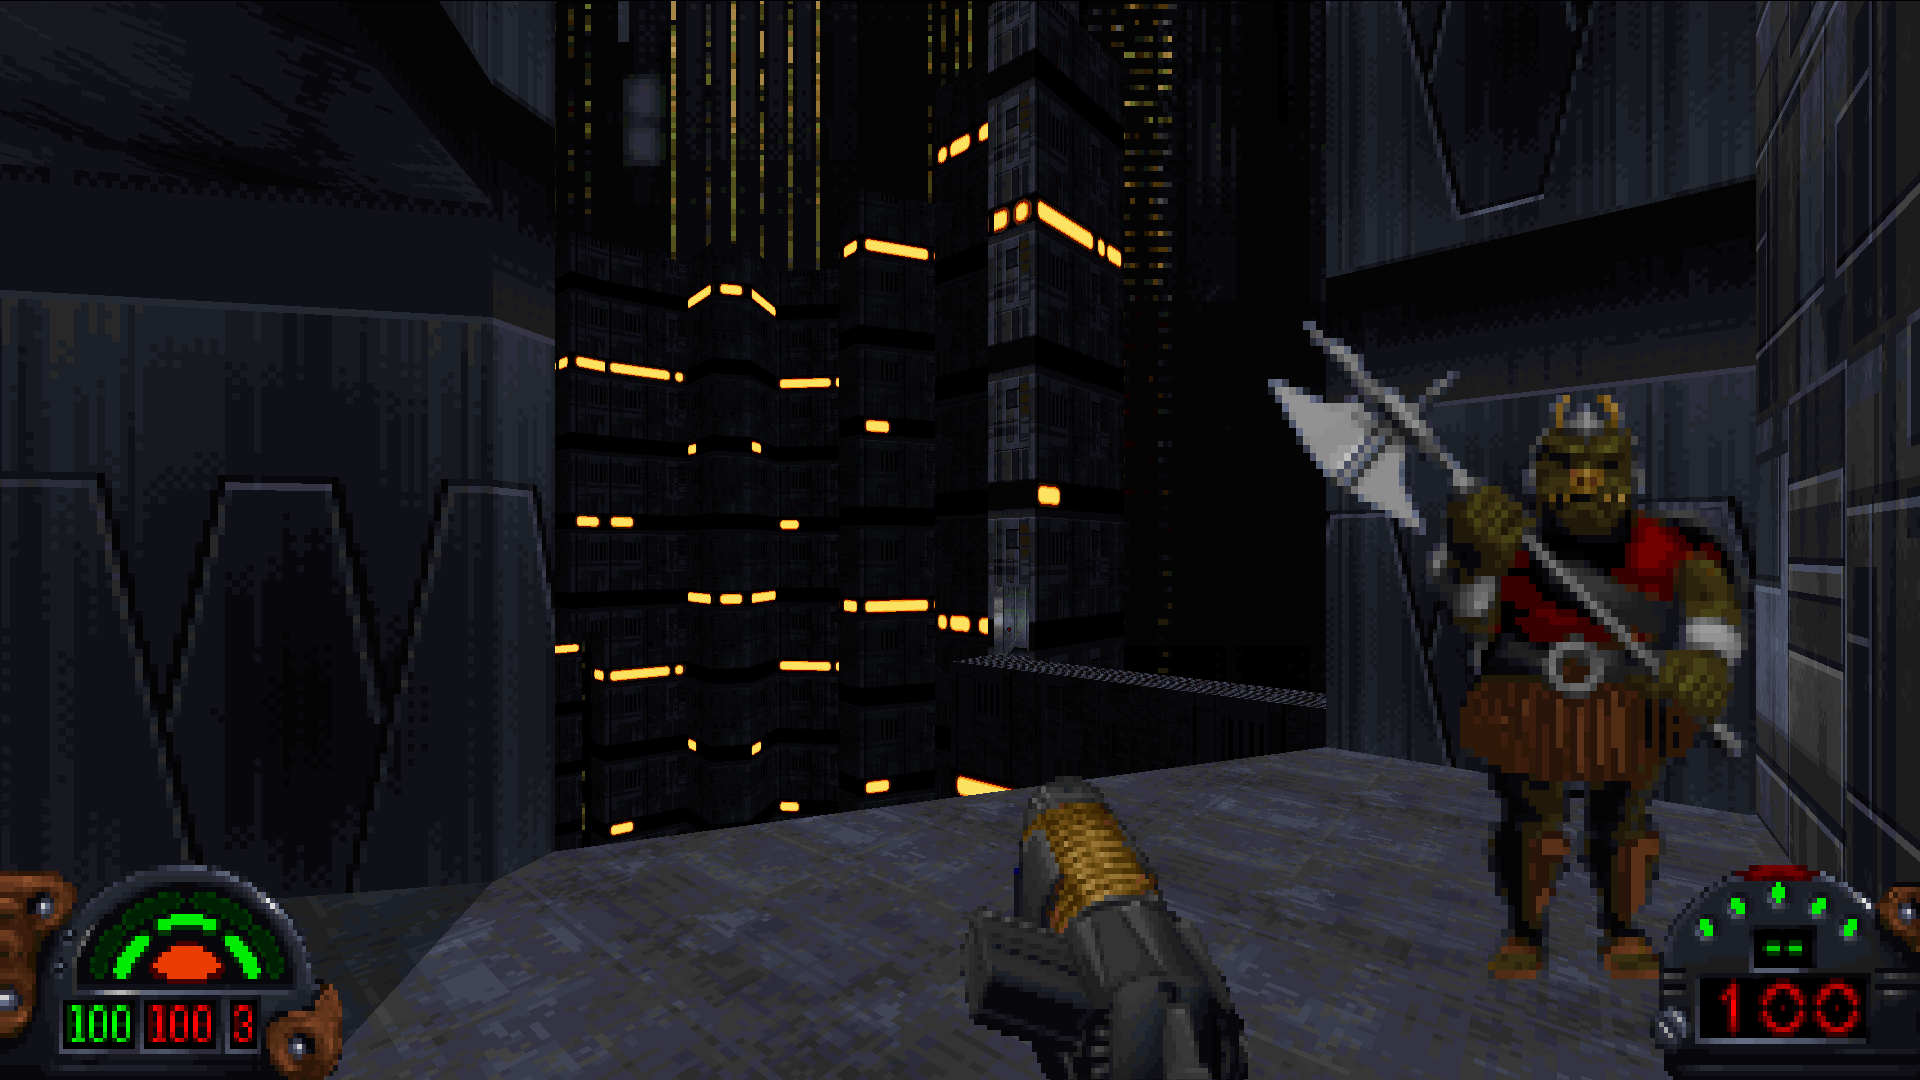
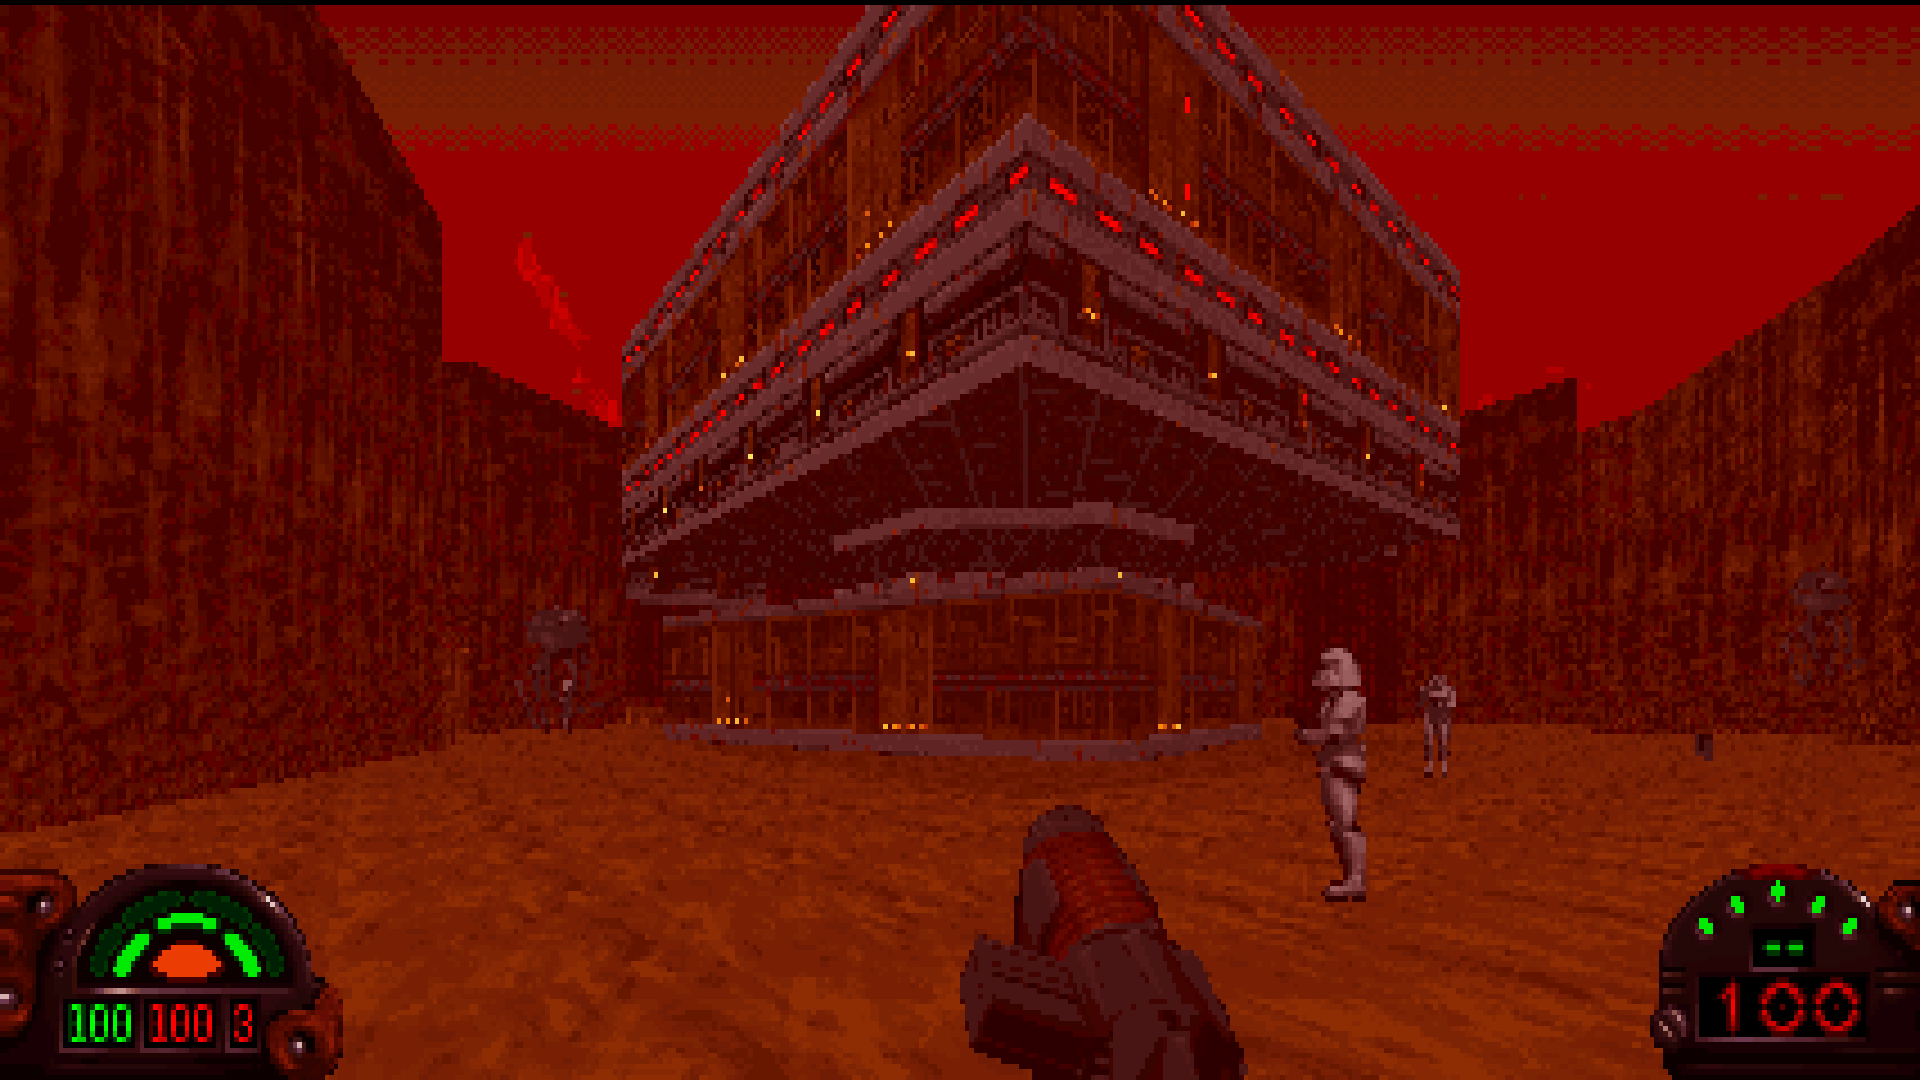

And don’t forget about ultrawide resolutions! I took this by resizing the window, so I don’t remember the exact aspect ratio but I think it was about 35:9. Note that this is still the original software renderer with minimal modifications to support widescreen.
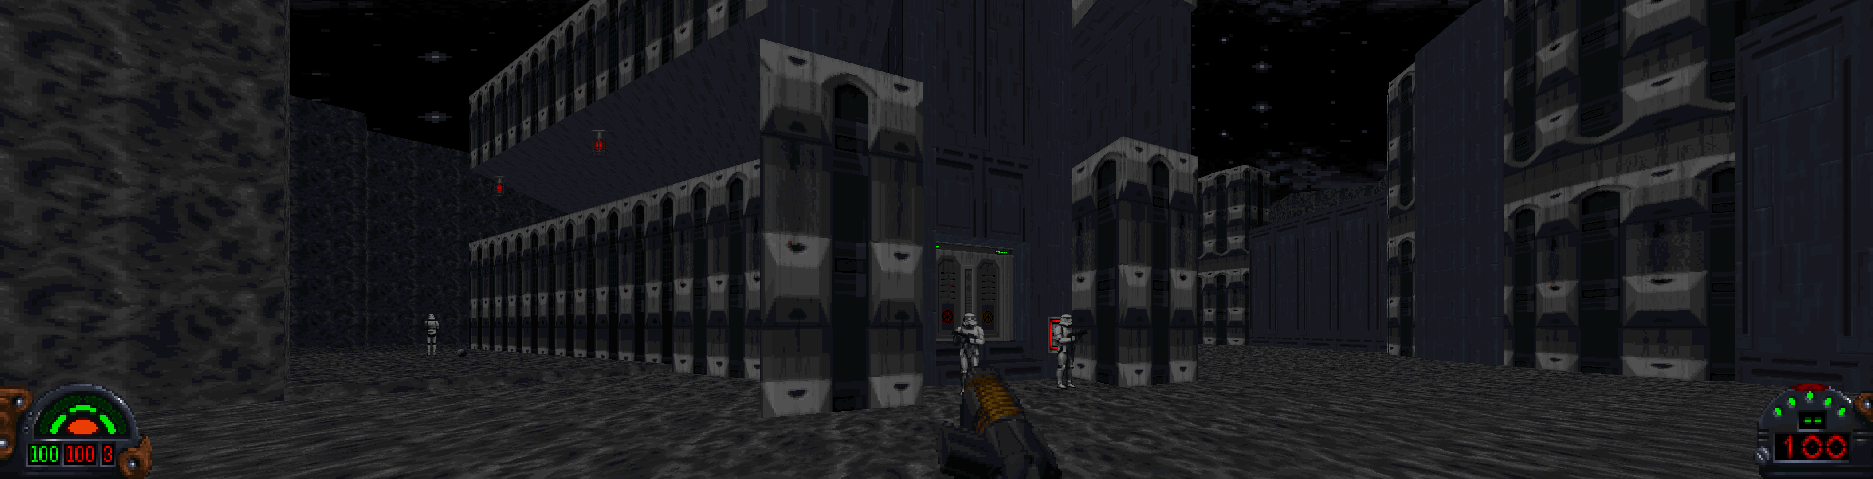
System UI
The “System UI” has been undergoing improvements. This includes:
- New title screen.
- OS (System) File Dialogs instead of the imGUI version I was using. This improves the UI when needing to select paths and files and makes this part of the UI more consistent with other programs used on your OS.
- New Graphics UI.
- Added the ability to bring up the System UI while playing a game using Ctrl + F1.
- Added the ability to adjust resolution and graphical settings and see the results immediately in-game.
- Added optional color correction.
TitleScreen
Adjusting Graphics Settings During Gameplay

Optimizations
Running the software renderer at high resolutions was not always performing well - especially beyond 1080p. The main issue was not the rendering itself, however, but the cost of transfering the framebuffer from CPU to GPU memory and to a much lesser degree, the cost of converting the framebuffer from 8-bit to 32-bit color on the CPU. Several methods are employed to fix this situation.
GPU Palette Conversion
Rather than converting from 8-bit to 32-bit on the CPU - the new default is to perform this conversion on the GPU during the blit of the framebuffer to the window/screen. This has multiple effects:
- Reduces CPU time spend converting from 8-bit to 32-bit.
- Reduces the amount of memory that needs to be transfered from the CPU to GPU by a factor of 4. This is a huge time-saver.
Asynchronous Framebuffer Transfer
The next big issue was the stall waiting for the framebuffer to be transfered to the GPU so that the screen could be updated. To fix this, the framebuffer was changed from a Texture to a DynamicTexture. The new DynamicTexture uses multiple Pixel Buffer Objects to allow for an asynchronous copy of the framebuffer data to the GPU and then copy from GPU to GPU resources.
Results
Combining these two reduced the cost of transfering the framebuffer and converting from 8-bit to 32-bit at 1440p by more than an order of magnitude - allowing the original levels to run at over 100fps at 1440p with the conversion and upload taking around 0.2ms instead of 14ms.
Level Editor
During this period, I also worked on the Level Editor on occassion. It still has a long way to go, but here are some things I worked on:
- Improved the grid rendering in the 3D view.
- Added the ability to actually edit geometry.
- Improved and refined the UI.
- Worked toward being able to properly draw and shape sectors.
3D Grid Rendering Improvements
Extended View Distance
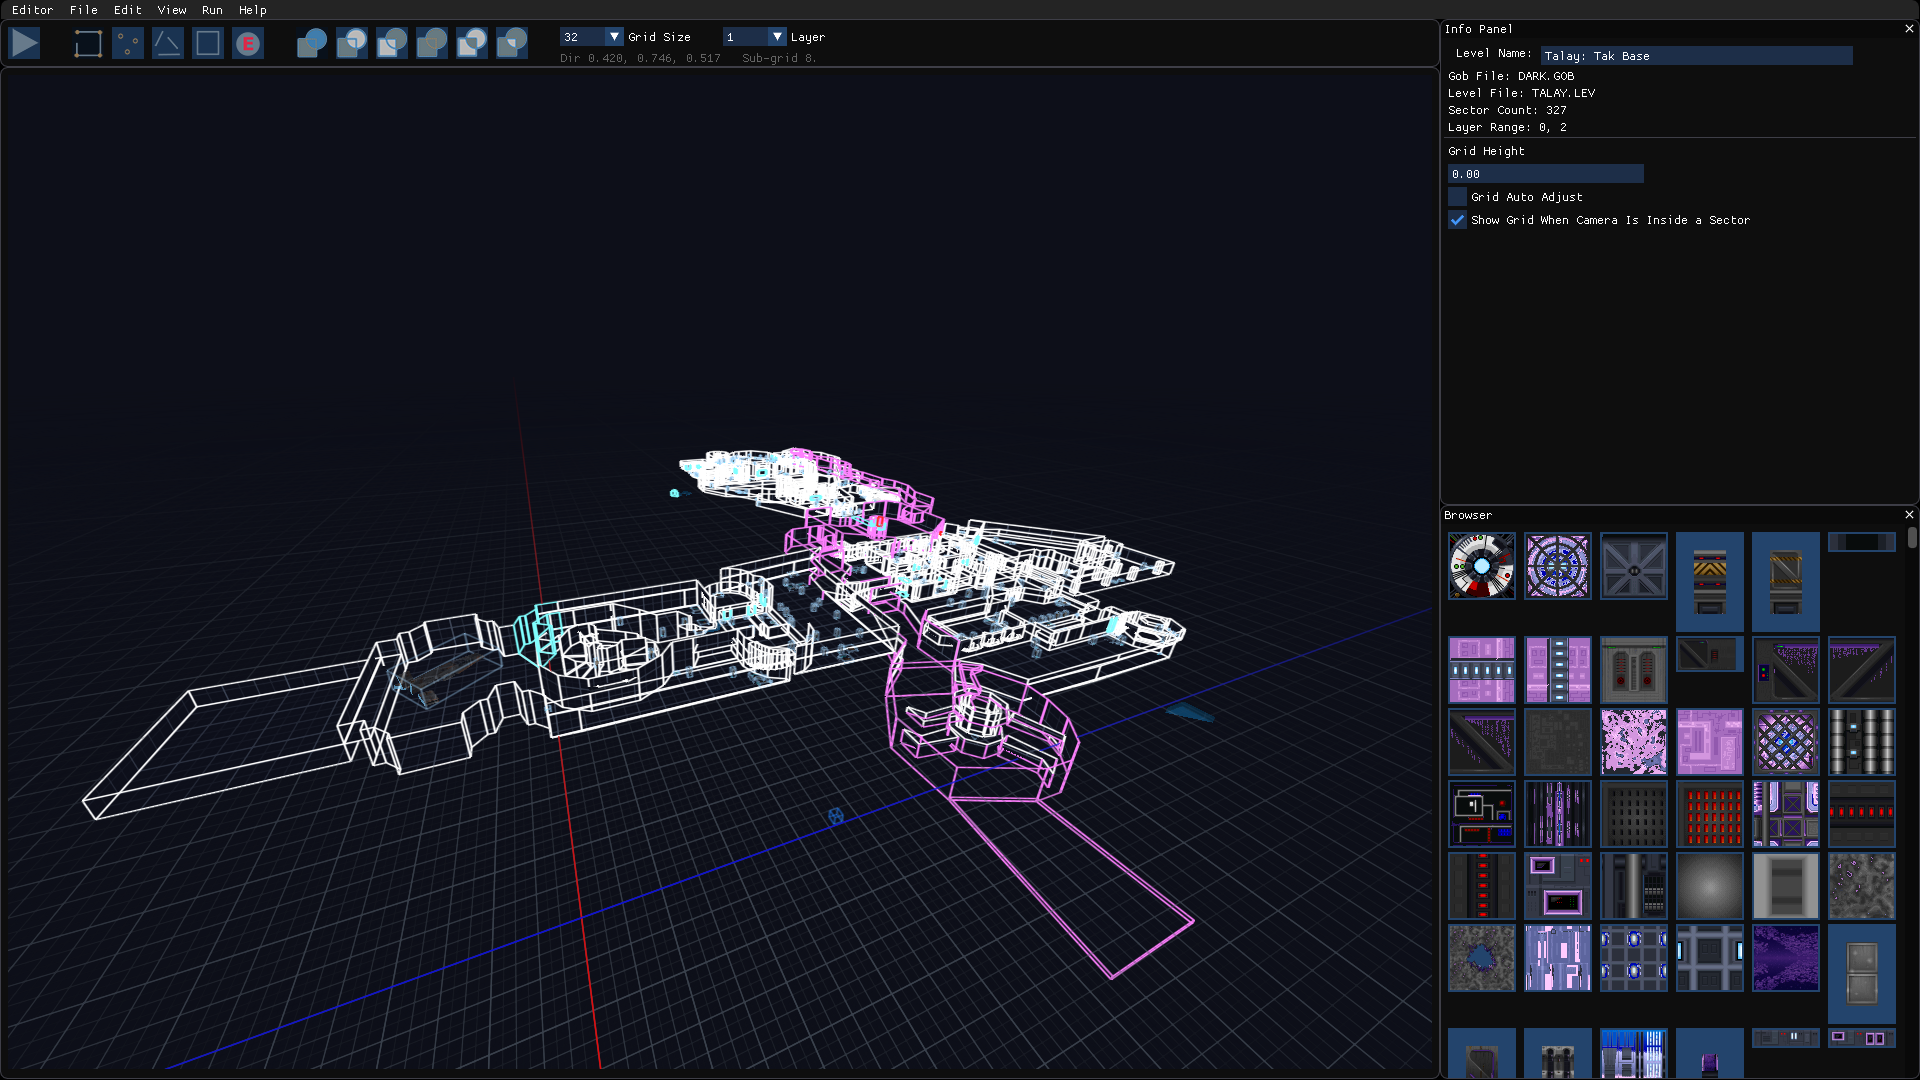
Rendering Sub-Grids (similar to the 2D Grid)
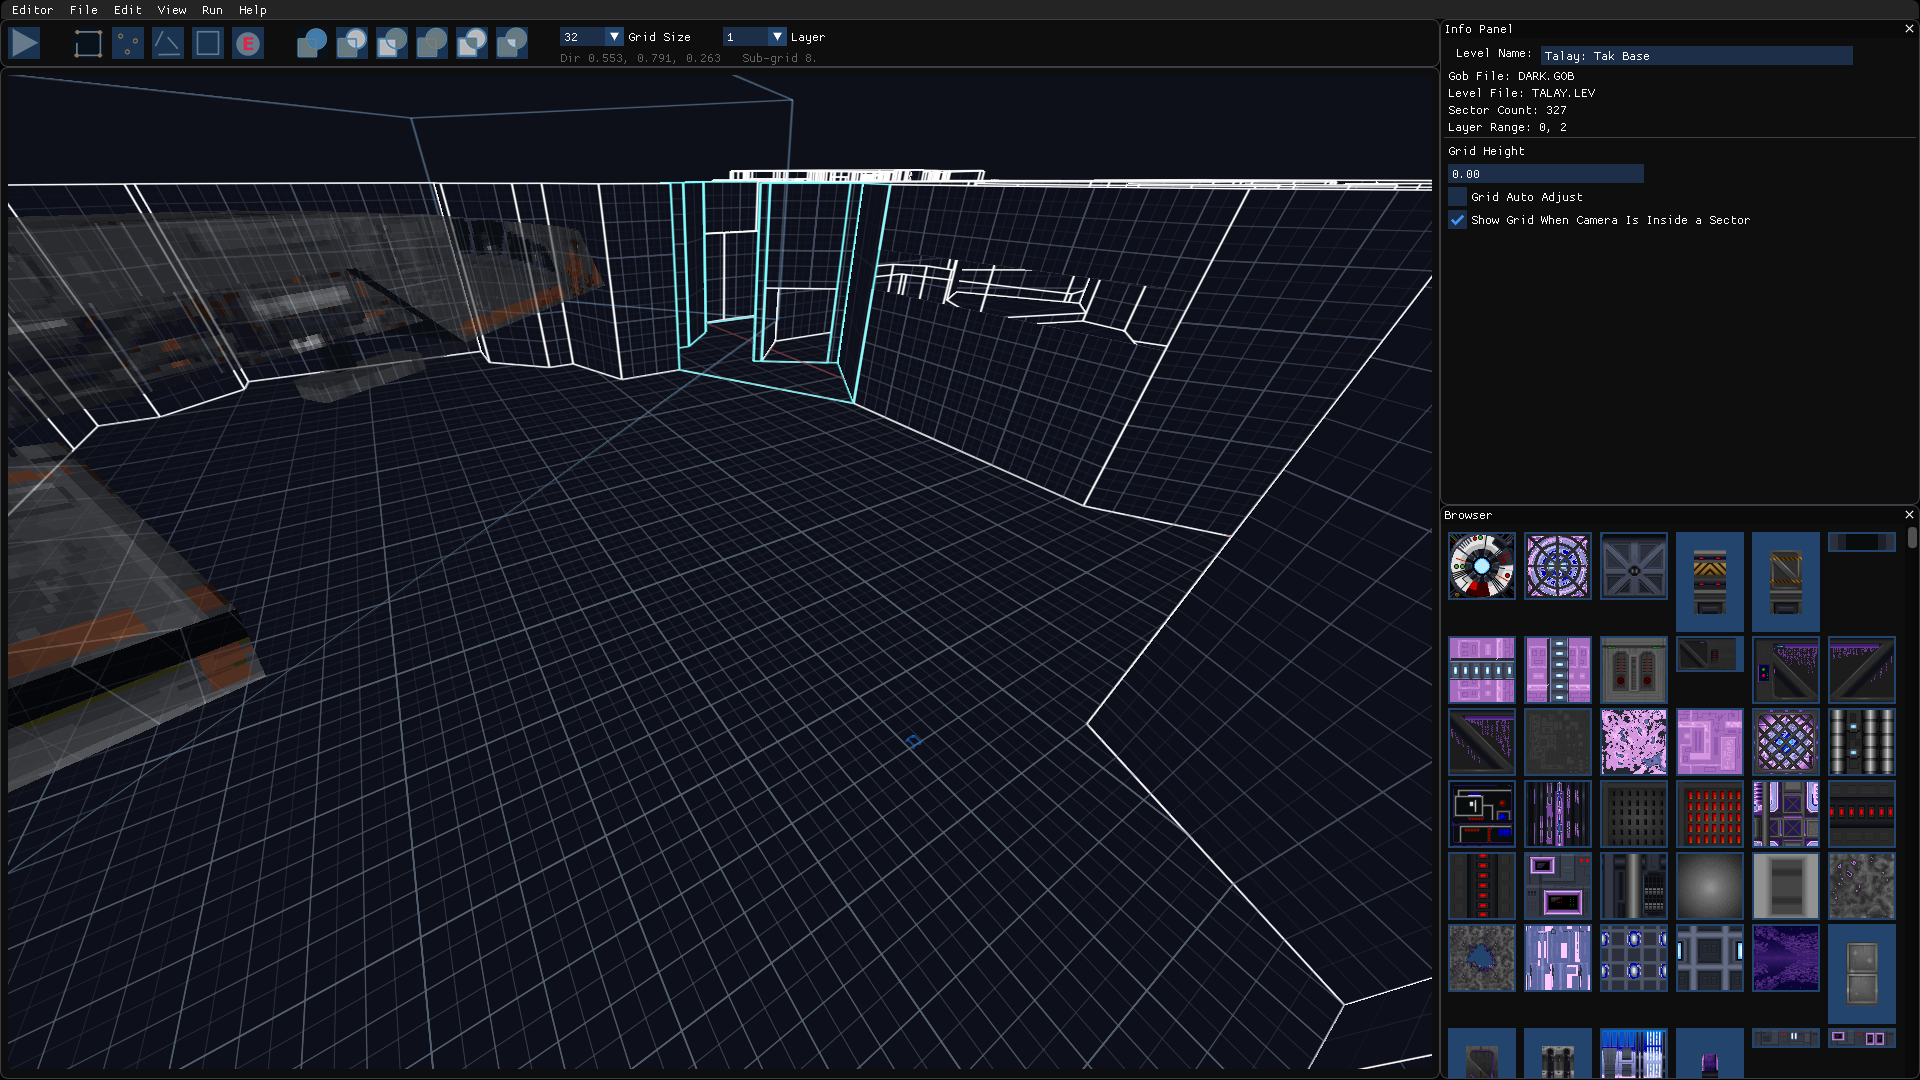
Geometry Editing
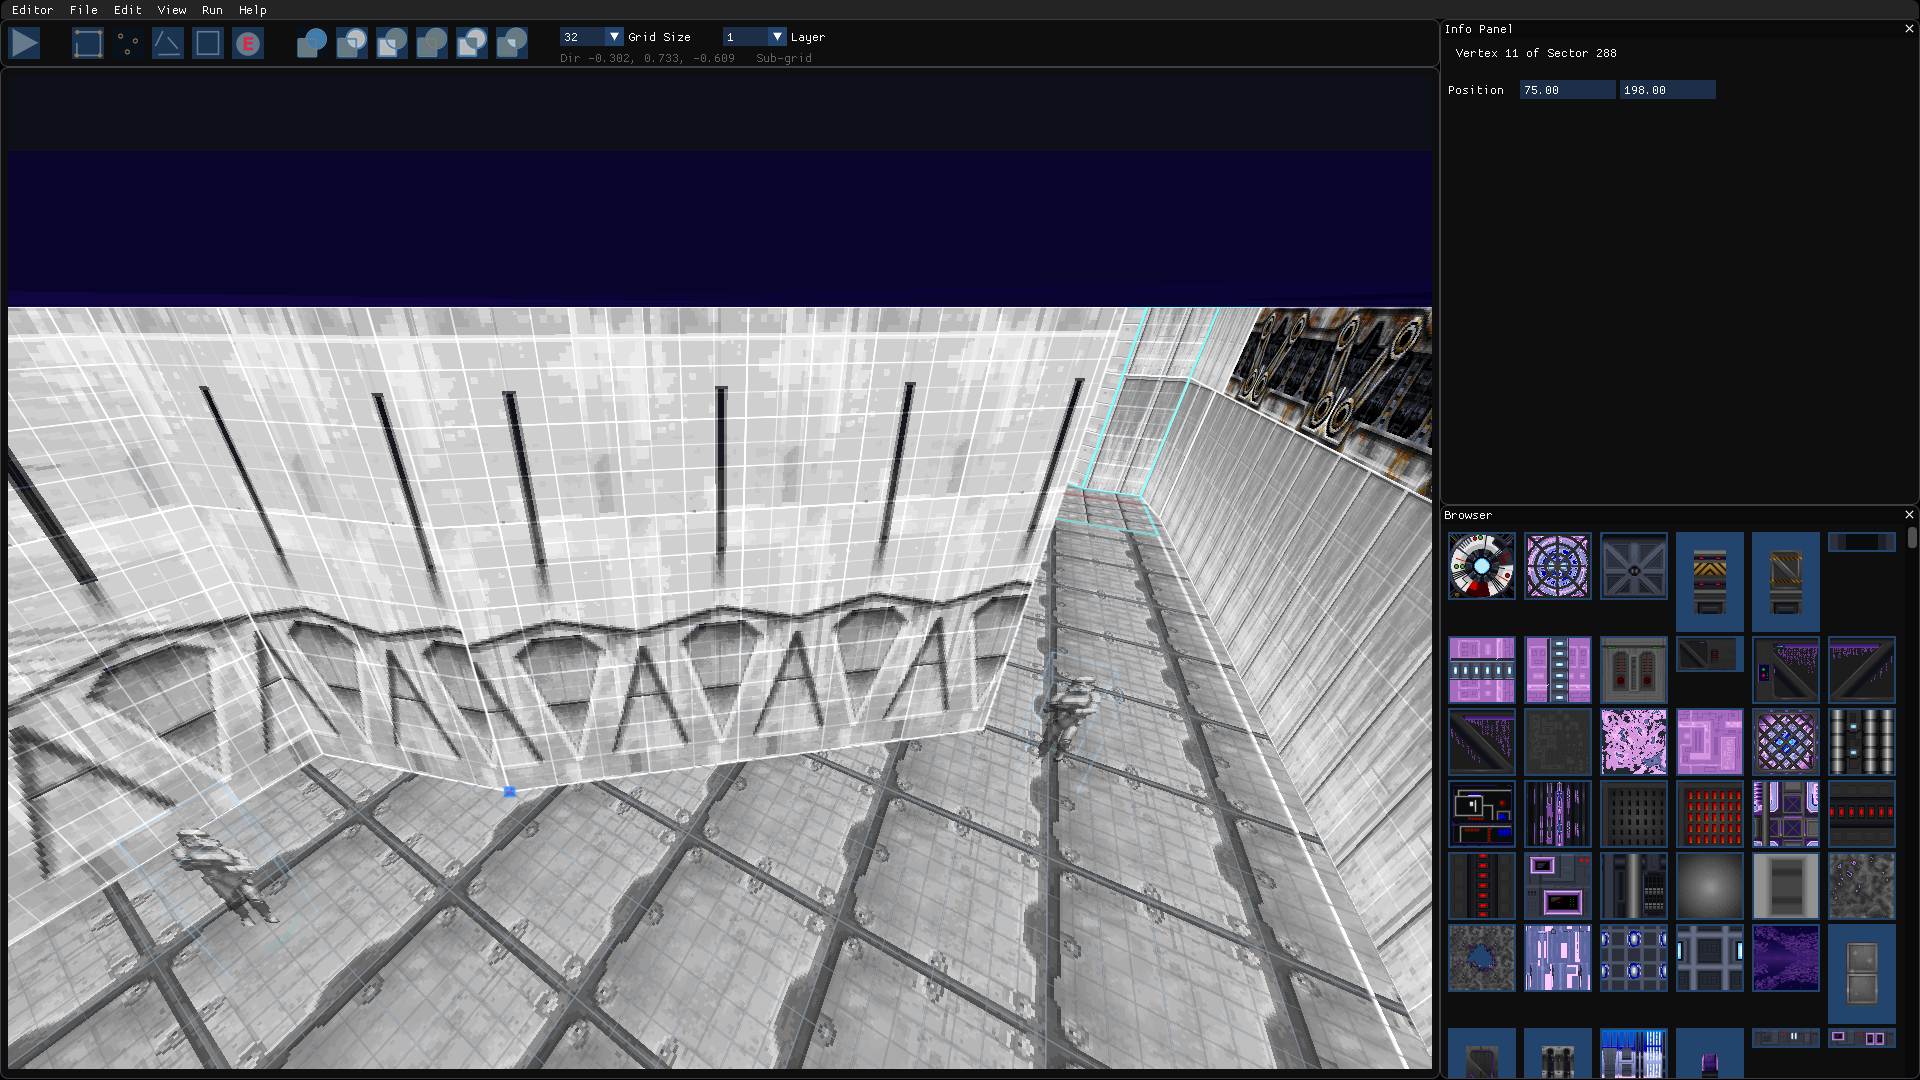
Object Editing
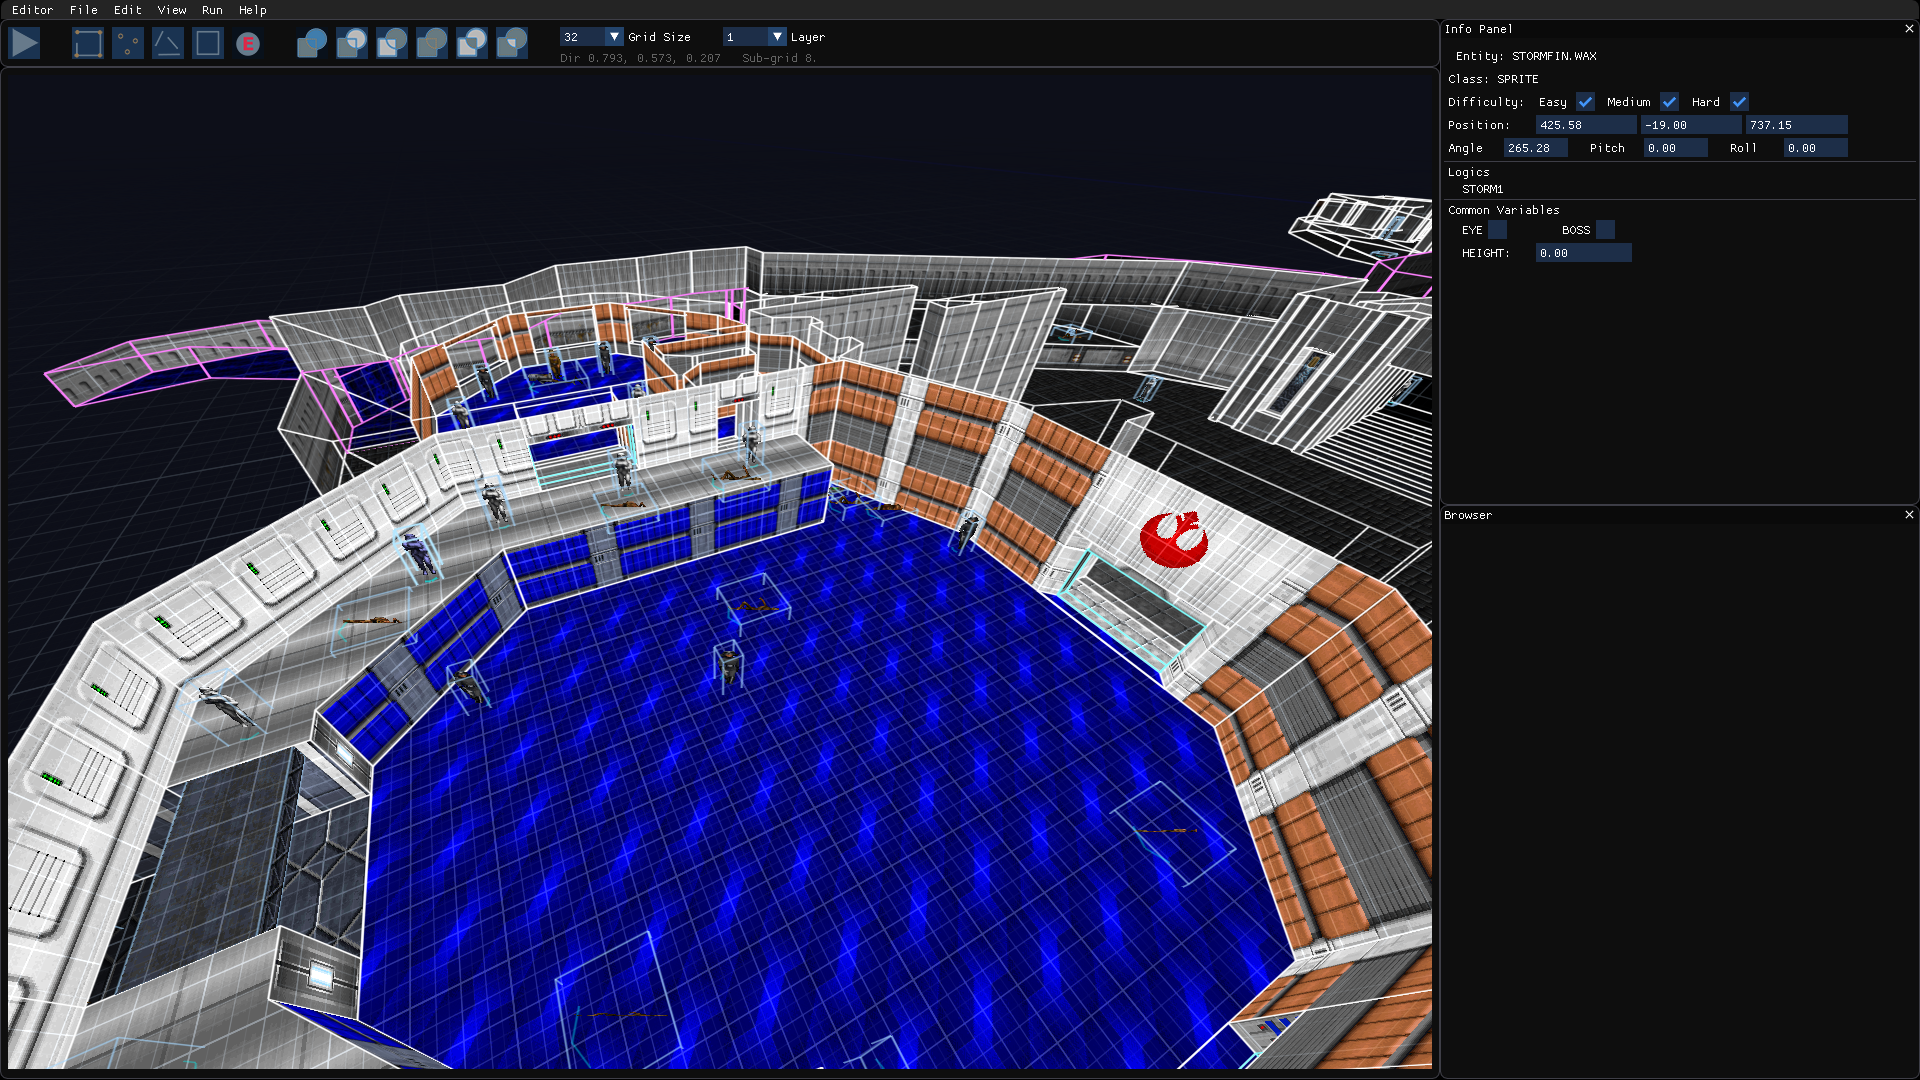
State of the Project
Now that you have read and seen some of the progress over the last few months, I want to quickly go over the current state of the project.
Roadmap Changes
The original November release was estimated based on the apparent project scope and development velocity when the Roadmap was put together. As a result, it was optimistic despite my original thoughts on the matter. The project is still in development, as I hope this post illustrates, but changes have been required to the Roadmap and time estimates. Please see the new roadmap for details.
Classic Renderer State
The Classic Renderer is now about 95% complete. 3D object rendering code still needs to be cleaned up and ported from the reverse-engineered code and the sorting algorithm needs to be finished - it doesn’t yet handle all of the special cases between sprites and 3D objects. Mainly because that code could not be tested until 3D objects are rendering properly.
Next Steps
The next steps for the project are to finish the Classic Renderer, which should be done in the next few weeks. Unfortunately I am going to have to put off a release a bit longer because of a issue:
In the original code, a lot of the initial texture offsets are handled when the INF system starts up. What this means is that some of the textures do not have the correct texture offsets when using the Classic Renderer (though most do). The second INF issue is that some adjoins are not correct until after setup is complete. And the final issue, is that many graphical issues in mods are actually caused by incorrect INF execution.
As a result of these issues, I have decided to put off the next test release until the reverse-engineering of the INF system is complete. Once this is finished most MODs will work correctly and it should be possible to properly test the Classic Renderer to find the real bugs. Basically I want to avoid having to worry about bug reports and issues people find (including myself) that are really due to INF issues.
Once the INF system is reverse-engineered and fully accurate, it will be time to make another test release. After that the focus will be on character control, physics and collision - the game needs to feel right. And then reverse-engineer and properly implement all of the Logics and weapons.
06 Sep 2020
It has been awhile since the last update but some of that has been cleaning up the design of the overall renderer structure. There are two forces at play, pulling in separate directions - a desire to preserve the original DOS renderer with all of its quirks and a desire to clean up artifacts, especially at higher resolutions, and provide a robust, forward thinking renderer. In either case the renderer needs to be faithful to the original and existing Mods and levels need to work as is (which means rendering correctly as well).
Fortunately the needed reverse-engineering for the renderer is complete, the work now is supporting all of the required features while preserving the original renderer while making sure the result is clean and maintainable. This means this release is taking longer than planned but, as the bedrock of the entire project, it needs to be done well.
Design
The TFE Dark Forces renderer consists of the following matrix of combinations:
| |
Classic |
Perspective |
| Software |
Fixed point DOS 320x200 software renderer. 8-bit only. |
Floating point software renderer. 8-bit or true color. |
| |
Floating point software renderer. 8-bit or true color. |
|
| Hardware |
Floating point hardware renderer - OpenGL 3.3 with future support for Vulkan/Metal. 8-bit or true color. |
Floating point hardware renderer - OpenGL 3.3 with future suppport for Vulkan/Metal. 8-bit or true color. |
| |
Floating point hardware renderer - Compute. 8-bit or true color. |
Floating point hardware renderer - Compute. 8-bit or true color. |
The “Classic Renderer Release” focuses on the “Classic” column. The “Fixed-point DOS” renderer is the reverse-engineered DOS renderer. Rather than trying to have a hybrid renderer using higher precision fixed point – an approach taken until recently which is not compatible with GPU rendering - the higher precision software renderer instead uses floating point except for inner column/scanline loops. This means that much of the code can be shared between the CPU and GPU renderers with the inner loops being swapped out. To put it another way, the original DOS renderer is preserved without limiting the renderer used for higher resolutions.
The Compute based renderer, which moves the majority of the rendering system to the GPU including visibility and all transformations – promises to greatly improve the performance of highly detailed custom levels and greatly reducing the data being transferred from the CPU to GPU. It also opens up new possibilities such as raytracing effects without requiring RTX hardware. However, this is a non-trivial endeavor and WILL NOT happen until after the gameplay is complete. So, it is included for completeness and future planning only.
The perspective renderers will also be work for a future, post-gameplay release. It is here for future planning.
Note that 8-bit / true color option does not add an extra combination, each sub-renderer has support for either.
TFE_RenderBackend
The Render Backend is responsible for abstracting the low level rendering API and providing the renderers with an API to manipulate GPU buffers, shaders, GPU textures, render targets and virtual displays, render state, and low level GPU draw and compute commands.
TFE_PostProcess
The Post Processing system handles blitting virtual displays and render targets to the window, color correction, and post process shaders such as Bloom. Note that the post processing stack is independent of the renderer, this means that color correction and post processing shaders can be applied just as well to CPU based renderers if the minimum GPU requirements are met. This also means that the post processing system can be used to convert from 8-bit to true color using the GPU, which can save CPU time and CPU to GPU bandwidth on supported hardware.
Note that if no usable hardware (GPU) support is available, such as on some low-end Intel iGPUs, then GDI (or equivalent technologies) will be used instead to blit the virtual frame buffer to the window. This will allow The Force Engine to be usable even when lacking GPU support – but Editor support will be disabled, and the menu system may be more limited. This feature may not make it in for the “Classic Renderer Release” but is planned before the “1.0” release.
TFE_JediRenderer
The TFE “Jedi” derived renderer, which consists of several sub-renderers based on feature sets and hardware being used. The goal of the entire family of “Classic” renderers is to faithfully reproduce the original renderer and algorithms with minimal changes that might disrupt Mods or prevent correct rendering of existing levels. Any changes of this nature, even if they are a good idea, should be optional in order to provide the most faithful experience possible by default.
TFE_JediRenderer
High level functionality used by various sub-renderers. This includes fixed point functionality and other higher-level constructs. Shared functionality between RClassic_Float and RClassic_GPU will also find itself here.
RClassic_DOS
The reverse-engineered DOS renderer only works properly at 320x200. This renderer is always 8-bit and provides minimal changes to preserve the original. However, if a similar look is desired, even in 8-bit, but without the artifacts the Classic Float renderer can be used instead. Originally, I partially implemented a fixed-point renderer with improved precision to avoid code duplication but realized I needed the floating-point renderer anyway for GPU support – I was overcomplicating the issue.
RClassic_Float
The Classic_Float renderer uses the original algorithms but uses floating point instead of fixed point and fixes artifacts that can be fixed in a non-destructive way (a way that does not interfere with existing mods or tricky effects). This means that a lot of the code can be shared between the floating point and GPU renderers – this code will be pulled up into TFE_JediRenderer. Classic_Float can use 8-bit or true color rendering by using color map interpolation (more details in the future).
RClassic_GPU
The Classic_GPU renderer is similar to the Classic_Float renderer but moves low level rendering to the GPU (such as wall and floor rasterization). It uses the same algorithms as the Classic_Float renderer, including sorting and 1D depth buffer for object versus wall visibility. The goal is to share as much as possible between the software and GPU renderers – but only when that sharing does not greatly increase complexity or make maintenance more difficult. Classic_GPU can render in 8-bit color or true color by using the same color map interpolation technique as the software true color renderer. Note OpenGL 3.3, or equivalent in the case of Metal or Vulkan, will be required.
RClassic_Compute (Post-Gameplay Addition)
The goal of Classic_Compute is to implement most or all of the Classic_Float renderer entirely using the GPU with very little communication to the CPU – mainly viewpoint data and changes to sectors and objects. The goal is to improve scalability of the portal-based renderer and better utilize modern GPUs. Note that Compute Shader support will be required, probably requiring OpenGL 4.5 or 4.6 or equivalent in the case of Metal or Vulkan.
07 Aug 2020
The Problem
So for a while I was working with two different “modes” for fixed point in the Classic Renderer - the original (DOS) 16.16 and then a higher precision, but also larger 44.20 format. The larger format fixes all of the overflow issues that happen in the renderer when rendering at above 320x200 and the smaller format matches the DOS original. However, when trying to reconcile these different modes which would have to exist at the same time in order to switch dynamically - without duplicating code - things were proving to be problematic. So I took a closer look at what Outlaws and the Mac version were doing and realized that they use the same precision for most operations, the same size type and still use fixed-point. This is obvious in hindsight. So what is the difference? Mainly that certain operations were handled more carefully in those versions of the engine. This is what I suspected but what I didn’t immediately realize that only a few places in the code need to change, most of the time 16.16 format is enough even at higher resolutions. The only time it is truly insufficient is when rendering textured scanlines (when rendering flats or textured models).
Note the code shown here isn’t complete but shows the relevant parts. And yes I realize the mul16() should be offseting the 64-bit result by HALF (32768 for 16.16) before the shift for proper rounding, but this follows the original code in that regard.
So what do I mean about being more careful? To answer that, I will show some problematic code found in the DOS renderer and explain the problem.
x0proj = div16(mul16(x0, focalLength), z0) + halfWidth;
div16() is fixed point division. It upcasts the fixed point values to 64-bits, scales the numerator by ONE (65536 in 16.16 fixed point) and then divides by the denominator.
fixed16 div16(fixed16 num, fixed16 den)
{
  s64 num64 = s64(num);
  s64 den64 = s64(denom);
  return (num64 << 16) / den;
}
mul16() is fixed point multiplication. It upcasts the fixed point values to 64-bits, multiplies the values and then scales by 1 / ONE (65536 in 16.16 fixed point).
fixed16 mul16(fixed16 x, fixed16 y)
{
  s64 x64 = s64(x);
  s64 y64 = s64(y);
  return (x * y) >> 16;
}
So what happens when we chain these operations - div16(mul16(a,b),c)? We will look at two cases, one at 320x200 and another at 640x400 and use the same X and Z values.
- We will assign
x = intToFixed(200); - since ONE is 65536, this means the fixed point equivalent is 13,107,200.
- Let’s assign
z = intToFixed(200); as well, this vertex will be on the edge of the screen after projection.
- If we are rendering at 320x200,
focalLength=intToFixed(160) (which is 320/2 for a 90 degree field of view) and at 640x400 focalLength=intToFixed(320), which are 10,485,760 and 20,971,520 respectively.
Here is the situation when rendering at 320x200:
div16(mul16(13107200, 10485760), 13107200):
Multiply: s32(13107200 * 10485760 / 65536) = 2,097,152,000
Divide: s32(2097152000 * 65536 / 13107200) = 10,485,760
This is fixed point, where ONE = 65536, so this represents: 160.0 - exactly what we expect for being on the right side of the screen. No problems here.
Now remember that an s32 (32-bit integer) can hold a maximum value of 2,147,483,647; you will probably notice how close we got to overflowing this value in the multiply above. Much bigger and things would start behaving weird. So let’s see what happens when we bump up the resolution to 640x400:
div16(mul16(13107200, 20971520), 13107200):
Multiply: s32(13107200 * 20971520 / 65536) = 4,194,304,000 -- OVERFLOW
...
Here the value overflows during the multiplication so when we get to the divide its already very wrong. But wait, the final answer should be 20,971,520 - so there should be plenty of precision! And indeed that is true.
The Solution
The problem with the original code is that the multiplication and division operations should be “fused” - in other words we should do them as one operation in 64-bits before dropping back from 64-bits to 32-bits.
So we replace mul16() and div16() with a single function fusedMulDiv(a, b, c), which computes (a * b) / c as one operation. Let’s see what that looks like:
fixed16 fusedMulDiv(fixed16 a, fixed16 b, fixed16 c)
{
  s64 a64 = s64(a);
  s64 b64 = s64(b);
  s64 c64 = s64(c);

  return ((a * b) / c) >> 16;
}
In other words (a * b) / c is computed in 64-bits - essentially 48.16 fixed point - and only converted to 32 bits once it is done. So let’s look at the results:
fusedMulDiv(13107200, 20971520, 13107200):
s32(13107200 * 20971520 / 13107200) = 20,971,520 -- No more overflow!
And since ONE = 65536, this represents 320.0 - exactly what we expect at 640x400 at the right edge of the screen.
Reality
Of course this, while being the most prominenent issue, is not the only one. The way scanlines are handled had to be fixed up as well. And there we really do need more precision, the original DOS game used 10-bits of fractional precision during scanline drawing for the texture coordinates, which is barely enough at 320x200. At higher resolutions we really need twice that (20-bits) to avoid artifacts, though 16-bits is tolerable (and most likely the solution used on the MAC). But this is a limited area of the code and so using specialized fixed point types for scanlines only affects a small amount of code, instead of the whole renderer.
Classic Renderer Release
So what does this mean for the release? To put it simply the renderer will detect if you are running at 320x200 or a higher resolution. If you are running at 320x200 the original code will be used as-is, flaws and all, in order to maintain the original limits. If you are running at any higher resolution or widescreen, then the code will instead use the improved, proper calculations as described here - just like the MAC port of Dark Forces and Outlaws - resulting in cleaner visuals, higher limits and a renderer that works well at higher resolutions.
13 Jul 2020
When taking breaks from the reverse-engineering work, sometimes I work a bit on the level editor. One area of work is deciding on the editor format and how to expose advanced features to Dark Forces and Outlaws (such as slopes in new Dark Forces levels). So I have been putting together a format “spec” that I am planning on implementing for the level editor at some point before it starts being used for real work.
TFEM Spec
Excerpt from the draft
The Force Engine will support the Dark Forces LEV format, Outlaws LVT and LVB formats and a super-set format called TFEM (“TFE Map”). Unfortunately the Jedi Engine reads text based data files in a fairly rigid way, meaning that there is no provision for skipping default parameters or adding new unknown parameters or structure. For this reason, the original formats are not very useful for adding new features or for the level editor. This format has some similarities to the UDMF format and is my attempt to “get ahead” of the format mess and allow the same format to be used while adding new features in the future and for the format to be the master format used by tools.
As a super-set format, TFEM will support the entire feature set of the Dark Forces version of Jedi and the Outlaws version as well as any new features added for The Force Engine. It will remain a text based format, though a binary “compiled” version may also be supported later. Finally it will support default values - in which case the parameter does not have to be specified and map readers must skip unknown values or blocks without giving an error - making the format more robust and making versioning easier. The plan is to use the TFEM format as the level editor format, which can then be exported to other formats as requested. If using Outlaws features in Dark Forces or using new map features not present in vanilla, the TFEM format must be used - in other words there will be no Outlaws in Dark Forces style formats. However when using the TFEM format all of the level features of both Dark Forces and Outlaws will be accessible when using the “TFE” featureset (and any addition TFE specific features).
08 Jul 2020
Its about time to post another update regarding the progress towards the Classic Renderer Release.
RE = fully reverse-engineered and ported to the engine.
Task List
The following task list are the items required for the release. The biggest remaining items are Object/Sector assignment and RE Object 3D rendering. Once those are complete the remaining tasks will be completed quickly. The release is still on track for this month. Also note that the reverse engineering efforts touch many systems in the DOS exe, so this work is also laying the foundation for the rest of the reverse-engineering effort, accelerating this project towards release.
Next Steps
Once this release is finished, the next non-bugfix release will be input/control binding - which will include being able to bind controls to the keyboard, mouse and controller but also things like mouse and thumbstick sensivity.
After that future releases will start fleshing out the gameplay - player movement and collision, weapons, logics/AI and remaining INF issues until the core gameplay is complete.
10 Jun 2020
Work on the reverse-engineering effort has been progressing well. The sector rendering portion is almost complete with some more work in the next few weeks on sprites and 3d objects. The goal of this effort is to finish the Classic Renderer (for Dark Forces) and have all levels and mods render correctly - except for issues caused by missing gameplay elements (caused by INF bugs or lack of AI).
The renderer will continue to support higher resolutions, such as 1080p. However limits will only be accurate at 320x200. To put it simply, resolutions beyond 320x200 have graphical issues with the base DOS limits. In other words 320x200 will produce near identical results to DosBox (same limits, etc) but resolutions beyond that will relax those limits as needed.
The Classic Renderer will also have hardware support, which means faster rendering at higher resolutions and optional texture filtering. I will post more about hardware rendering features once the software renderer is complete. There will also be additional options in order to improve performance and optionally even rendering quality.
The renderer in the current build has issues with low light environments, where the lighting itself doesn’t quite match the original. The Classic Renderer fixes this (among other issues) - so I put together a screenshot that shows the Classic Renderer and DosBox side by side. The Force Engine version was resized in Photoshop and cropped so there is some slight distortion and the viewpoints aren’t exactly the same but I think you will be able to see that the character of the rendering, lighting and colors match.
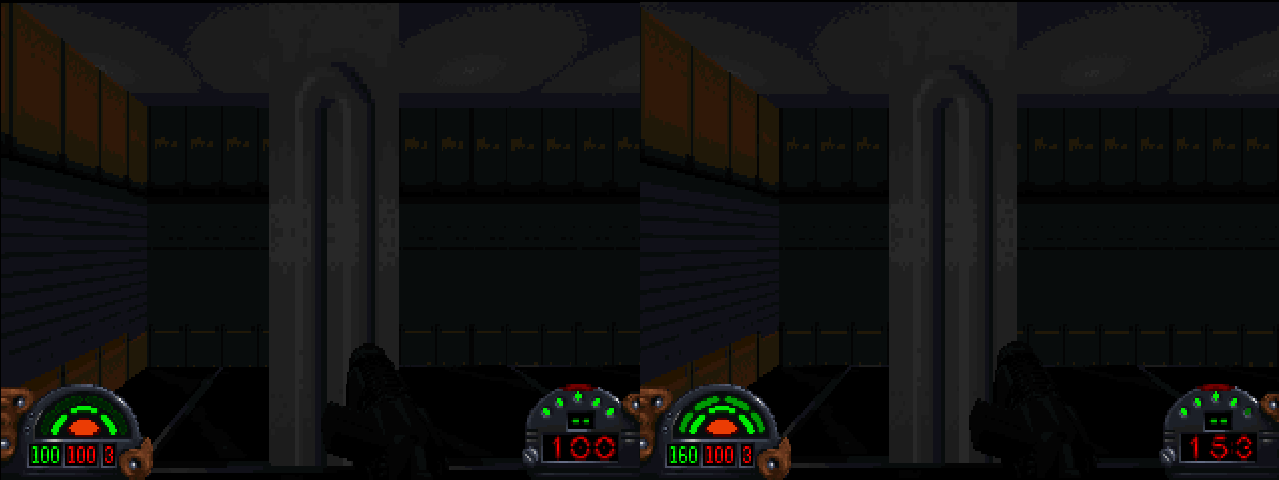
25 May 2020
This post concerns the next major test release, the DF Classic Renderer Release. There may be smaller releases in the meantime, such as bug fixes or quality of life improvements.
Classic Renderer
The “Classic Renderer” is the Dos-Dark Forces derived Jedi Engine renderer. This covers the rendering in the 3D view - purely 2D rendering such as UI is basically done except for a few bugs. This renderer involves several key components: walls with overlays (such as switches or signs), flats (floors and ceilings), mask walls (walls with transparent elements such as fences or force fields), sprites and 3D models - with proper light attenuation in different situations.
For a more thorough description of the DOS renderer itself see the work in progress Dark Forces (DOS) Rendering series starting with Dark Forces (DOS) Rendering, Part I. I will probably post Part 2 within a week or so.
DF Classic Renderer Release
The current renderer in the test release is not complete and not fully accurate - there are several issues such as sorting issues with sprites versus walls in a few cases and incorrect sorting with 3D objects versus sprites and walls in general. There are also some issues with wall rendering in some mods - such as “Prelude to Harkov`s Defection” (see the tram/subway). Finally the light falloff is not quite correct (though it is close in many levels), which is probably most obvious in Gromas Mines - the fog effect does not match the original very well in some areas.
As the reverse-engineering of the original DOS renderer nears completion, The Force Engine code is being updated and the code refactored. The ultimate goal of this release is to complete the Classic (DF) Renderer and ensure that it is functionally identical to the Dos version in 320x200. As I have been working, when I identify look-up tables I spend the time to make sure I understand how to accurately re-build the tables - with this knowledge I can remove the tables entirely when appropriate in order to support higher resolutions without sacrificing accuracy.
While refactoring the renderer code I plan on implementing a few non-DOS based features:
- Widescreen support.
- “Window-Resolution” option that changes the virtual resolution to match window size and aspect ratio.
- Improved software renderer performance.
- [Maybe] Classic Hardware Renderer.
Note that after the gameplay is more complete there will be another big renderer release before the project beta release in November that will feature the “Perspective Renderer”, more hardware support and Outlaws Jedi Engine enhancements (such as slopes, double adjoins, vertical adjoins, etc.). The goal of this release is renderer accuracy so that all levels and mods are rendered correctly and visually match the DOS version at 320x200.
Next Steps
Once the DF Classic Renderer Release is finalized, the next steps are to focus on gameplay elements - fully accurate collision detection and player movement, AI and weapons. These will be broken down into major test releases, in a similar manner as the DF Classic Renderer.
Add Comment
16 May 2020
I have been reverse engineering the Dark Forces executable in order to figure out how it works, exactly, so that The Force Engine can truly be “source port” accurate. Figuring out how the AI works, player movement, collision detection, etc. is very important but this series of posts will start with rendering. These posts will talk about how Dark Forces rendering works in DOS and how the “Classic” Software Renderer works in the Force Engine (or will work as more work needs to be done there). Note that I will be showing some code snippets, these are directly from the reverse engineered work and represent what is actually happening in Dark Forces. However I obviously won’t be showing all of the code here and instead just snippets as needed.
Fixed Point
Back when Dark Forces was developed, floating point processors were generally not available. So, like most 3D games of the time such as Doom, they used “fixed point” instead. The concept is pretty simple but I will not go into too much detail here. Basically a fixed number of bits are assigned to store the fractional part of the number and the remainder are used for the sign (1 bit) and integer part. Dark Forces used 16.16 for most of fixed point numbers (or 1.15.16 if you want to call out the sign bit). In this scheme 1.0 = 65536 (0x10000) and 0.5 = 32768 (0x8000), which are the HALF_16 and ONE_16 constants used in the code.
Adding and subtracting works as you would expect (ignoring possible overflow) but multiplication and division can be problematic. In Dark Forces, they essentially upcast the values to 64 bit, do the operation and then use the lower 32 bits of the result. You will see functions such as mul16(), div16(), round16(), floor16(), etc. that handle these details in the explanations.
Camera
The Player has 3D position in the world - an (x, y, z) coordinate where (x,z) represent their position on the floor, as if seen from above (or a map view) and (y) is the height. In Dark Forces negative (y) is going up and positive (y) is going down. To convert to camera coordinates the (x,z) value is left as-is and the (y) value is offset by the eye-height, which is about -5.8 DFU when standing (Dark Forces Units, ~1 foot, though some estimates put it closer to 25cm). For the curious, the exact value is -380108 / 65536.
vec3 camPos = { player.x, player.y - eyeHeight, player.z };
The Player also has pitch, yaw and roll angles in order to orient the view. For Dark Forces only yaw and pitch are used for the camera, though 3D models (3DOs) can be fully oriented using all 3 angles.
From this several values are computed, the equivalent of a matrix:
cosYaw, sinYaw, negSinYaw
xTranslation, zTranslation
Cosine and Sine are computed using a 4096 entry table and with transformations to handle each quadrant and phase shifting one table handles both sine and cosine. Note that the precision is equivalent to a 16k entry table. Translations are computed thusly:
zTranslation = mul16(-camPos.z, cosYaw) + mul16(-camPos.x, negSinYaw);
xTranslation = mul16(-camPos.x, cosYaw) + mul16(-camPos.z, sinYaw);
Sectors & Walls
Drawing starts in the current player sector, processing each sector as they are seen through portals (“adjoins”). Each time a portal is traversed, “window coordinates” are tracked that clip the view to the current portal. To start with, those window coordinates exactly cover the full view. We start by processing these walls - which includes culling, projection and preparing for rendering, which will be the focus of the rest of this post. Details such as merging and sorting, drawing columns, drawing floors and ceilings, traversing portals, drawing sprites and models will be handled in future posts.
Each sector keeps track of the last frame it has been used. By using this, the engine only transforms its vertices and processes its walls - converting them to renderable segments once per frame. The first time a sector is encountered, the first step is to transform all of its vertices from world space to viewspace:
vec2* vtxWS = curSector->verticesWS;
vec2* vtxVS = curSector->verticesVS;
for (s32 w = curSector->vertexCount - 1; w >= 0; w--)
{
vtxVS->x = mul16(vtxWS->x, cosYaw) + mul16(vtxWS->z, sinYaw) + xTranslation;
vtxVS->z = mul16(vtxWS->x, negSinYaw) + mul16(vtxWS->z, cosYaw) + zTranslation;
vtxVS++;
vtxWS++;
}
Note that the vertices are “2D” - the (y) coordinates, which map to the heights on screen, are computed later by projecting the floor and ceiling heights. It is still fair to say that the Jedi Engine, like the Doom Engine, is 3D since the third dimension is accounted for in the varying floor and ceiling heights.
Culling
Next we must loop through every wall in the sector and process them. In Dark Forces this is what the Wall_Process() function is for. Dark Forces uses a 90 degree horizontal field of view. As a result, we can think of the top down, 2D frustum as consisting of two 45 degree right triangles. What this means is that for a given ‘depth’ (z value), the left clipping plane passes through x = -z and the right clipping plane passes through x = +z. Or to put it a different way, given a point (x,z) in viewspace - we know that if x < -z it is outside the left side of the screen and if x > +z it is outside the right side of the screen.
At this point the wall being processed consists of two view space coordinates (x0,z0) and (x1,z1). First Wall_Process() culls the wall if it is completely behind the camera and then culls it if both vertices are outside the left plane or both vertices are outside the right plane.
if (z0 < 0 && z1 < 0)
{
wall->visible = 0;
return;
}
if ((x0 < -z0 && x1 < -z1) || (x0 > z0 && x1 > z1))
{
wall->visible = 0;
return;
}
Next, Wall_Process() determines if the wall is front facing. That is if the camera is looking at the front or back of the wall. We can determine which side of a wall we are on by taking the cross-product. However, the original programmer didn’t quite finish simplifying the equation, so did something equivalent but slightly more complicated. This actually simplifies to a cross-product, so it is mathematically equivalent and gets the job done.
s32 dz = z1 - z0;
s32 dx = x1 - x0;
s32 side = mul16(z0, dx) - mul16(x0, dz);
if (side < 0)
{
wall->visible = 0;
return;
}
Clipping
Now things get a little more complicated. I won’t post the code, there is a lot of it, but the next phase of the function is clipping the wall the view frustum and to the near plane. There are still a few interesting things to point out, though. First, whenever a wall changes in Dark Forces (i.e. the vertices are moved, such as in the case of rotating doors or moving sectors) - its length in texels is computed and stored. Dark Forces uses a consistent texel density - 8 texels per DFU. To put it simply:
wall->texelLength = mul16( length(x0, z0, x1, z1), intToFixed16(8) );
length in texels = length of wall * 8.0
Anyway when clipping lengthInTexels must be tracked, in addition to the starting texel offset after clipping (which is 0 if no clipping is required).
Projection
Once the wall is clipped to the view frustum, it is finally time to project it into screenspace. Note that we still don’t care about the wall height or camera pitch. For now we are still focusing on the x coodinates. First I will show the code and then explain it since it is pretty simple:
x0_screen = div16( mul16(x0, focalLength), z0 ) + halfWidth;
x1_screen = div16( mul16(x1, focalLength), z1 ) + halfWidth;
x0_pixel = round16(x0_screen);
x1_pixel = round16(x1_screen);
halfWidth is half of the width of the screen in pixels.
focalLength controls the horizontal field of view - it is basically tan(FOV/2) * halfWidth. Since FOV = 90, tan(45) = 1, so focalLength is actually the same value as halfWidth. But Dark Forces stores them as two seperate variables.
Finally round16() rounds the fixed point number and then converts it to an integer. Basically if the fractional part is less than 0.5, it rounds down otherwise it rounds up. The code is actually really simple:
s32 round16(s32 x) { return (x + HALF_16) >> 16; }
More Culling
Once the wall is projected, Dark Forces tries culling it again just to be sure.
First Backface culling. Since we know the orientation of the walls, we know that if x0 > x1 then we are looking at the backside of the wall:
if (x0_pixel > x1_pixel)
{
wall->visible = 0;
return;
}
Next we check if the wall is outside of the screen. Since we know the order of the x values, we can just see if the minimum value is to the right or the maximum value is to the left:
if (x0pixel > s_maxScreenX || x1pixel < s_minScreenX)
{
wall->visible = 0;
return;
}
Finally Dark Forces has a limit of 384 potentially visible walls. Fortunately each sector is only processed once and culled walls don’t count, so this limit isn’t as severe as it seems. Also note that only potentially visible sectors are processed in this way, so any invisible sector also doesn’t count towards this limit.
if (s_nextWall == MAX_SEG)
{
errorMessage(5, 20, "Wall_Process : Maximum processed walls exceeded!");
return;
}
Wall Segments
The walls themselves aren’t directly used for rendering. Instead processed walls are converted into “WallSegments.” The remainder of Wall_Process() handles creating a new segment which will be merged, clipped and sorted later during rendering.
Most elements are fairly straight forward, so I will just show the code:
wallSeg->srcWall = wall;
wallSeg->wallX0_raw = x0_pixel;
wallSeg->wallX1_raw = x1_pixel;
wallSeg->z0 = z0;
wallSeg->z1 = z1;
wallSeg->uCoord0 = curU;
wallSeg->wallX0 = x0_pixel;
wallSeg->wallX1 = x1_pixel;
wallSeg->x0View = x0;
Like I said, this is mostly straight forward. As WallSegments are processed, they are merged and clipped against existing segments and against the current window (or portal). This means that the projected (x) values are clamped during this process. To compute proper per-column depth (z) and texture coordinates, we have to keep around the ‘raw’ - or unclipped version of the coordinate (or no additional clipping anyway).
Next, remember in the clipping section when I mentioned we have to keep track of the starting ‘u’ texture coordinate after clipping? That is stored in uCoord0. If the renderer didn’t track this then the texture would swim as the wall went off screen. Finally we also save the view space x coordinate, this will be useful later for calculating per-column depth and u coordinate.
In the next step we have to compute two more values used to compute per-column depth (z) and texture coodinates - the slope of the wall and the texture scaling factor. We only have 16 bits of fractional precision available and we have to deal with purely horizontal or vertical walls (when viewed from top down) - so this complicates this part.
dx = x1 - x0;
dz = z1 - z0;
s32 slope, den;
if (abs(dx) > abs(dz))
{
slope = div16(dz, dx);
den = dx;
}
else
{
slope = div16(dx, dz);
den = dz;
}
wallSeg->slope = slope;
wallSeg->uScale = div16(texelLengthRem, den);
abs(x) = Absolute Value of x
Notice that we compute abs(dx) and abs(dz) (where dx = x1 - x0 and dz = z1 - z0) and use the larger value as the denominator in the slope. How does that help us? Let’s assume that abs(dx) > abs(dz):
Assume we want to compute the depth (z) at any point (x) along the WallSegment. We know that z(x0) = z0 and z(x1) = z1. So:
z(x) = z0 + (x - x0)*dx/dz => z(x) = z0 + (x - x0)*slope
Adding the WallSegment
So we have created a WallSegment, ready to be rendered. What next? First we have a list of “source segements” - again only computed once per frame for each potentially visible sector. So this segment is simply added to that list:
WallSegment* wallSeg = &s_wallSegListSrc[s_nextWall];
s_nextWall++;
Conclusion
Now we leave the Wall_Process() and continue to draw the wall. In Part 2 I will go over the merge/sort/clip process so we can start drawing the visible parts of the WallSegments!
Add Comment
05 May 2020
This is my first “real” post on this blog. Several years ago there was a project called the “XL Engine” which evolved from DarkXL with lofty ambitions. I personally hit some difficult times but never properly canceled the project, even if I couldn’t get back to it for a long time and didn’t really want to for a long time after that. Fast forward to today, things are much better now with more free time but time moves on and the XL Engine isn’t really necessary anymore - both Daggerfall and Blood have great projects that fill the niche the XL Engine wanted to fill (or close enough).
But the Jedi Engine never had a proper source release or reverse engineering effort. While many considered DarkXL to be a promising effort, it was incomplete and inaccurate in many ways. Ultimately the methods used to reproduce the game could never be 100% faithful in the ways that matter. And so The Force Engine was concieved as a complete re-write, rebuilt from the ground up with the following tenets:
- Support all Jedi based games - Dark Forces and Outlaws.
- Source-level accuracy by reverse engineering the original executables.
- Focus on making sure the core games are completely supported before adding effects on top like dynamic lighting, this means starting with the software renderer just like the originals.
- Open sourcing the project the moment it goes public.
- Cross platform support (though admittadly this last area still needs a lot of work before the first release).
While the GitHub repository has been made public, The Force Engine has not been officially announced and no release has been made. It will be some time before that happens (see the Roadmap).
Add Comment